Viewing Metadata
|
Topics: |
|
How to: |
Viewing metadata is useful when creating request documents and SQL statements. You can view:
- Table metadata, as described in How to View Table Metadata.
- Stored procedure metadata for a relational or a non-relational database, as described in How to View Stored Procedure Metadata.
- Table metadata while creating an SQL statement, as described in Creating an SQL Statement and Generating Schemas.
Procedure: How to View Table Metadata
To view table metadata:
- If you are not connected to a defined target, connect to one, as described in How to Connect to a Defined Target.
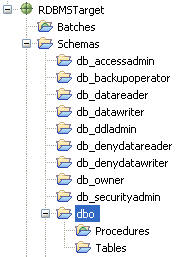
- Underneath the desired connection, click the Schemas node to select it, and then expand the Schemas node.
- Click
a database to select it, and then expand the database. For example,
click and expand the dbo database.
In the following image, the dbo database is selected and expanded.
- Select and expand the Tables node.
- Scroll
down and select the table whose metadata you want to view, for example, xmltable.
Although the list of tables includes all tables in the RDBMS, the user ID that you specified for the connection may not have access to the table that you select. If that is the case, the creation of schemas will fail.
- If it is
not already selected, click the Properties tab
in the right pane.
Tip: If the Properties tab is not displayed, you can display it using the Window menu. From the Window menu, select Show View and click Other. Underneath General, click Properties and then OK.
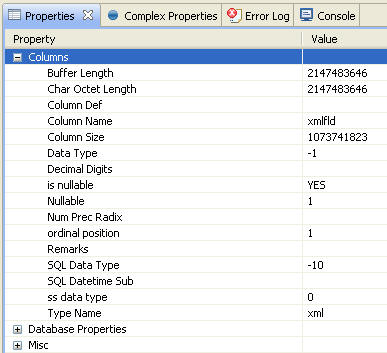
When the Properties tab is selected, summary information for the selected table is displayed in the right pane, with categories for Columns, Database Properties, and Miscellaneous (Misc). Each category contains Property and Value fields.
You can expand the category that you are interested in. In the following image, the Columns category is expanded for the selected table by default. It displays information on the column named xmlfld in the xmltable in the dbo database.
When you are ready to create a schema, use the information provided to determine the table or tables and columns to use.
Procedure: How to View Stored Procedure Metadata
To view stored procedure metadata:
- If you are not connected to a defined target, connect to one, as described in How to Connect to a Defined Target.
- Underneath the desired connection, click the Schemas node to select it, and then expand the Schemas node.
- Click a database to select it, and then expand the database. For example, click and expand the dbo database.
- Select and expand the Procedures node.
- Select the
procedure whose metadata you want to view, for example, InProc.
Although the list of procedures includes all procedures in the database, the user ID that you specified for the connection may not have access to the procedure that you select. If that is the case, the creation of schemas will fail.
- If it is
not already selected, click the Properties tab
in the right pane.
Tip: If the Properties tab is not displayed, you can display it using the Window menu. From the Window menu, select Show View and click Other. Underneath General, click Properties and then OK.
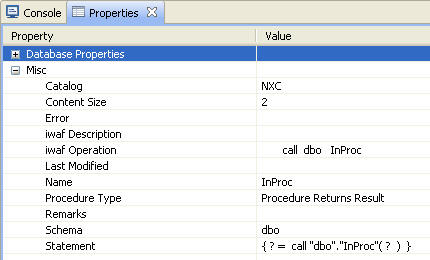
When the Properties tab is selected, summary information for the selected procedure is displayed in the right pane, with categories for Database Properties and Miscellaneous (Misc). Each category contains Property and Value fields.
You can expand the category that you are interested in. In the following image, the Misc category is expanded for the selected procedure by default. It displays information on the procedure named InProc in the dbo database.
When you are ready to create a schema, use the information provided to determine the procedure or procedures and fields to use.
Viewing Sample Data
The iWay Technology Adapter for RDBMS provides an option that assists you in viewing sample data.
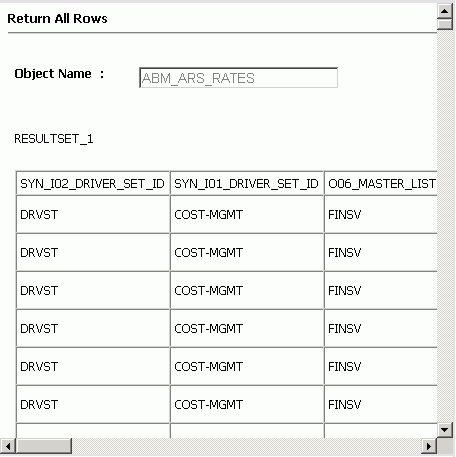
The Return All Rows option is available from any table node and all records for the given table. This option produces a formatted table of all the rows in the selected table.
To access this option, in the left pane of iWay Explorer right-click the table node of interest and select Return All Rows from the drop-down list. The Return All Rows pane opens on the right.
The following image is an example of a Return All Rows pane for a table named ABM_ARS_RATES. Use the scroll bars at the bottom and on the right of the pane to view the entire table.
About the Search Tool
|
How to: |
The iWay Technology Adapter for RDBMS search tool allows you to find specific items in an RDBMS target. An RDBMS target is structured into three major nodes:
- Schemas
- Statements
- Batches
These nodes contain subnodes of tables, procedures, Oracle packages, statements, and batches. The search tool is available from all nodes and subnodes in the Schemas, Statements, and Batches hierarchy.
If the database contains more than 64 tables or procedures, you must use the Search Tool to locate that Table or Procedure.
Procedure: How to Use the Search Tool
To open the search tool:
- Select a node under which you want to find one or more items. You can select either the Schemas, Statements, Batches node, or a sub node such as Tables, depending on which item you are looking for.
- Move the
cursor over Operations in the right pane
and select Search from the drop-down list.
The Search pane, shown in the following image, opens on the right.
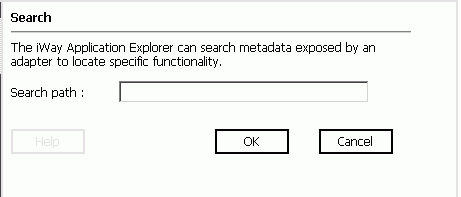
- In the
Search path, type a specific item name or use the following search
options.
- Use %% for a recursive search.
- Use % for a wildcard, non-case sensitive.
The following is an example of a search entry:
- %%%eda% indicates to recursively search for all nodes that contain the string "eda".
- %%eda% indicates to recursively search for all nodes that start with the string "eda".
- %%%eda indicates to recursively search for all nodes that end with the string "eda".
- Click OK.
The Search Result(s) pane appears on the right displaying the items that match the search criteria.
For example, under the Schemas, ABM, Tables node you can search for all tables that have MLS in the name using a search entry of %%%MLS%.
The following image shows the search results, which returns all tables with MLS in the table name.
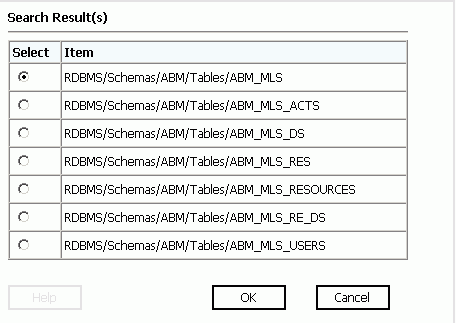
- In the Select column, click the item you want to view.
- Click OK.
The item you selected is highlighted in the left pane.