Creating and Testing a Regular SQL Statement
|
Topics: |
|
How to: |
This section explains how to create and test a regular SQL statement. In addition, it describes how to edit an existing SQL statement.
Procedure: How to Create a Regular SQL Statement
To create an SQL statement:
- If you are not connected to a target, connect to one, as described in Connecting to a Target.
- Click
the Statements node.
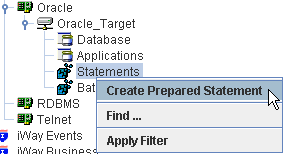
- Right-click
the Statements node and select Create
Prepared Statement.
The Create Prepared Statement dialog box opens, as shown in the following image.
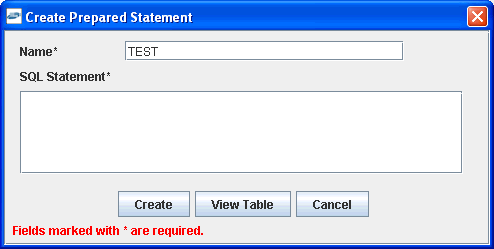
- In the
Name field, type a name for the prepared statement.
iWay Software recommends that you specify a name that describes the service. For example, a name of CustomerIntField could represent a request against the Customer Interface table returning a Field format response document.
- In the
SQL Statement field, type the SQL statement for the adapter to use.
Note: If you are not the owner of the table(s), the table name must be fully qualified.
To view table metadata while you edit:
- Click View Table.The Create Prepared Statement dialog box expands and the Schema drop-down list is now available.
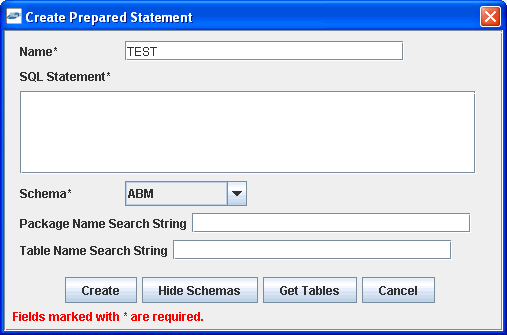
- Select a schema from the Schema drop-down list and click Get
Tables.The Table drop-down list is now available under the Table Name Search String field.
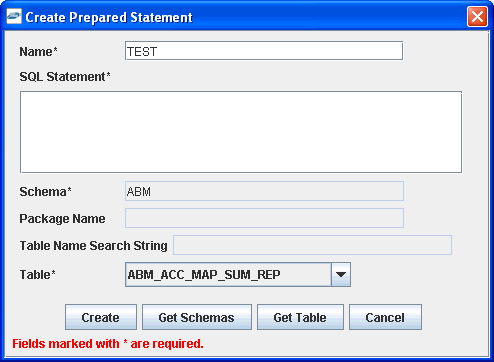
- Select a table you want to view from the Table drop-down list
and click Get Table.
The table metadata appears at the bottom of the Create Prepared Statement dialog box. Use the horizontal and vertical scroll bars to view the entire table. An example of a table displayed in the Create Prepared Statement pane is shown in the following image.
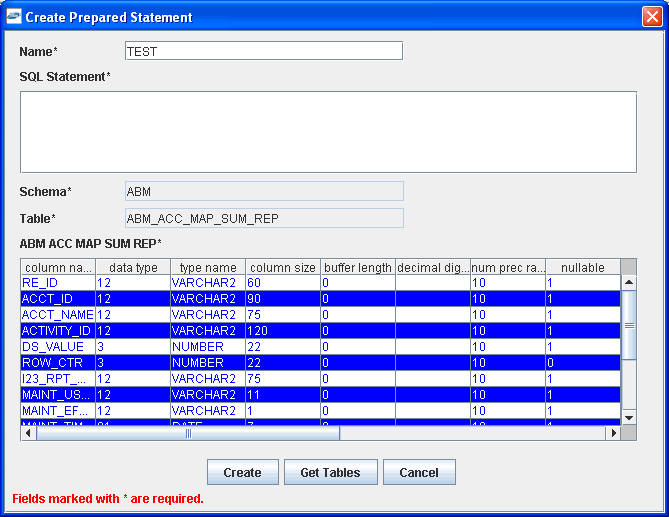
You can browse additional tables if required by clicking the Get Tables button found at the bottom of this dialog box.
- Click View Table.
- Enter
an SQL statement in the SQL Statement field and click Create.
After the SQL statement node is built, you are ready to test the statement.
For information on testing a regular SQL statement, see How to Test a Regular SQL Statement.
Procedure: How to Test a Regular SQL Statement
To test a regular SQL statement:
- Select
the SQL statement node you want to test.
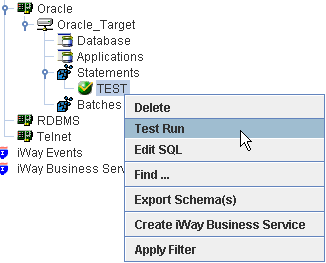
- Right-click
the SQL statement node and select Test Run.The Test Run dialog box opens and the test results appear in a table format, as shown in the following image.
 To see the results in XML, click View XML. The following image is an example of test results in XML format.
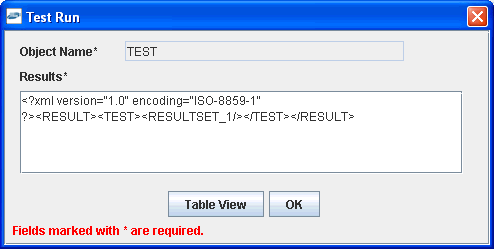
- Click Test.
To see the results in XML, click View XML. The following image is an example of test results in XML format.
You can click Table View to return to the table format display.
- To exit the Test Run dialog box, click OK.
Procedure: How to Edit a Regular SQL Statement
Note: You can follow this procedure to edit the SQL for a parameterized SQL statement as well.
To edit an SQL statement:
- Expand the Statements node in the left pane.
- Select
the SQL statement you want to edit.
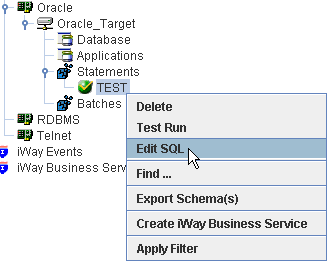
- Right-click
the SQL statement node and select Edit SQL.
The Edit SQL pane opens on the right, as shown in the following image.
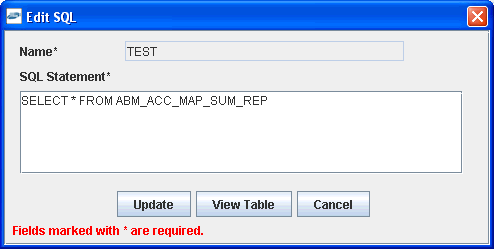
You can view table metadata by clicking View Table.
- When your edits are complete, click Update.
About Table Functions
|
How to: |
Table functions enhance the ability to update and query a table by creating commonly used prepared statements.
When you create web services from a table function, the adapter builds the SQL request and incorporates it into the web service. You can also export the schema and use it to generate XML instance request documents.
Existing APIs into which these functions can fit are the J2EE design pattern data accessobject (DAO), Java data objects (JDOs), and J2EE entity beans, all of which abstract andencapsulate access to a data source.
The functions include the following:
- SELECT
- CURSOR
- GET
- INSERT
- UPDATE
- DELETE
- UPSERT
- COUNT
- AVERAGE
- MAX
- MIN
- SUM
Procedure: How to Use the CURSOR Function
CURSOR is a query function that allows you to scroll through a result set without having an open cursor within the adapter.
- Select the table node in which you are interested.
- Select CURSOR.
- Move
the mouse pointer over Operations and select Create
iWay Business Service.
If you are using Swing iWay Explorer you can also Export the Schema by right-clicking the node in which you are interested and selecting Export Schemas. When using the JSP version of iWay Explorer, you can generate schemas by moving the mouse over Operations and selecting Generate Schema. You can use the schema to create instance XML request documents.
The web service or schema that is created incorporates the SQL statement for the CURSOR function. This function requires five parameters. Only ROW_COUNT and ROW_REFERENCE require a value. The parameters are listed and defined in the table below.
Parameter
Description
ROW_COUNT (required)
The number of rows that you want the function to return. If you a supply a value of -1, all rows will be returned.
ORDERBY_COLUMN
The list of columns for the table. It is an enumeration and can have only values in its enumeration list. The column name passed to this parameter sets the “order by” clause in the dynamic statement generated by this function.
ROW_REFERENCE (required)
The row and all of its values from which the returned result set starts or ends. The function dynamically creates a select statement and determines the next set of rows to be sent based on the parameters sent.
ASCENDING
The boolean input parameter that determines if the “order by” is ascending or descending.
NEXT
The boolean input parameter that determines if the result returned is the next or previous set of rows.
Procedure: How to Use Test Run for the CURSOR Function
Using Test Run for the CURSOR function provides an opportunity to use the function. To use Test Run for the CURSOR function:
- Ensure that the CURSOR function is selected.
- Right-click
the CURSOR function and select Test Run.
The Test Run information appears.
- Specify
the information required:
- For Row count, enter the number of rows you want to be returned.
- From the Column drop-down box, select the column by which you want the result to be sorted.
- Select Ascending if you want to order rows in ascending order.
- Click Get
Rows.
The result appears in the right pane.
- Click Previous or Next to
return the previous rows or next rows, respectively.
The number or rows returned by clicking Previous or Next is the same number specified in the Row count parameter in the Test Run dialog box.