Loading Sample Data
|
How to: |
This section describes how to load sample data for Omni-Gen™ for Customer.
Procedure: How to Accessing the Sample Data
After Omni-Gen™ for Customer is installed, sample data, including Data Quality (DQ) plans that you can edit and run, is available in the following location:
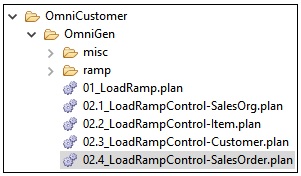
C:\omnigen\OmniGenData\OmniCustomer\OmniGenThe following image shows the contents of this folder.
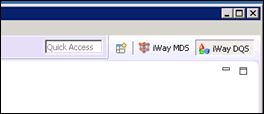
Open iWay Data Quality Server (DQS) and verify or change the perspective in the upper-right corner to iWay DQS, as shown in the following image.
There are two ways you can access the sample data for Omni-Gen™ for Customer:
- Using the File Explorer tab.
Simply browse to the following folder in the File Explorer tab:
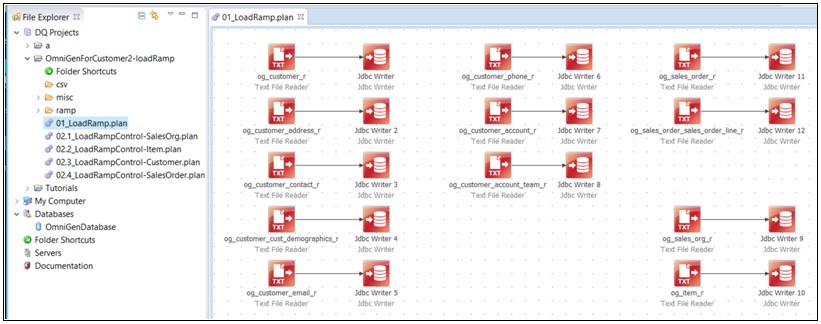
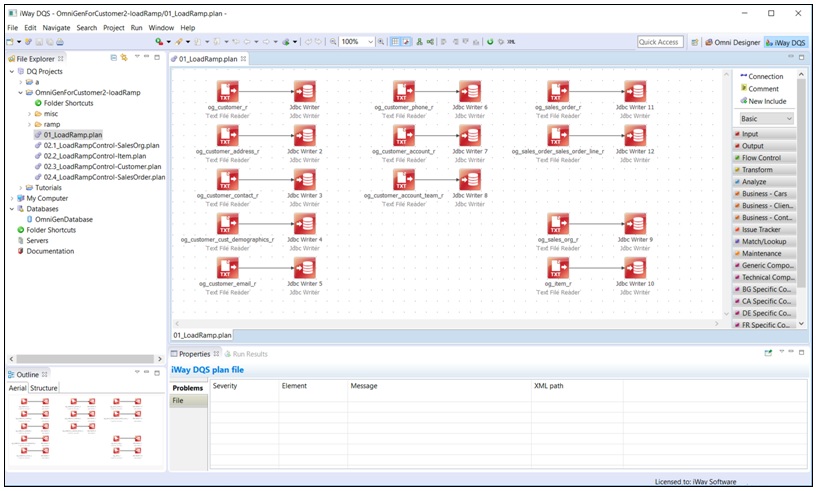
C:\omnigen\OmniGenData\OmniCustomer\OmniGenDouble-click 01_LoadRamp.plan, which opens the selected plan as a tab in your workspace area, as shown in the following image.
You can modify, save, and run the sample DQ plans as required.
- Importing the \OmniGen folder into your workspace.
- Right-click DQ Projects in the File Explorer tab and select Import from the context menu.
The Import dialog opens.
- Expand General, select Existing Projects into Workspace, and then click Next.
The Import Projects pane opens.
- Ensure Select root directory is selected and click Browse to the right of this field.
- Browse to the following folder:
C:\omnigen\OmniGenData\OmniCustomer\OmniGen - Ensure the \OmniGen folder is selected and then click Finish.
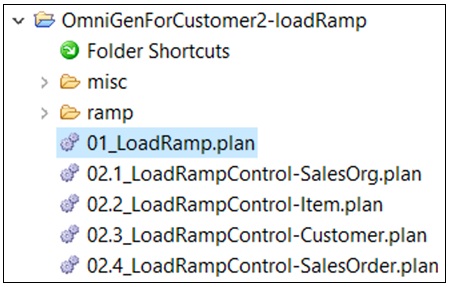
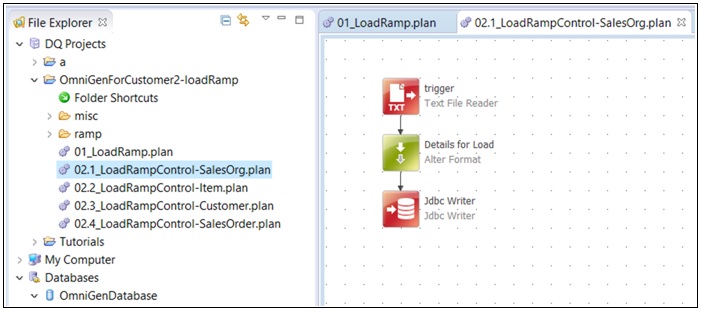
The project is loaded as OmniGenForCustomer-loadRamp, which contains a subfolder called data, and five DQ plans:
- 01_LoadRamp.plan
- 02.1_LoadRampControl-SalesOrg.plan
- 02.2_LoadRampControl-Item.plan
- 02.3_LoadRampControl-Customer.plan
- 02.4_LoadRampControl-SalesOrder.plan
- Double-click 01_LoadRamp.plan, which opens the selected plan as a tab in your workspace area, as shown in the following image.
You can modify, save, and run the sample DQ plans as required.
- Right-click DQ Projects in the File Explorer tab and select Import from the context menu.
Procedure: How to Create the Database Connection
You must now create a database connection, which is used by the Data Quality (DQ) plans.
Note: The database connection you create in iWay DQS must match the database properties that you defined for the combined Omni-Gen Server (OGS) and Remediation database during the Omni-Gen™ for Customer installation. For example, the database name must match in both areas. To review the installation, see Step 20 in How to Install Omni-Gen Server and Omni Governance Console on Windows.
To create a database connection:
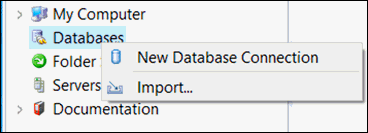
- Right-click Databases and select New Database Connection from the context menu, as shown in the following image.
The Edit Database Connection dialog opens, as shown in the following image.
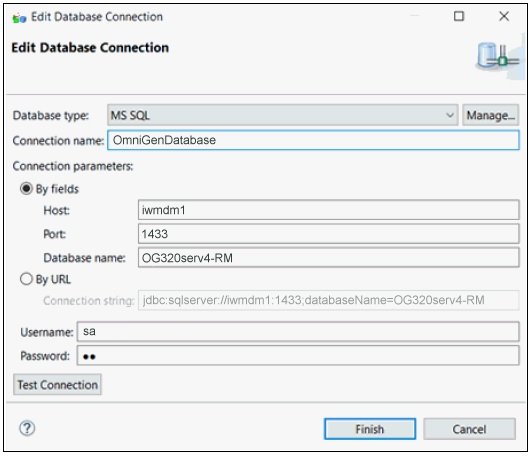
- From the Database type drop-down list, select the same database you specified to use for the combined Omni-Gen Server (OGS) and Remediation database during the Omni-Gen™ for Customer installation.
- Enter OmniGenDatabase as the connection name followed by the connection parameters (including your user name and password).
All of the connection parameters (including the database name) must match the database properties you defined for the combined Omni-Gen Server (OGS) and Remediation database during the Omni-Gen™ for Customer installation.
If your database type is not available in the drop-down list, create it by:
- Clicking Manage.
- Selecting your database type (for example, MS SQL).
- Clicking Add.
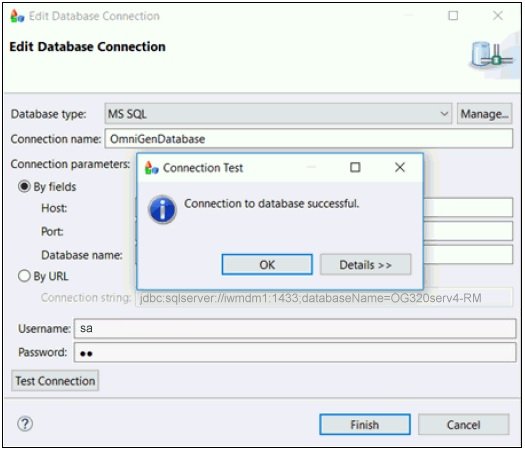
- Click Test Connection to verify your connection parameters.
A success message is displayed if your database is accessible and all of your connection parameters are valid, as shown in the following image.
- Click OK and then Finish to complete the process of adding a database connection.
Procedure: How to Load the Omni-Gen Relational OnRamp Tables
You must now load the sample data to the Omni-Gen Relational OnRamp tables and execute the job to process the data using Omni-Gen.
To load the Omni-Gen Relational OnRamp:
- In the File Explorer tab, double-click 01_LoadRamp.plan, as shown in the following image.
The 01_LoadRamp.plan opens as a tab in your workspace area, as shown in the following image.
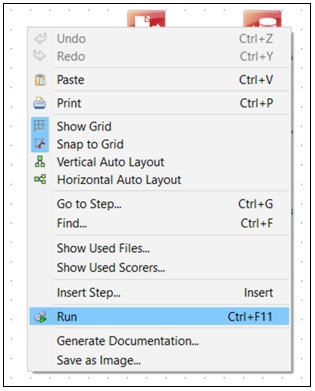
- Right-click anywhere in the white space area of the opened plan and select Run from the context menu, as shown in the following image.
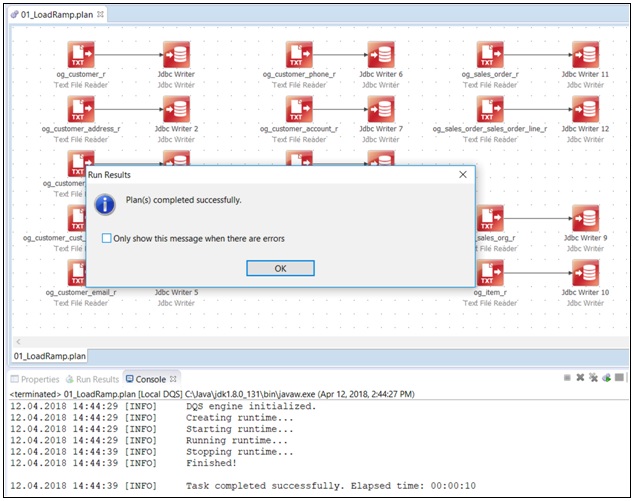
Once the process is complete, a success message is displayed, as shown in the following image.
If you encounter any errors, then you must verify if you require a schema in your SQL statement by double-clicking on each of the JDBC Writer steps and changing the Table Name as required.
To process the data, continue in iWay DQS to load the sample data from the ramp into Omni-Gen.
- Double-click 02.1_LoadRampControl-SalesOrg.plan, as shown in the following image.
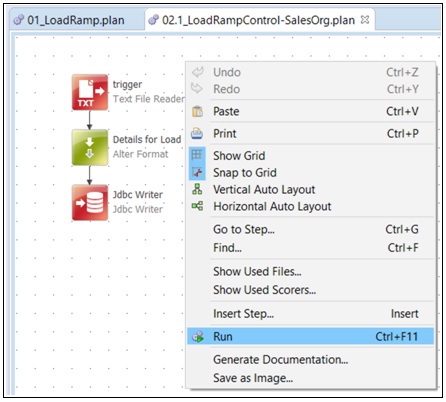
- Right-click anywhere in the white space area of the opened plan and select Run from the context menu, as shown in the following image.
Once the process is complete, a success message is displayed.
During the process, you can switch to the Omni Console (Processing --> Work Orders) to verify that the work order is set to ACTIVE.
- Repeat steps 3 and 4 for the following remaining DQ plans:
- 02.2_LoadRampControl-Item.plan
- 02.3_LoadRampControl-Customer.plan
- 02.4_LoadRampControl-SalesOrder.plan