Creating Filters
|
Topics: |
Filters are used to define the base set of data for the view. Filtering will allow a subset of source data to be defined. Multiple filters can be defined and applied.
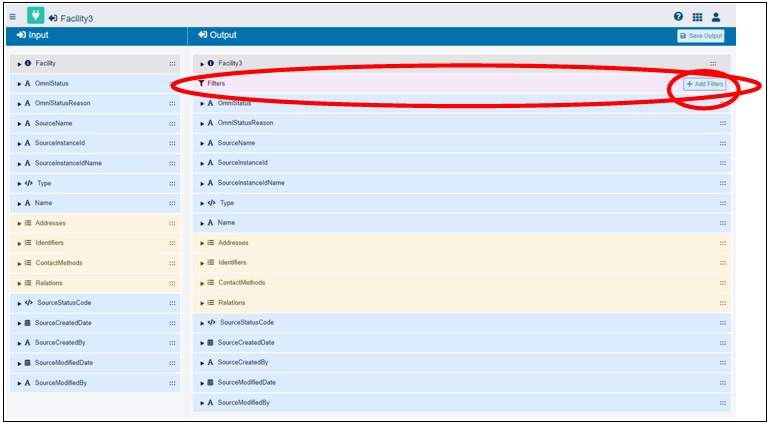
- From the Input Documents screen, select the IDS that requires filters and then click Add Filters, as shown in the following image.
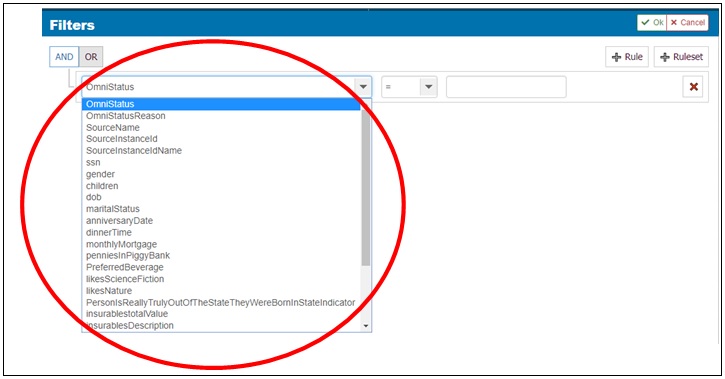
- Select the AND or OR operation, and then click +Rule, as shown in the following image.

- Once selected, expand the first drop-down list, which is pre-populated with the General output elements (Blue
 General Elements) available to filter on.
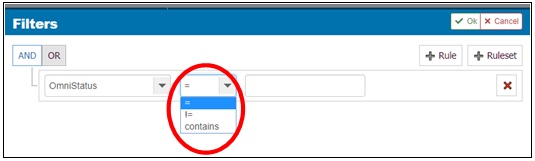
- Expand the next drop-down list, located to the right, for additional filter options, as shown in the following image.
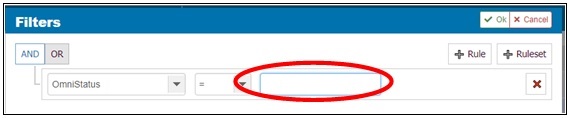
- In the next field, located to the right, you can enter your specific filter criteria, as shown in the following image.
- To add additional filters, click +Rule, as shown in the following image.
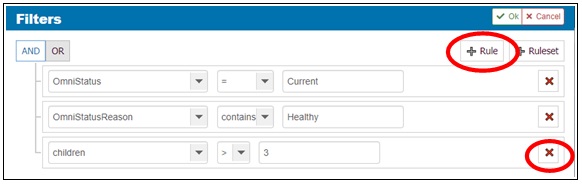
- To remove a filter, click the red X icon.
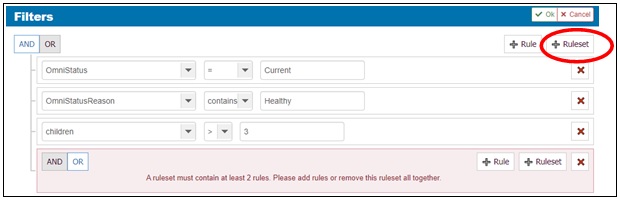
Adding a Rule Set (Nested Rule)
To add a rule set (nested rule):
- Click +Ruleset in the Filters pane, as shown in the following image.
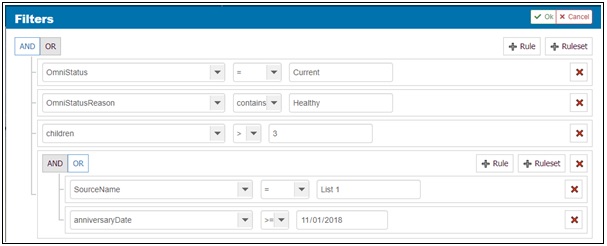
- Multiple rules and rule sets can be added, as shown in the following image.
- When your filters are complete, click OK, as shown in the following image.

- Click Save Output, as shown in the following image.

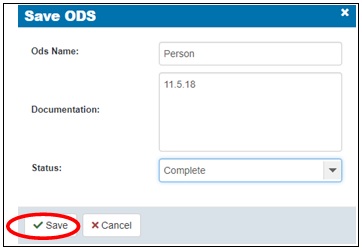
The Save ODS dialog box opens, as shown in the following image.
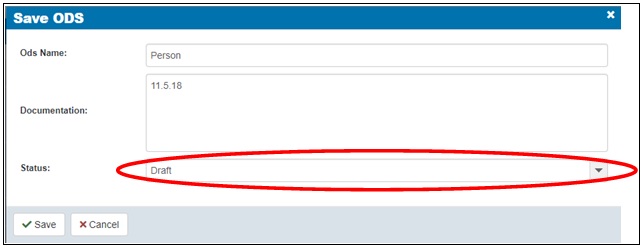
- Change the status from Draft to Complete in the drop-down list.
- Click Save, as shown in the following image.
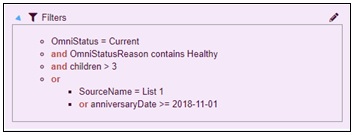
- After the filters have been saved, the filters can be viewed by clicking the arrow next to Filters, as shown in the following
image.

The filters view is now expanded, as shown in the following image.
- If additional editing is required, click the pencil (edit) icon, make your edits to the filters, click OK, and then click Save Output.
- To deploy the newly created ODS with filters, follow the ODS deployment steps as described in Deploying an Output Document Specification.