Issues Page
When you select the Remediation menu item from the application navigation menu, you are navigated to the Issues Page.
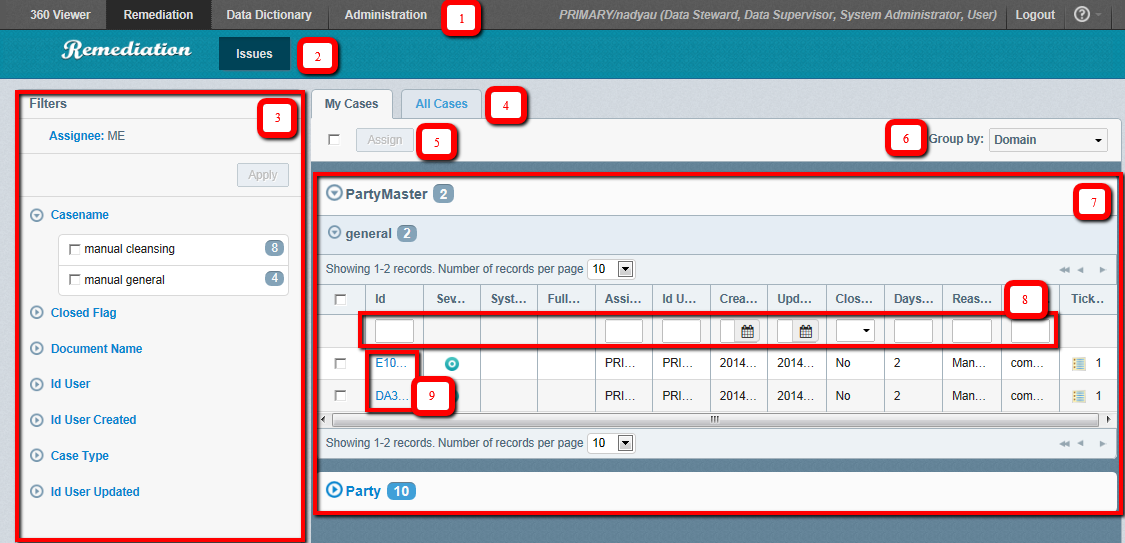
The structure of the page is the following:
- The application navigation menu
- Remediation logotype and menu items
- Filtering panel
- My Cases/All Cases tabs
- Assign button
- Group By drop-down list
- Tables with the list of issues
- Filtration pane
- Links to View Issue pages
The Issues page is the main page Data Stewards and Data Supervisors work in. They can view issues existing in the system through links in the tables (9), switch quickly between pre-configured groups of issues (for example, view My Cases and All Cases) (4), assign (5), or filter issues to see falling within particular criteria (3 and 8). They can also group existing issues by Case Type, Domain, or Assignee (the last option is available in the All Cases tab (6)).
The Remediation logotype is a link that leads you to the Issues page from whatever Remediation page you are currently on.
The My Cases tab displays a list of Issues assigned to the current user. In order to see all issues that are in the system, you can select the All Cases tab.
A list of Issues is represented in expandable tables. By default, only the tables in the first domain are expanded. You can filter, sort issues by preferable column(s), and change the look of the table by resizing the width of the column or selecting different number of records to be shown per page. By default, up to 10 records are displayed per page, but you can select 15, 20, 25, or 30 records to be displayed per page. All tables are configured through the Administration portal.
For more information, see Issues Page.
If you want to filter data in the table by more than one criteria for a specific column, then you can use the OR operator in any filtration field. Both full and partial entries are supported.
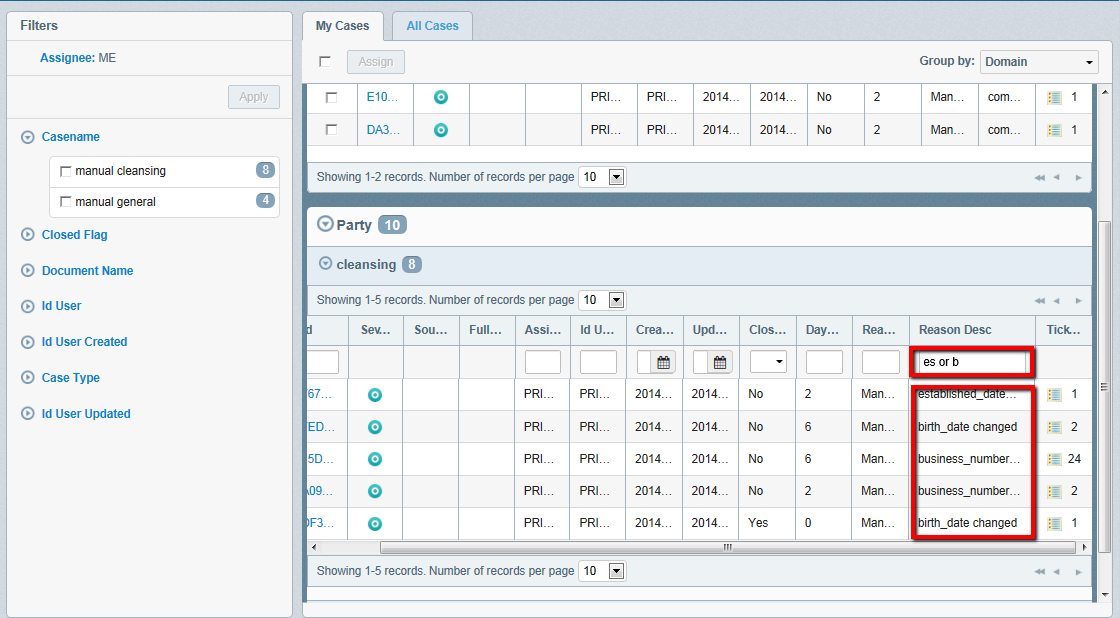
Note: The OR operator works only for fields with a string data type.
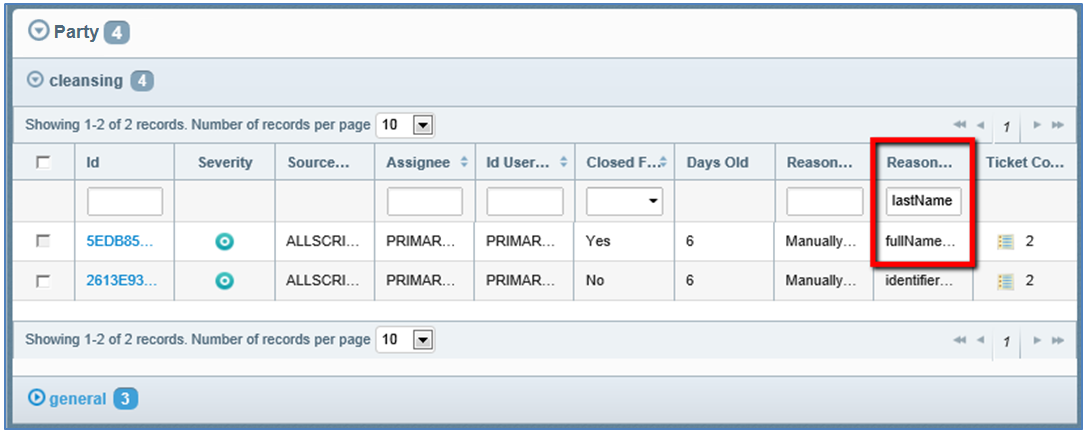
There are three unusual columns on the Issues page: Reason Code, Reason Description, and Ticket Count. They display information about tickets within the cases.
The value of the random ticket within the case is displayed in the table, but all ticket values are included in the filtering process. For example, you can override values of middleName and fullName fields for some record. That means that within one case, there are two tickets. One corresponds to the fullName change, and the other corresponds to the lastName change. The Reason Description column displays the fullName changed value, but if you filter data by lastName changed, the same case is displayed in the table.
The Ticket Count column displays the number of tickets within the case. When you move the pointer over the icon, a pop-up window with the appropriate information appears.
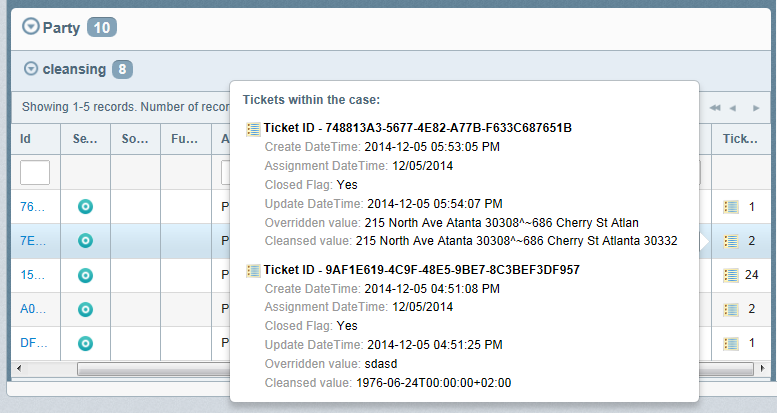
Note: The Ticket Count column should be available only for Cleansing cases.
The cleansing case can also be created by adding a general comment. No ticket will be created, but an appropriate pop-up appears when the mouse arrow is hovering over the icon in the Ticket count column.
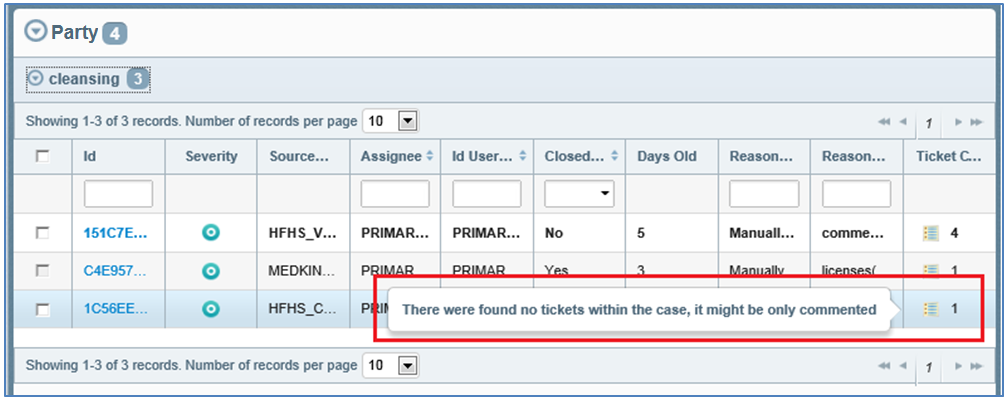
Fields displayed in the Tickets within the case pop-up window can be configured using the Administration console.
For more information, see 'Ticket Within the Case' Pop Up.
You can filter data in all tables simultaneously by using the Filtering panel.
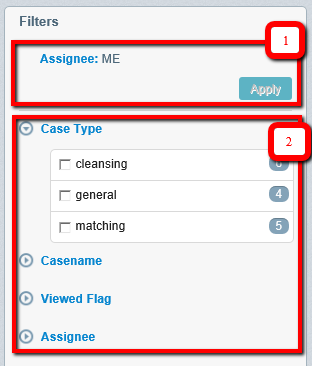
The filtering panel is located to the left of the table and is fully customizable. You can form the list of filtering criteria and select how many sections can be expanded by default, as shown in the following image.
For more information, see Filtering Panel on My Cases Tab.
The Filtering panel consists of two main sections:
- The list of filters already applied or ready to be applied (1).
- The list of all available filtering criteria (2). The count of records that fall under specific criteria is displayed beside each criteria.
Note: On the My Cases tab, data is already filtered by Assignee, and cannot be discarded.
Filtering on the My Cases and the All Cases tabs are independent from each other.
In order to add some filtering criteria to the upper section, select the appropriate check box, as shown in the following image.
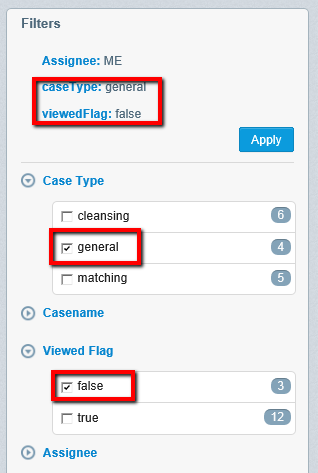
The Apply button becomes available when at least one filtering criteria is selected. When you click the Apply button, the table with records reloads in order to show only relevant data. The Clear all filters link appears, so that filtering could be discarded, if needed.
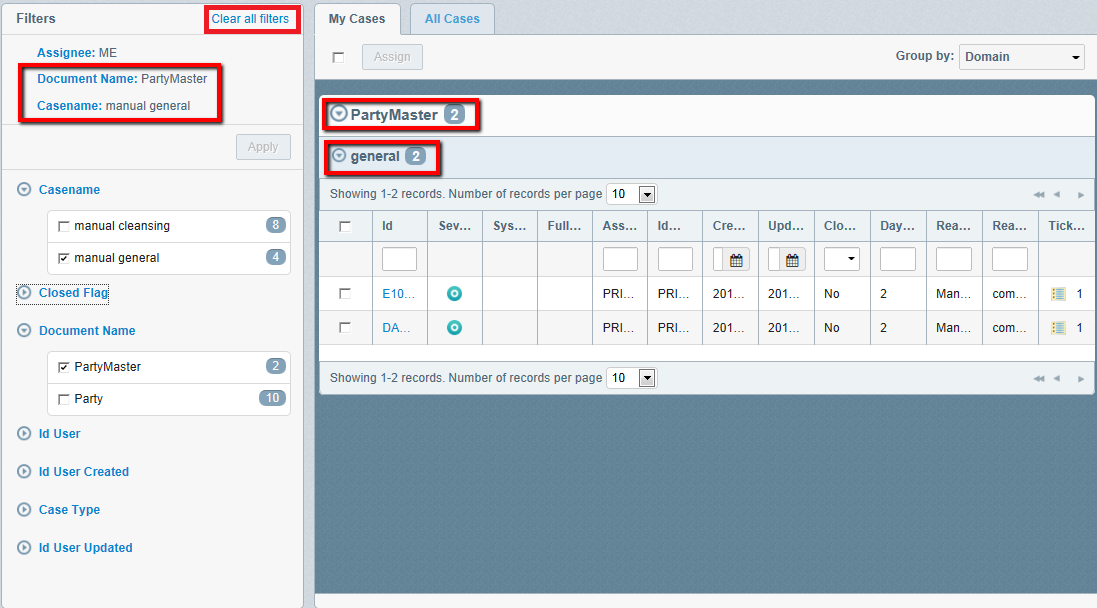
Note: Filtering data using the Filtering panel and Filtering panes inside of the tables can be easily combined to display only relevant information.
If the combination of filtering criteria gives no results, the appropriate message is displayed.

Note: Filtering by criteria within one section works similar to using the OR operator, and filtering by criteria from different sections is similar to using the AND operator (for example, filtering by manual cleansing, manual general case names, and document name Provider Master will find both Cleansing and General cases that belong to Provider Masters domain only).
When you want to delete some selected filtering criteria from the list, you can clear the appropriate check box in the bottom section of the Filtering panel or click the Delete (X) icon corresponding to the appropriate criteria in the upper section.
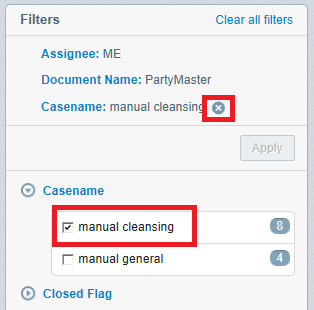
Note: An X icon appears when hovering over the appropriate criteria.
When you delete unnecessary criteria, click the Apply button again, so that filtering is applied.
After applying filters, the state of Issues page is preserved when navigating throughout the application. It is saved until you log out or the session has expired.
The Issues page allows you to bulk assign cases to different users. By default, the Assign button is disabled. To enable it, at least one issue needs to be selected by selecting the check box near the issue that needs to be reassigned. If all issues available on the page need to be reassigned, you can select the top check box that allows selecting all issues on the page, and then click the Assign button, as shown in the following image.
Note: Only cases of preloaded tables get selected due to the Lazy Loading logic that is implemented.
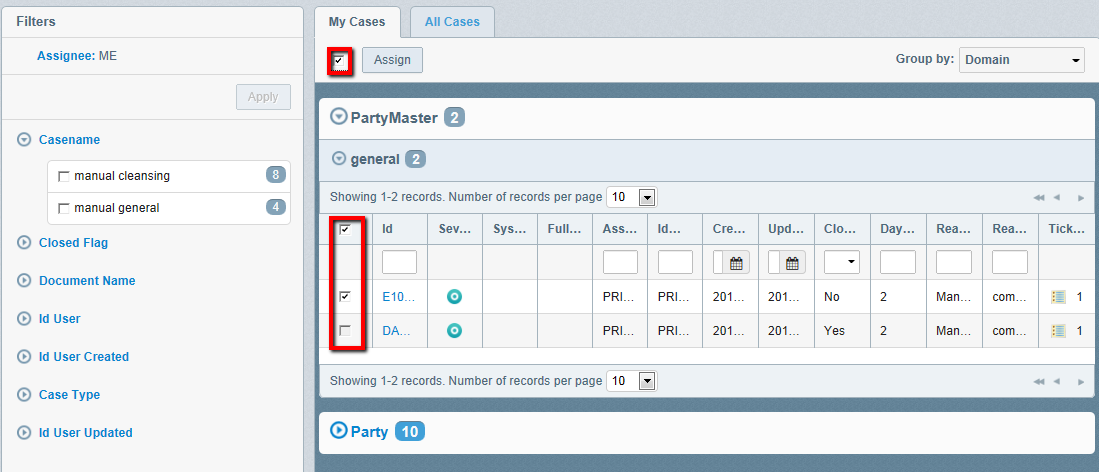
Note: When a case is closed, the check box for that record is disabled and cannot be reassigned.
After the required cases are selected and you click Assign, the Assign dialog box appears, as shown in the following image.
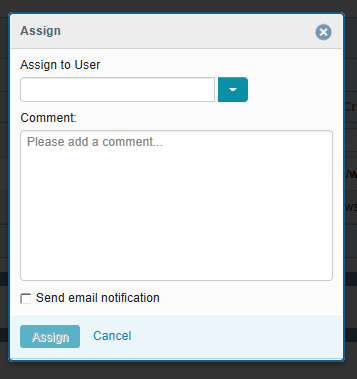
A list of users is available in the Assign to User drop-down list. When you start typing in the field, data is filtered dynamically to display only the relevant information.
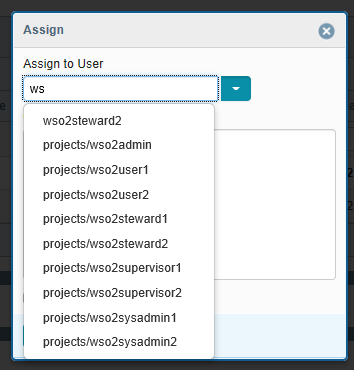
If the case cannot be assigned to the user selected from the list (for example, because the selected user has no permissions to resolve the issue, or has no permissions to work with the required domain and so on), or entered data finds no matches in the database, then the appropriate validation message is displayed, as shown in the following image.
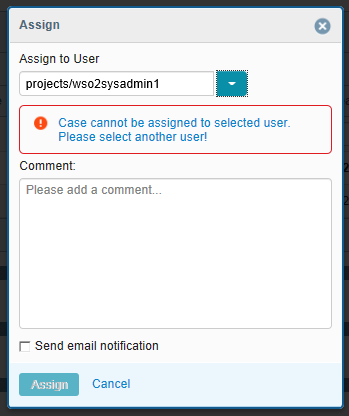 |
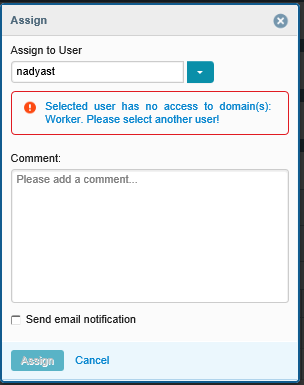 |
If the selected user is valid, the Assign button becomes available and issue(s) can be reassigned.
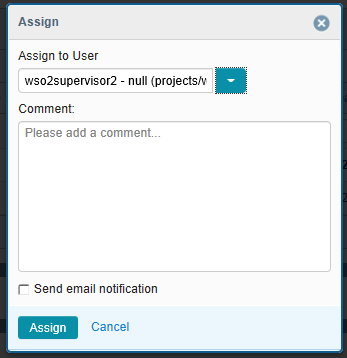
Note: If you want an assignee to be notified about the reassign activity, then the Send email notification check box should be selected.
If there are some cases where issues can be reassigned and some cannot (for example, selected issues belonging to different domains and the new assignee has no access to some of them), then a warning message will appear, as shown in the following image.
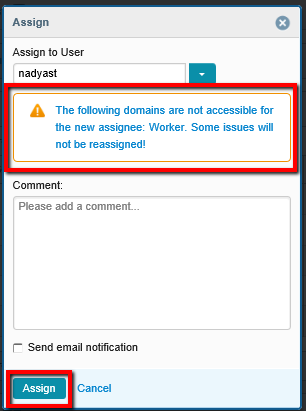
The Assign button remains available since issues that belong to the accessible domain(s) can still be reassigned.
After the Assign button is clicked, tables get refreshed in order to show the updated list of cases, and the appropriate notification message is displayed in the upper right corner of the pane.
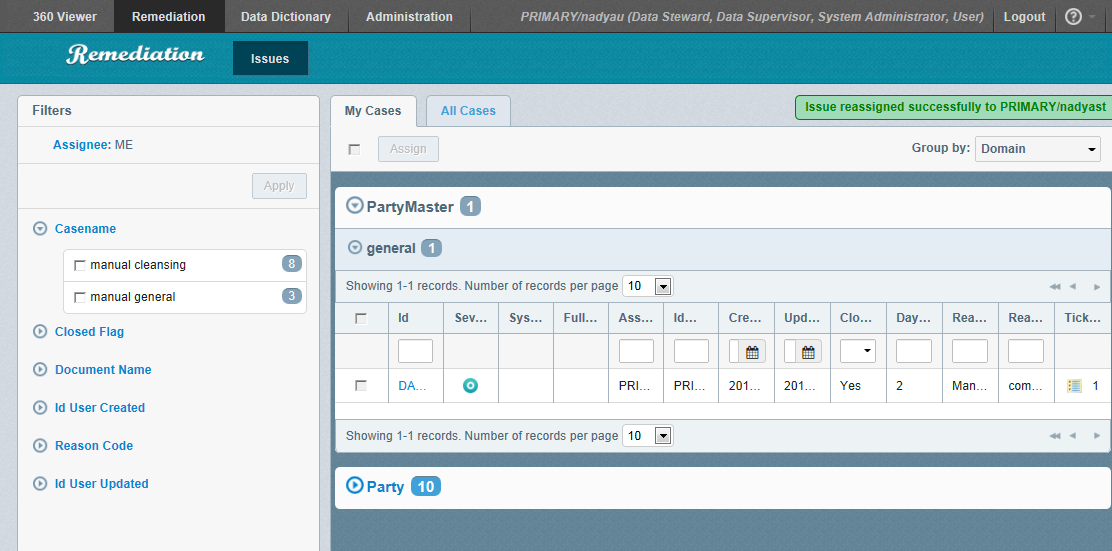
If you have a queue of issues from inaccessible domains, the notification icon will be displayed in the My Cases tab. You will not be able to view or work with those issues, but can ask the Administrator, for example, to be provided with permissions to work with certain domain(s) or reassign issues to someone else.
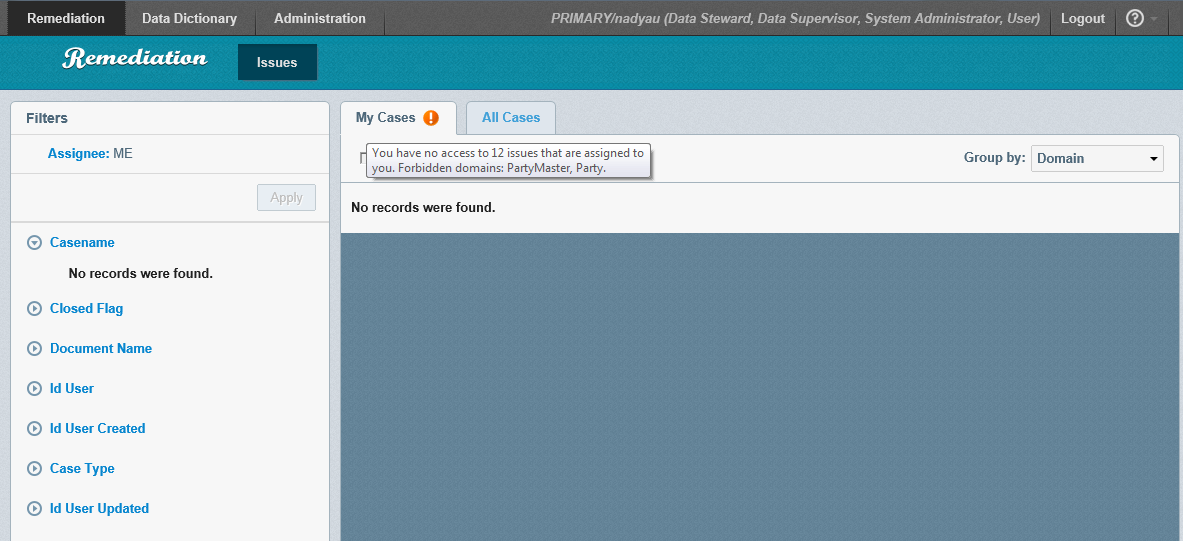
When moving the cursor over an icon, the appropriate pop-up window will be displayed.
Tables are adjustable to your requirements and can display information according to the selected grouping criteria.
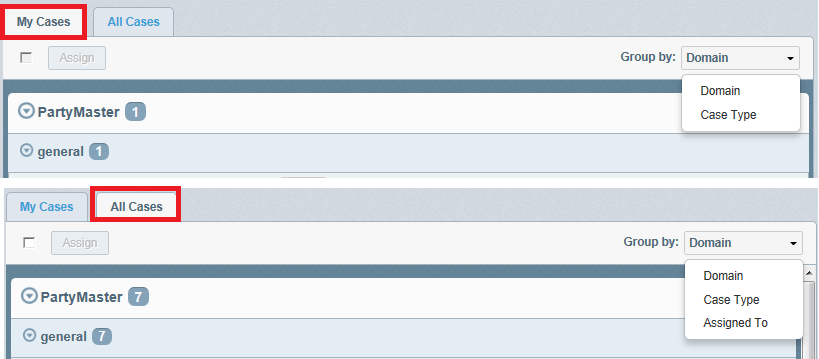
When any value is selected from the Group By drop-down list, tables become re-grouped by the appropriate criteria. By default, cases are grouped by Domain.
Note: If filtering using the Filtering panel was applied, then records in the tables get grouped according to it.
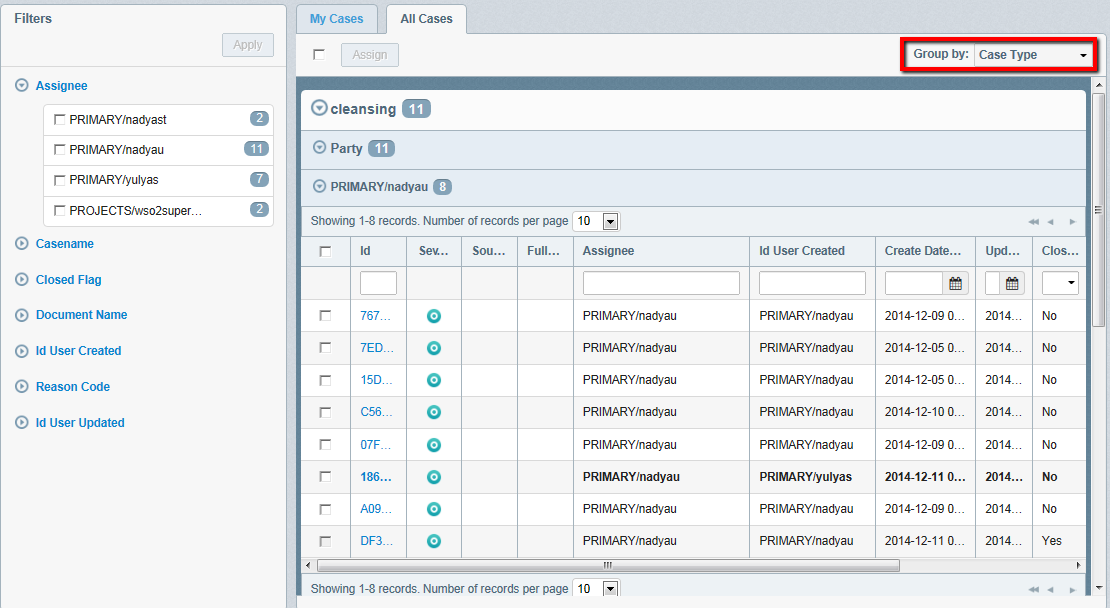
Note: If the case is not viewed by its assignee, it is initially displayed in bold text. After the case is has been initially reviewed, the font is changed to normal text.