Creating and Testing a Parameterized SQL Statement
|
Topics: |
|
How to: |
Parameterized SQL allows an SQL statement to be stored within the repository system with parameters imbedded within it. These parameters can be retrieved from XML documents at run time and executed against the SQL statements specified at design time. iWay Explorer creates and maps parameters for the parameterized SQL at design time.
Procedure: How to Create a Parameterized SQL Statement
To create a parameterized SQL statement:
- Connect to a defined target.
- Click the Statements node.
- Right-click
the Statements node and select Create
Prepared Statement.
The Create Prepared Statement opens, as shown in the following image.
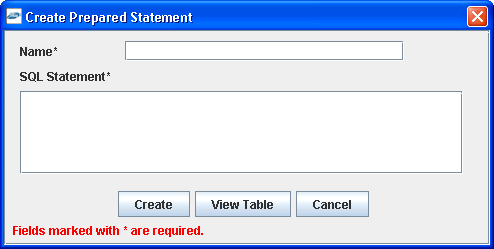
- In the Name field, type a name for the statement.
- In the
Enter SQL Statement field, type the parameterized SQL statement.
Note: If you are not the owner of the table or tables, the table name must be fully qualified.
To view table metadata while you edit:
- Click View Table.The Schema drop-down list is now available at the bottom of the pane.
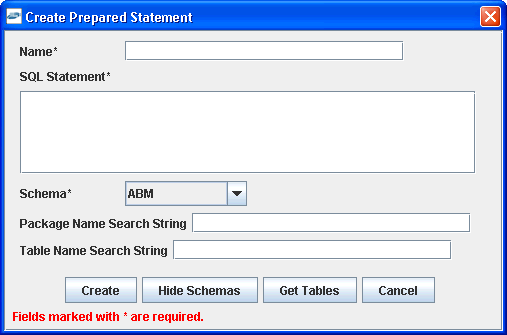
- Select a schema from the drop-down list and click Get
Tables.The Table drop-down list is now available under the Schema field.
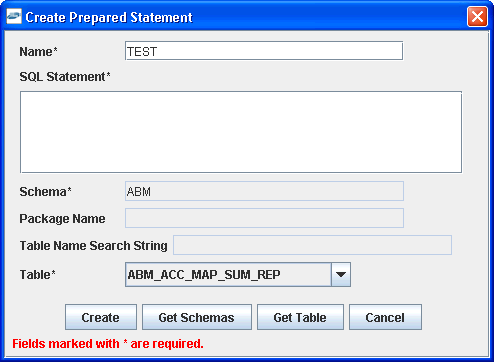
- Select the table you want to view from the drop-down list and
click Get Table.
The table metadata appears. Use the horizontal and vertical scroll bars to view the entire table. An example of a table displayed in the Create Prepared Statement pane is shown in the following image.
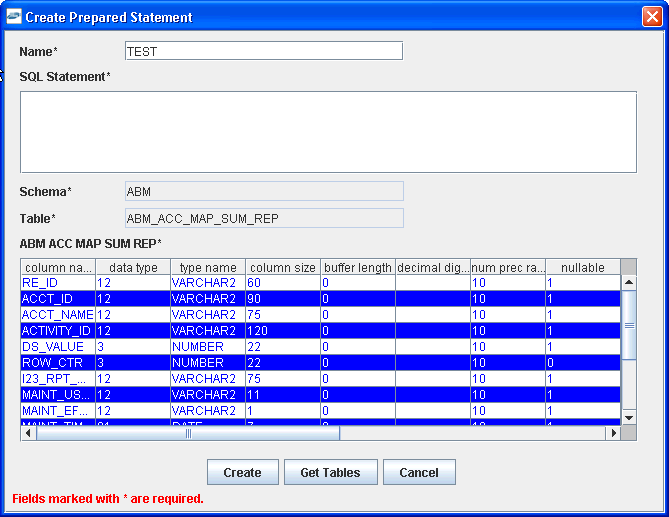
You can browse additional tables if needed using Get Tables found at the bottom of this pane.
- Click View Table.
- When
the parameterized statement is complete, click Create.
The Parameter Name, Data Type, and Value selection information appears at the bottom of the pane, as shown in the following image.
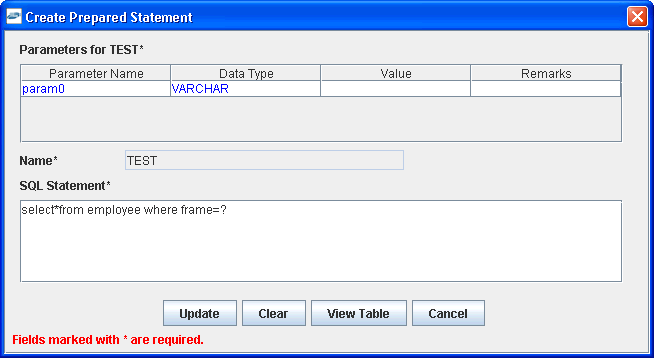
- In the Parameter Name column, type a name for each parameter.
- In the Data Type column, select a data type for each parameter from the drop-down list.
- In the Value field, type a value for the parameter.
- Click Update.
The information for the newly created statement appears in the right pane as shown in the following image.
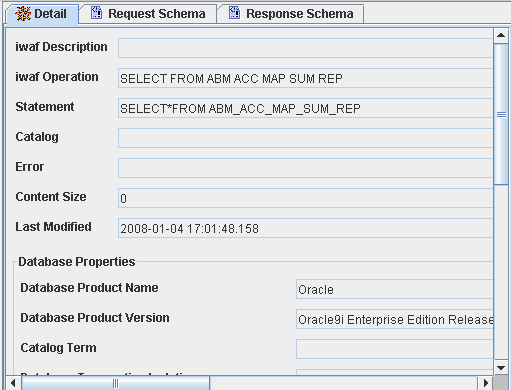
Use the horizontal and vertical scroll bars to view the properties and parameters.
If your statement is not accurate, an error message appears at the bottom of the pane.
The date on which the statement is created is saved along with other data about the statement. In addition, the date for each parameter is saved. The date information can help debug problems. For example, if a batch statement that references a prepared statement has a modified date earlier than the date listed for the prepared statement, the batch might behave differently than expected. Also, when the design-time and runtime repositories are the same, a deployed service with a date earlier than the modified date shown for the service in design-time might mean that the service behaves differently than intended. In this case, the service should be redeployed.
For information on testing a parameterized SQL statement, see How to Test a Parameterized SQL Statement.
Procedure: How to Test a Parameterized SQL Statement
To test a parameterized SQL statement:
- In the left pane, select the parameterized SQL statement node you want to test.
- Right-click
the statement and select Test Run.
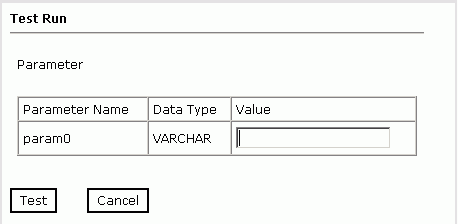
The Test Run pane opens on the right for the SQL statement. This pane contains the parameter name, data type, and an input box where you can type the parameter value, as shown in the following image.
- For each
parameter, type a value in the Value field.
For example, provide a sample character value, for example, BELLA, for the following SQL statement:
select * from employee where lname=?
In this example, the values correspond to values of fields found in a table. Parameterized statements may include parameters that are input for SQL functions, for example, the Oracle SQL function TO_DATE(StringParm). In this case, the data type selected is the expected data type of the SQL function. This is why you provide the SQL type when you create the prepared parameterized SQL statement.
- Click Test.
The results appear in the Test Run results window in a table format. An example of test results is shown in the following image.
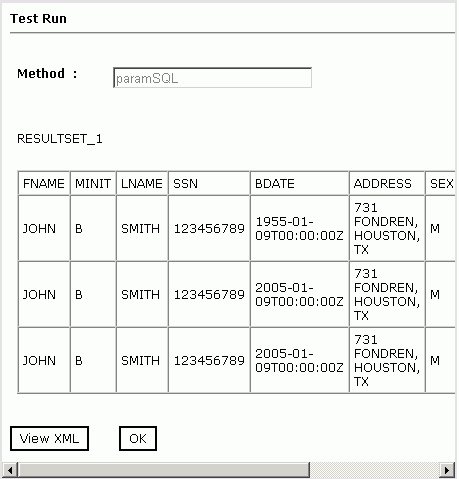
To see the results in XML, click View XML. The following image is an example of test results in XML format.
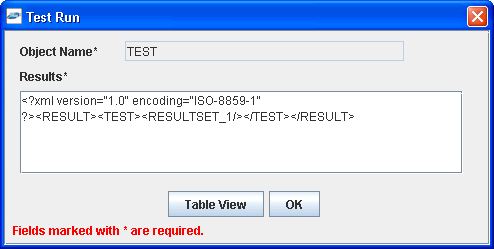
Click Table View to return to the table format display.
- To exit the results, click OK.
Procedure: How to Edit a Parameterized Statement
You can edit the parameter name, data type, and value through the Edit Parameters pane.
To edit a Parameterized SQL statement:
- Expand the Statements node in the left pane.
- Select the Parameterized SQL statement you want to edit.
- Right-click the statement and select Edit Parameters.
- Type
the changes to parameter name and value, and select the data type
as necessary.
To view table metadata while you edit, click View Table. For more details see How to Create a Parameterized SQL Statement
- When
your edits are complete, click Update.
If your statement is not accurate, an error message appears at the bottom of the pane.
- If you
need to add or delete a parameter, right-click the parameterized
statement, and select Edit SQL.
For example, the following image shows a parameterized statement before it is edited:
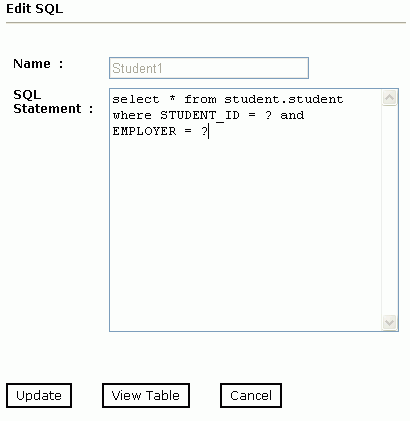
- Edit
the SQL to add the new parameter, for example, COST, and click Update.
When a new parameter is added to the SQL statement, iWay Explorer adds the new, unnamed parameter automatically to the parameter list. The following image shows the edited SQL statement and the parameters listed below the SQL Statement box:
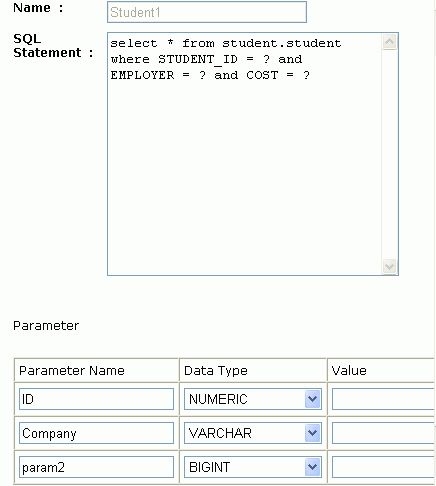
You can edit the parameter name and data type.
- Edit
the parameter as needed and click Finish or
click Update if you are not done editing the
statement.
The following image shows the edited parameter in the parameter table.
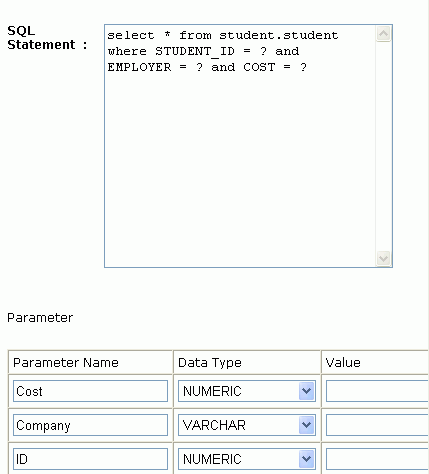
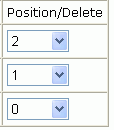
You can change the position of the parameters in the parameter table to match the order of parameters in the SQL statement by specifying the position in the Position/Delete column. The following image shows the reordering of the parameter rows in the Parameter table based on the position selected. As shown in the image, the third row will become the top row, followed by the two other rows.
- Click Change to view the changes in the parameter table without committing them, or click Finish to commit the changes.
- To delete
a parameter, edit the SQL to remove the parameter and click Change.
The delete setting appears by default in the Position/Delete column of one of the parameter rows. If it is not the parameter you want to delete, you can change the setting for that row.
- Select delete from
the Position/Delete column for the parameter you are deleting.
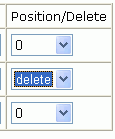
The following image shows delete selected in the second row, which contains the Company parameter:
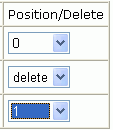
You can also change the position of a parameter relative to other parameters in the list by selecting a position number in the parameter row whose position you want to change. This is useful if you delete the middle parameter from a SQL statement and want to reposition the other parameters in the parameter table to match the sequence of parameters in the SQL statement. The following image shows delete selected in the middle row and a position of 1 selected in the third row of the parameter table. This will move the position of the this parameter from the third row to the second row:
- Click Change to perform the modification without committing the changes, or click Finish to complete the edits and commit the changes.
- If you want to clear the edits and return the parameter list to its original form, click Undo Edit.
- If you want to remove all parameters from the list and start fresh, click Clear All.
- If you are not satisfied with the edits, click Undo Edit to clear the edits you are making and return the parameter list to its original form or click Clear All to return the list to a list of unnamed parameters.
- Click Finish when you are done with all the edits and want to commit the changes.
Using Date and Time Formatting
|
How to: |
Because dates can be formatted in many different ways, some applications might have to take extra time transforming a date and time string to the correct XML format. You can specify the date and time format when you design a service so that it does not have to be done in the flow of the message. You can configure and test the date formatter the adapter uses at runtime to parse the request value.
Note: The date format you specify structures the date format for the request document. The date format returned in the response will conform to the date format defined in the database.
Procedure: How to Use Date and Time Formatting Options
To specify the date and time format in a request:
- Select the date parameter in the prepared SQL statement for which you want to format the date and time.
- Right-click
the parameter and select Customize Test Datetime Formatter.
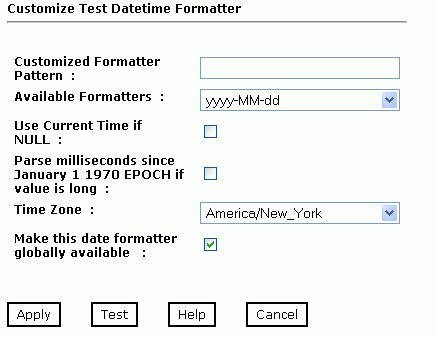
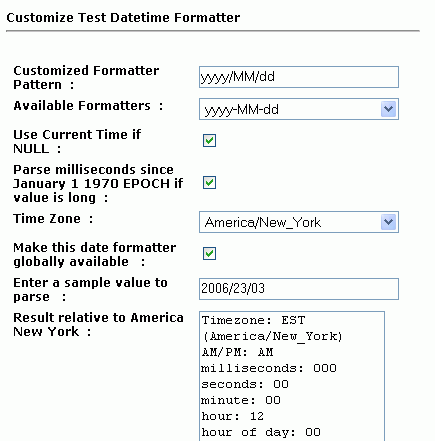
The Customize Datetime Formatter pane appears on the right, as shown in the following image:
- Provide
the information as follows:
- In the Customized Formatter Pattern box, provide the date and time pattern, or select a Formatter from the Available Formatters drop-down box.
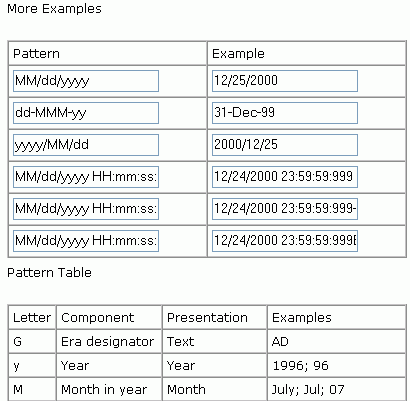
- Click Help if you want to see two tables
that assist you in configuring the custom formatter, the Pattern
Table and an examples table.
The Examples and Pattern tables appear. The following image shows the Examples Table and the Pattern Table. The Examples Table lists date examples. The Pattern Table specifies the letter, component of the date, the date presentation, and examples.
- Select Use Current Time if NULL to use the current time as the default value if the request value is null.
- Select Parse milliseconds since January 1, 1970 (EPOCH) if you want to have the adapter check if the value returned is a long value representing the number of milliseconds since January 1, 1970 (EPOCH).
- Select the time zone from the Time Zone drop-down list.
- Select Make this date formatter globally available if you want this formatter available for use by other services.
- To test a sample date value, click Test and enter a sample value to parse in the Enter a sample value to parse text entry box.
- Click Test to test the sample date value.
The following image shows sample test results.
- Click Apply to commit the changes.
Executing an SQL Statement or Stored Procedure Multiple Times
You can execute a prepared SQL statement or stored procedure multiple times with different input parameters each time. The major benefits of this feature are as follows:
- Connection Resource Utilization. One connection or thread is established to the back-end database. This minimizes resource consumption. Note that the number of cursors for select statements created is based on the number of parameter sets in the submitted request. If there are three sets of parameters for a select statement, there will be three cursors created and closed sequentially.
- Logical Unit of Work (LUW). A logical unit of work (LUW) is established that will roll back all of the updates or inserts that were issued by the SQL statement of prior executions. A transaction starts at the first set of parameters. The sets of parameters are executed in order from top to bottom of the message sequentially. For example, if an insert statement is submitted along with three sets of parameters, and the third set of parameters fails to insert, the previous two inserts will be rolled back.
- Integration of Data From an Outside Source. For integration scenarios where external data is used to "feed" SQL or stored procedures, this feature allows external data to be mapped to one XML execution block for the adapter to execute.
Note: Multiple processes in one message is not supported. Only one SQL statement or stored procedure can be executed in a single XML execution request block.