Navigating the Table Layout
|
Topics: |
Omni-Payer 360 Viewer displays retrieved data within tables. There are several types of tables in Omni-Payer 360 Viewer, which are all structured, as shown in the following image.
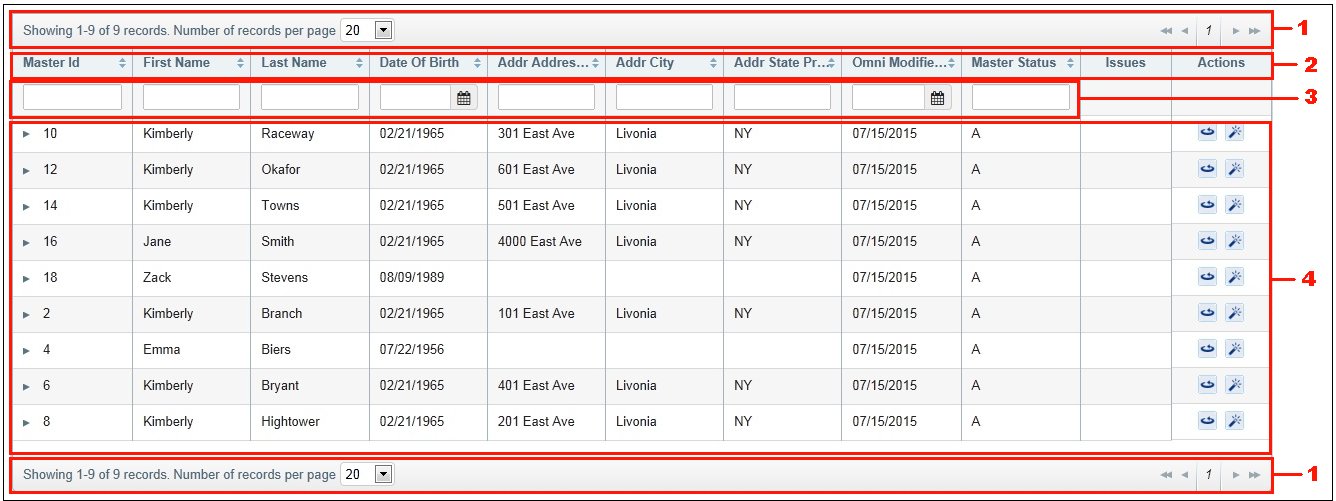
Each table contains the following areas:
- Navigation bar
- Column headers
- Input fields for filtering
- Record lists
Using the Navigation Bar
The navigation bar provides you with functionality to move to the next, previous, first, and last page. You can also select a specific page number to navigate. The Number of records per page drop-down list specifies how many records to display on one page at once. Available values include 10, 15, 20 (default), 25, or 30.
Although headers are used to display columns names, you can click on a header to sort the data in the table by that column.
Sorting Through Records
Sorting is case-insensitive and can be applied to one column at time. Although headers are used to display columns names, you can click on a header to sort the data in the table by that column. To change the sorting order, click on the column header again. The column by which the sorting is performed is highlighted in green and the arrow indicates ascending or descending order of sorting.
You may also filter the results using dynamic filters below the table columns headers. The results are updated dynamically to show only relevant records while you type in the value (with a slight delay). Filtering can be applied to several columns at once.
Data entered in filter fields is validated before actual filtering begins. Validation is performed dynamically as you specify the value. When invalid data is entered, a message indicating invalid data is displayed and the corresponding field is highlighted in red, as shown in the following image.
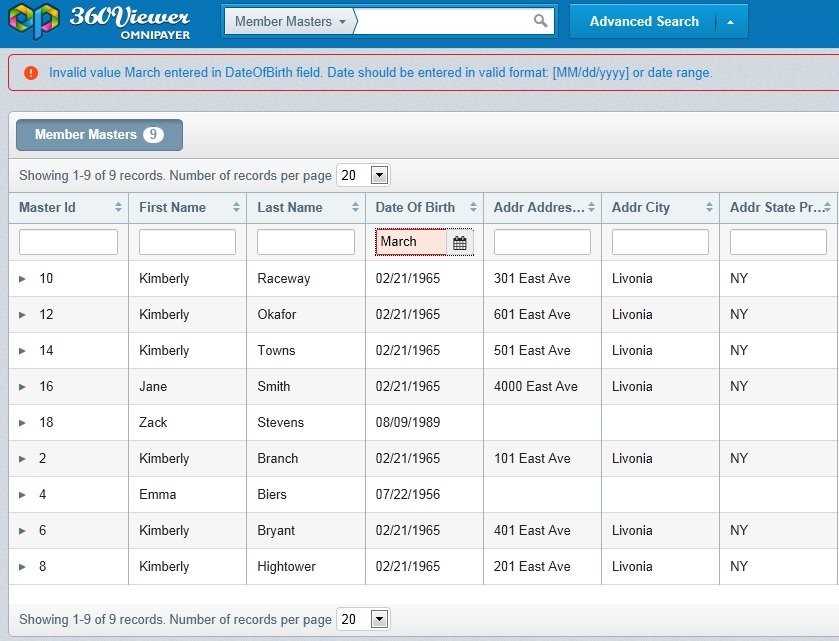
Validation is performed for numeric fields and fields with date format.
Using the Admin Console, you can configure the width, alignment of columns, and the specific columns that can be sorted and filtered. For more information, see Using the Admin Console.
Using the Calendar
The calendar feature allows you to retrieve Omni records by their creation date. You can manually type in a specific date or select a date from the calendar, as shown in the following image.
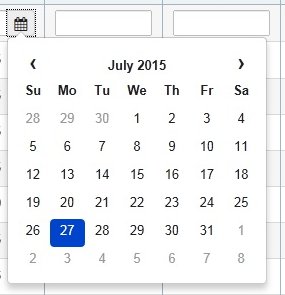
By default, the calendar displays the current date for empty fields or the date specified in the input field for populated fields. To close the calendar without selecting a specific date, click any area outside of the calendar.