Installing and Deploying the OPMC Application
This section describes how to install and deploy the OPMC application.
- Install the OPMC application.
- From the Applications section, expand Application Types, and then click WebSphere enterprise applications.
- Click the Install button.
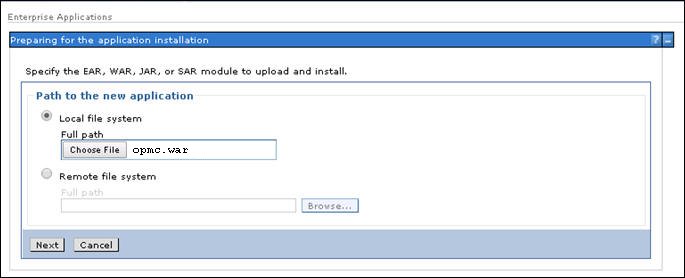
- Select the .war file that pertains to the OPMC application you
wish to install (for example, opmc.war),
as shown in the following image.
- Click Next.
- Leave the default values (Fast Path mode) and click Next.
- Select Allow EJB reference targets to resolve automatically, and leave the other options to their default settings, then click Next.
- Continue clicking Next until you reach Step 4.
- In the Context root field, enter:
/opmc
- Click Next, and then click Finish.
- Click Save.
- Reference the shared libraries.
The previously created Apache HTTP Client shared library should be referenced by the OPMC application.
- From the Applications section, expand Application Types and click Websphere enterprise applications, then select opmc_war.
- Click Shared library references.
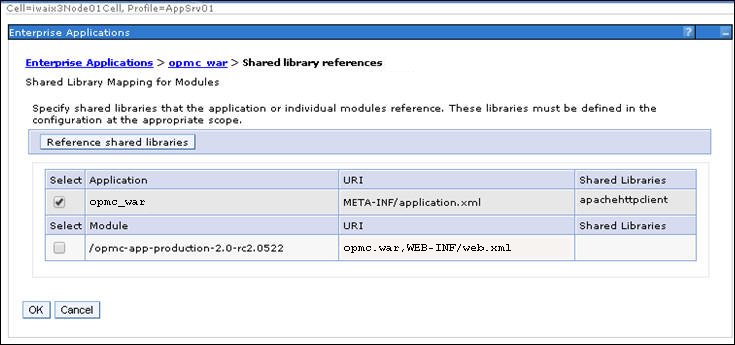
- Select the opmc_war check box and then
click the Reference shared libraries button,
as shown in the following image.
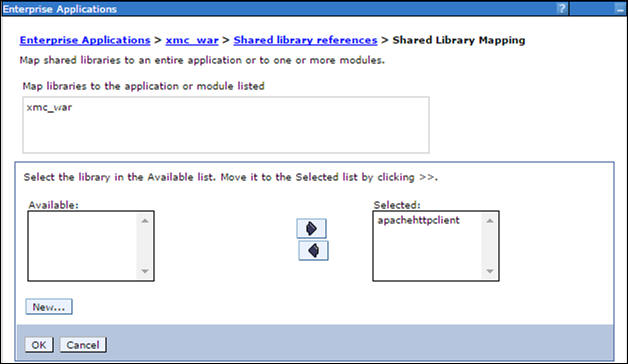
- Move the apachehttpclient shared library
from the Available section to the Selected section,
as shown in the following image.
- Click OK and then click OK again on the following page.
- Click Save.
- Configure the class loader.
- From the Applications section, expand Application Types, click WebSphere enterprise applications, and select opmc_war.
- Select Class loading and update detection.
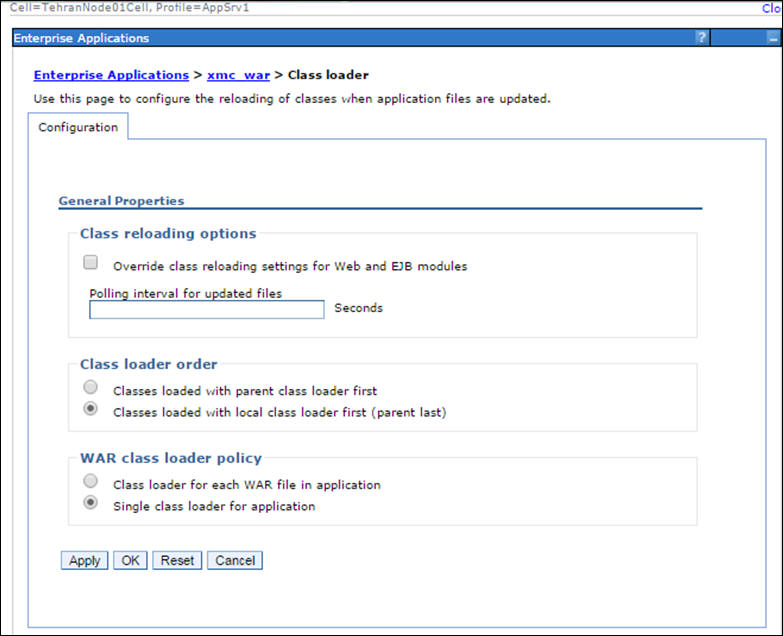
- Select Classes loaded with local class loader first
(parent last) and Single class loader for
application, as shown in the following image.
Click OK and then click Save.
- Install the Omni-Payer Domain application.
- From the Applications section, expand Application Types, and then click WebSphere enterprise applications.
- Click the Install button.
- Select the .war file that pertains to the Omni-Payer application you wish to install, for example, OmniPayerDomain.war.
- Click Next.
- Leave the default values (Fast Path mode) and click Next.
- Select Allow EJB reference targets to resolve automatically, and leave the other options to their default settings, then click Next.
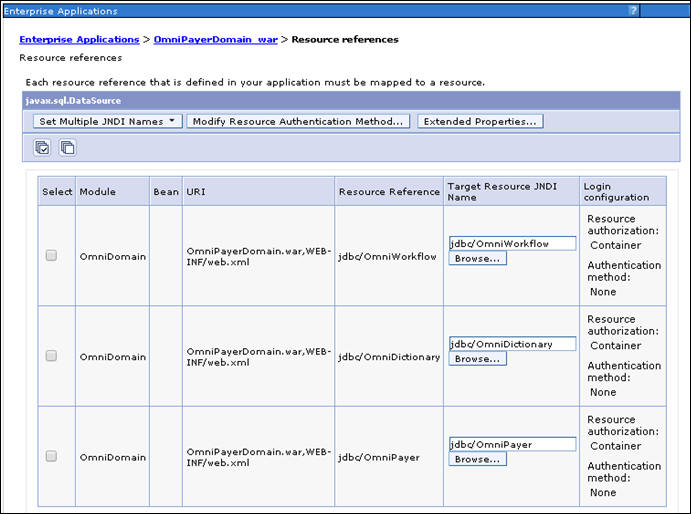
- Enter the following Resource References:
- jdbc/OmniWorkflow
- jdbc/OmniDictionary
- jdbc/OmniPayer
- Click Next.
- In the Context root field, enter:
/OmniPayerDomain
- Click Next, and then click Finish.
- Click Save.
- Start the Omni-Payer application.
- From the Applications section, expand Application Types, and click WebSphere enterprise applications.
- Select OmniPayer_war.
- Click Start.
- Check and review the installation by navigating to:
http://localhost:9080/opmc/
where:
- localhost
-
Is the site-specific machine name.
- 9080
-
Is the site-specific default host port number.
If the Omni-Payer login page is displayed, then the installation was successful. It is also recommended to restart the IBM WebSphere Application Server after the Omni-Payer application installation to determine whether there are any library conflicts.