Configuring JDBC Providers
|
Topics: |
This section describes how to configure JDBC providers for the H2 database and Omni-Payer DB2 database.
H2 Database
|
How to: |
This section describes how to configure a JDBC provider for the H2 database, which will be used to store the Omni-Payer configuration database location.
Procedure: How to Configure a JDBC Provider for the H2 Database
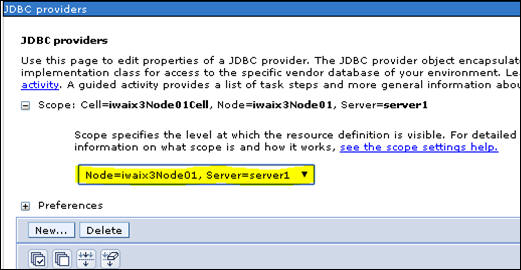
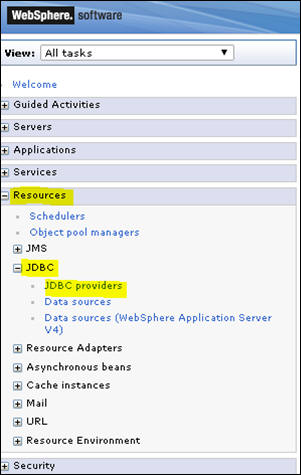
- In the Resources section, expand JDBC,
and then click JDBC providers, as shown in
the following image.

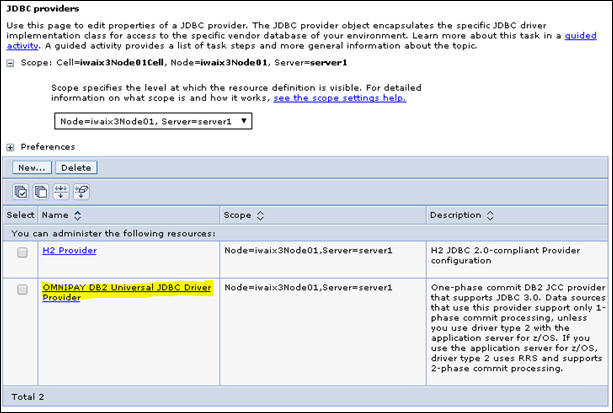
- From the Scope/Server drop-down list, select the node
and the server (for example, Node=iwaix3Node01, Server=server1),
and then click New, as shown in the following
image.
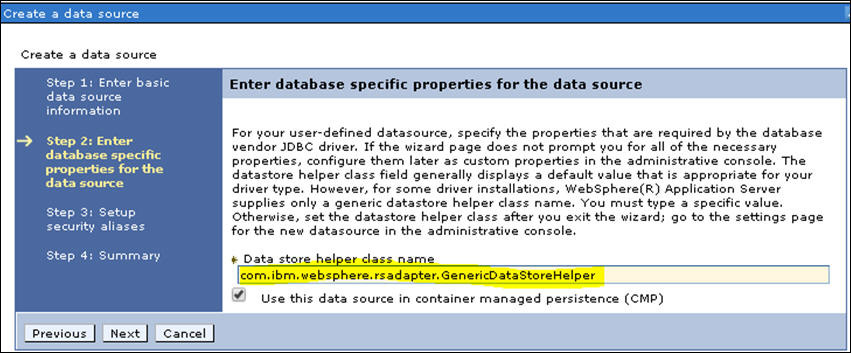
The Create new JDBC provider pane opens, as shown in the following image.

- Enter the required parameters, as shown in the following
table.
Parameter
Value
Database type
User-defined
Implementation class name
org.h2.jdbcx.JdbcDataSource
Name
H2 Provider
Description
H2 JDBC 2.0-compliant Provider configuration
- Click Next.
The Enter database class path information pane opens, as shown in the following image.

- In the Class path field, enter the path where the h2.jar
file is located, for example:
C:/h2-1.3.176.jar
You can download the library from http://www.h2database.com/html/download.html.
Note: The H2 .jar file for IBM WebSphere Application Server version 8.5.5 in the AIX environment .jar must be version 1.4.186 or higher (for example, h2-1.4.186.jar).
- Click Next.
- Click Finish.
- Set up the configuration database data source.
This data source will be used by the Omni-Payer application to get a connection configuration (metadata) data source.
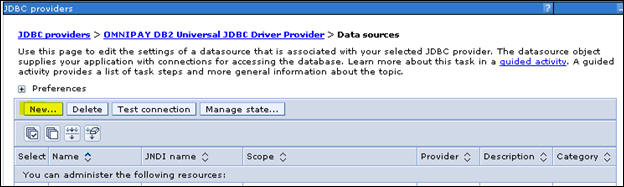
- Click Data sources,
as shown in the following image.

- Click New.
The Enter basic data source information pane opens, as shown in the following image.

- In the Data source name field, enter config.db.
- In the JNDI name field, enter config.db
- Click Next.
- In the Data store helper class name field, enter com.ibm.websphere.rsadapter.ConnectJDBCDataStoreHelper,
as shown in the following image.
- Click Next, and then click Next again, using the default selections.
- Click Finish.
- Click config.db, as shown in
the following image.

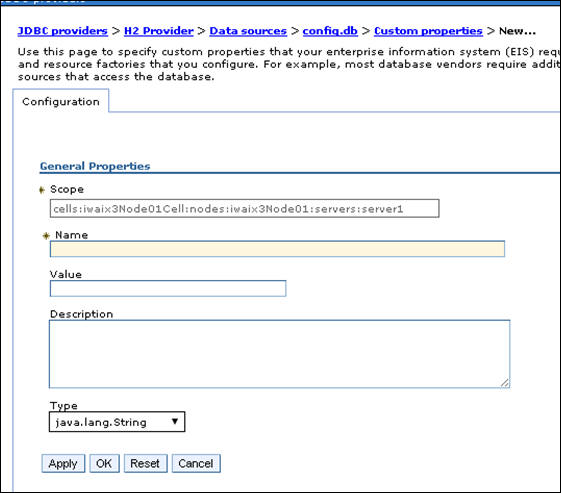
- In the Additional Properties section, click Custom Properties.

- Click New, as shown in the
following image.

- Adding each property value individually, create the
following properties (taken from the config.db JNDI property configuration)
and click OK and then New after
each property:
Property
Value
Property 1:
Name
auth
Value
Container
Property 2:
Name
type
Value
javax.sql.DataSource
Property 3:
Name
pooled
Value
true
Property 4:
Name
driverClassName
Value
org.h2.Driver
Property 5:
Name
username
Value
sa
Property 6:
Name
Value
Property 7:
Name
password
Value
password
Property 8:
Name
URL
Note: The absolute path must be used to define where the production database will be written to. In this case, write it to /prog/lc10683/prod-db (directory). Replace /prog/lc10683/prod-db with a site-specific directory.
Value
jdbc:h2:/prog/lc10683/prod-db/prodDb;MVCC= TRUE;LOCK_TIMEOUT=10000;DB_CLOSE_ON_EXIT= FALSE
Property 9:
Name
numTestsPerEvictionRun
Value
3
Property 10:
Name
testOnBorrow
Value
true
Property 11:
Name
testWhileIdle
Value
true
Property 12:
Name
maxActive
Value
-1
Property 13:
Name
maxIdle
Value
30
Property 14:
Name
maxWait
Value
10000
Property 15:
Name
testonReturn
Value
false
Property 16:
Name
validationQuery
Value
Select 1
Property 17:
Name
jdbcInterceptors
Value
ConnectionState
Property 18:
Name
validationInterval
Value
15000
Property 19:
Name
maxAge
Value
600000
Property 20:
Name
timeBetweenEvictionRunsMillis
Value
5000
Property 21:
Name
minEvictableIdleTimeMillis
Value
60000
Property 22:
Name
removeAbandonedTimeout
Value
120
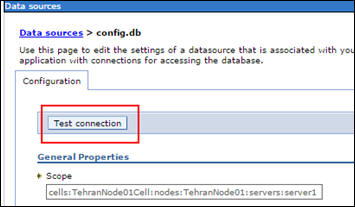
- Click Data sources,
as shown in the following image.
- Click Test connection, as shown
in the following image.
Omni-Payer DB2 Database
|
How to: |
This section describes how to configure a JDBC provider for the Omni-Payer DB2 database.
Procedure: How to Configure a JDBC Provider for the Omni-Payer DB2 Database
- From the Resources section, expand JDBC and
then click JDBC providers, as shown in the
following image.
- From the Scope/Server drop-down list, select the node
and the server (for example, Node=iwaix3Node01, Server=server1),
and then click New, as shown in the following
image.

The Create new JDBC provider pane opens.
- Provide the required values for the parameters.
- For the Database type drop-down list, select DB2.
- For the Provider type drop-down list, select DB2 Universal JDBC Driver Provider
- For the Implementation type drop-down list, select Connection Pool Data Source.
- In the Name field, enter the name of the provider,
for example, DB2 Universal JDBC Driver Provider.

- Click Next.
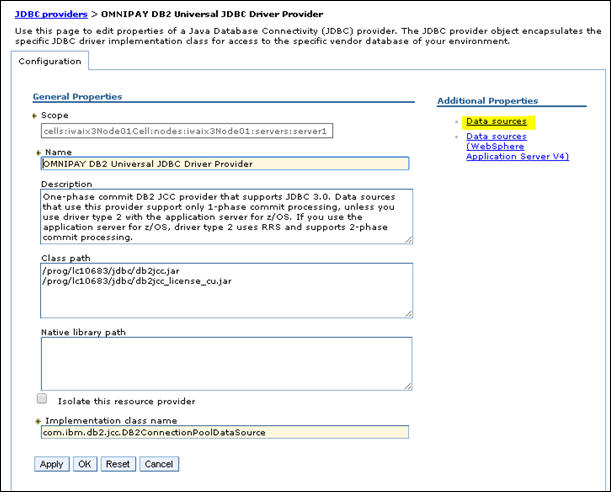
- In the Class path field, enter the path where the database
drivers reside in, and then click Apply,
as shown in the following image.

Note: Use a site-specific directory of where the database drivers reside.
- Click Next.
- Click Finish.
- In the following screen that opens, click OMNIPAY
DB2 Universal JDBC Driver Provider, as shown in the
following image.
- Click Data sources, as shown in
the following image.
- Click New.
- Create the following JNDI/Names:
- jdbc/Omni-Workflow
- jdbc/Omni-Payer
- jdbc/OmniWorkflow
- jdbc/OmniDictionary
- jdbc/omnidictdbx
- In the JNDI name field, enter:
jdbc/Omni-Workflow

- Click Next.
The Enter database specific properties for the data source pane opens.
- Enter the required values for the requested parameters.
- In the Database name field, enter the name of the database (for example, iwayprs).
- In the Server name field, enter the name of the server, for example, iwaix3.
- In the Port number field, enter the port number, for example, 60004.
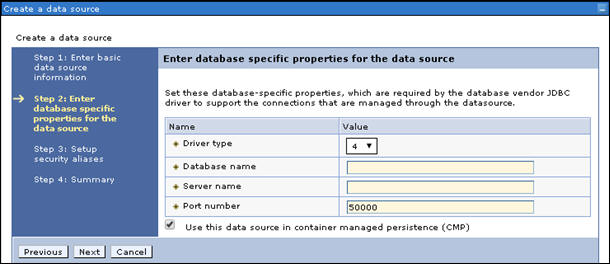
Note: The Database name, server name, and port number in this example are for documentation purposes. You should use a site-specific database name, server name, and port number as it relates to Omni-Payer.
- Click Next, and then click Next again.
- Click Finish, and then save your progress.
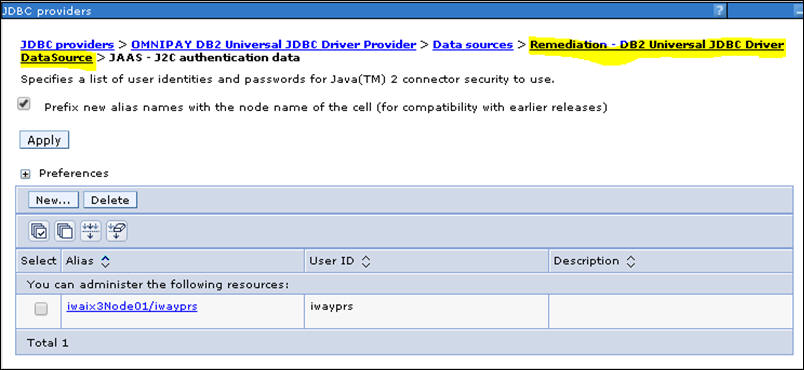
- Click Remediation - DB2 Universal JDBC Driver DataSource,
as shown in the following image.
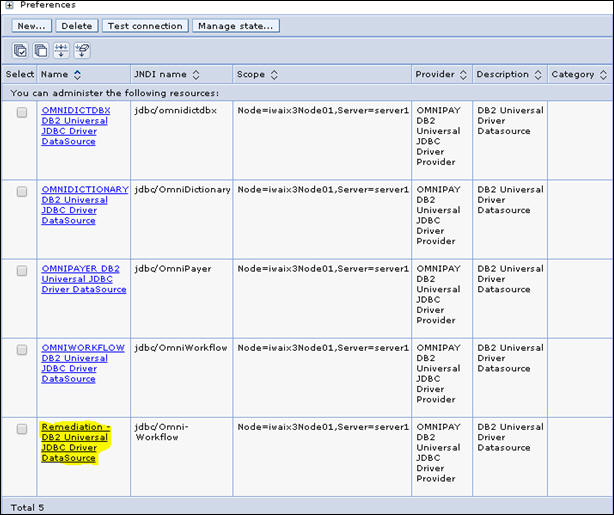
- Click JAAS - J2C authentication data.

- Click New, as shown in the following image.
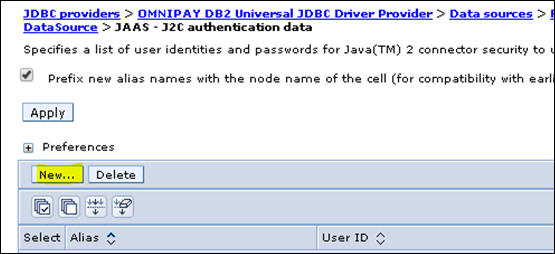
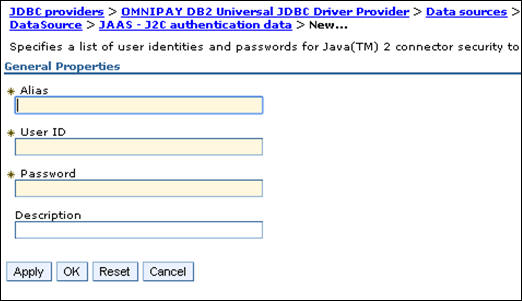
The General Properties pane opens, as shown in the following image.
Note: When adding additional JNDI database names, proceed to Step 23 in this procedure.
- Enter the required values for the requested parameters.
- In the Alias field, enter an alias name, for example, iwayprs.
- In the User Id field, enter a user ID, for example, iwayprs.
- In the Password field, enter a password, for example, iwayprs.
Note: The Alias, User ID, and Password in this example are for documentation purposes. You should use a site-specific alias, user ID, and password as it relates to Omni-Payer
- Click Ok and then save your work.
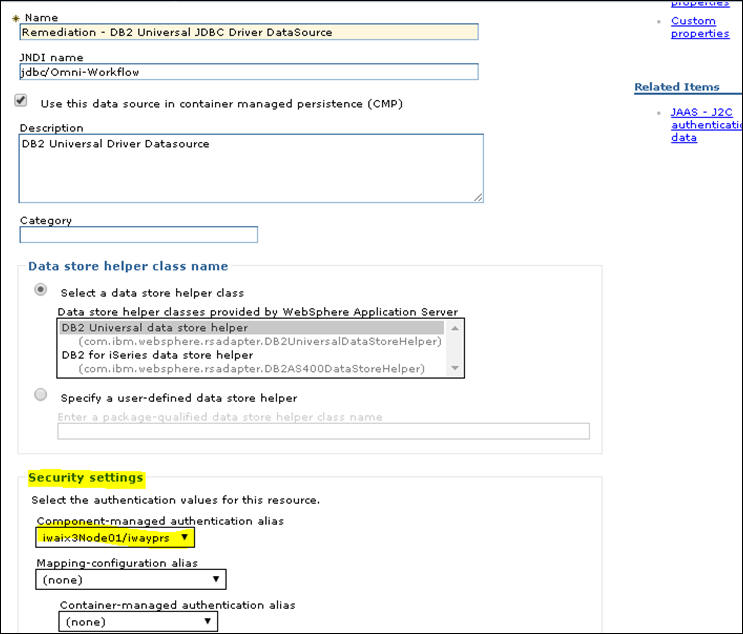
- Click the bread crumb, Remediation - DB2 Universal
JDBC Driver DataSource, to go back to the previous section,
as shown in the following image.
- In the Security settings section, click the Component-managed authentication
alias drop-down list and select iwaix3Node01/iwayprs,
as shown in the following image.
Note: For documentation purposes, use a site-specific node.
- Click Apply.
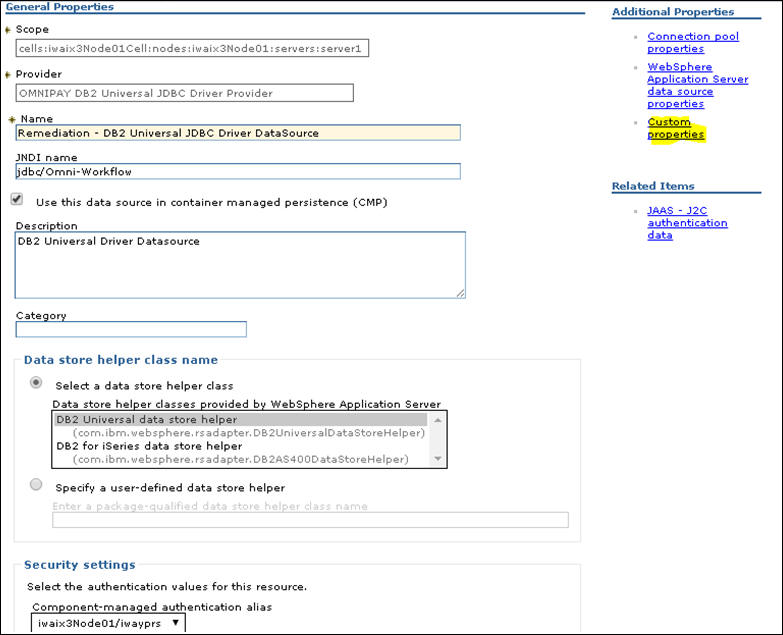
- Click Custom properties, as shown
in the following image.
- Scroll down the list of properties and then click on CurrentSchema,
as shown in the following image.
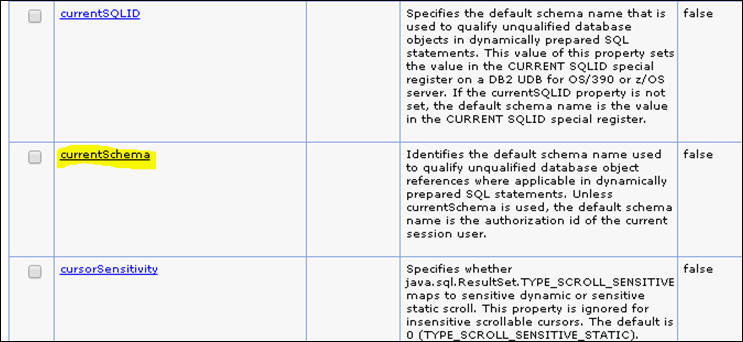
- In the Value field, enter OMNIPAY_WORKFLOW,
as shown in the following image.
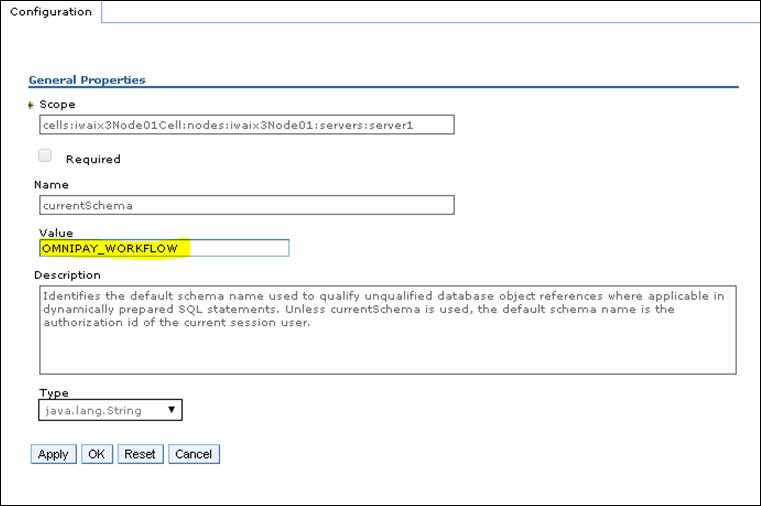
Note: This value changes for each schema as it relates to a JNDI data source.
- Click OK and then click Save.
- Select the check box for Remediation - DB2 Universal JDBC Driver,
and then click Test connection, as shown in
the following image.
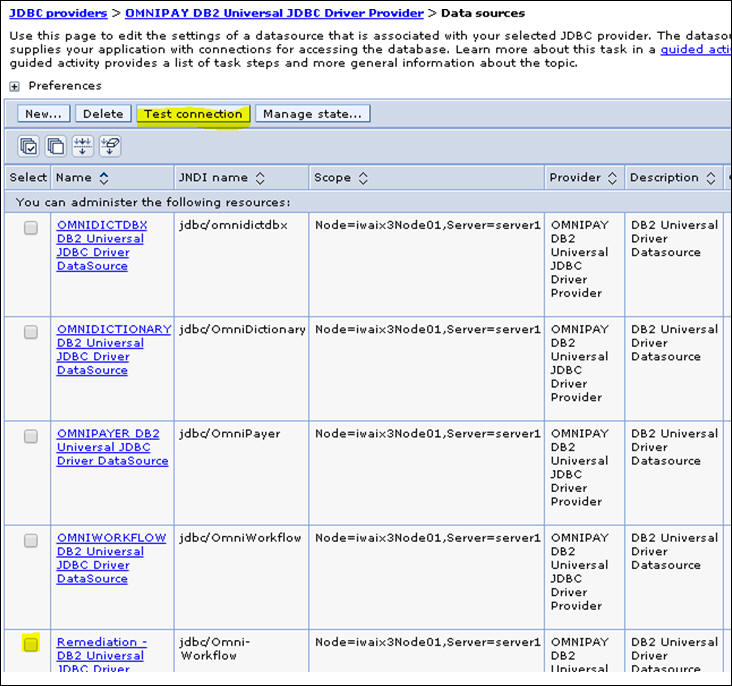
A confirmation message indicates that connection was successful.

- Repeat Step 12 for the other JNDI database connections listed in Step 11.