Manual Cleansing Page
|
Topics: |
Administration panel is available for Users with role System Administrator.
Workspace Panel
|
Topics: |
In order to configure the Workspace panel, the administrator should navigate to the Tables tab and select the Instance table (for example, Provider, Worker).
That table consists of many views, but the one we need is Full Info View.
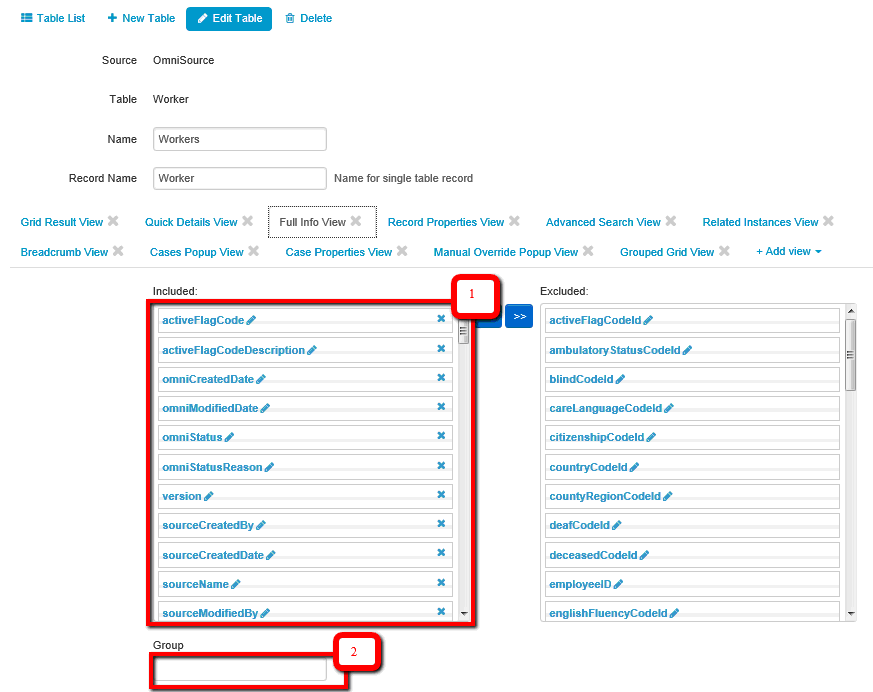
To rearrange the columns in the view – just simply drag needed column from 'Excluded' to 'Included' section in order to include column in the view or click 'X' icon if you want to exclude some column from the view (1).
If you want columns to be separated in Groups – Administrator has to add appropriate group to 'Included' section (2).
Allowing or Prohibiting the Option to Edit Fields
To configure the ability to edit the fields in the workspace panel administrator should edit nested columns (for example, display name, sortable, filterable). This can be done via clicking the 'Pencil' icon for appropriate columns in the Full info view of appropriate table and updating corresponding option:
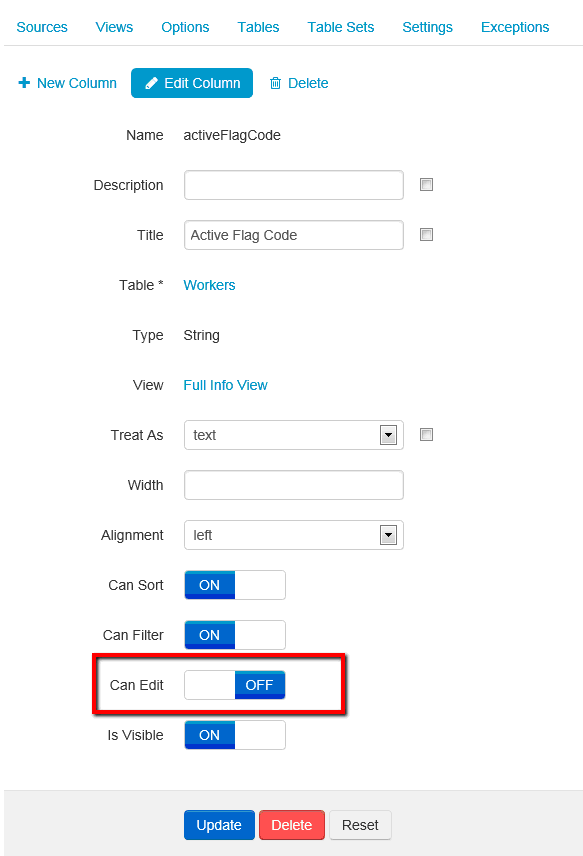
If some field needs to be disabled for editing – administrator should select 'Off' option, if field can be edited – 'On' option should be selected.
Case Properties Panel
Another thing that can be configured Manual Cleansing page is Case Properties panel. Administrator should find WF Cases table in the list of tables. The view that is needed to be configured is called Case Properties View.
Note: The configuration of this view affects all Remediation cases pages (Override Matching, Manual Cleansing, General Issue Cases).
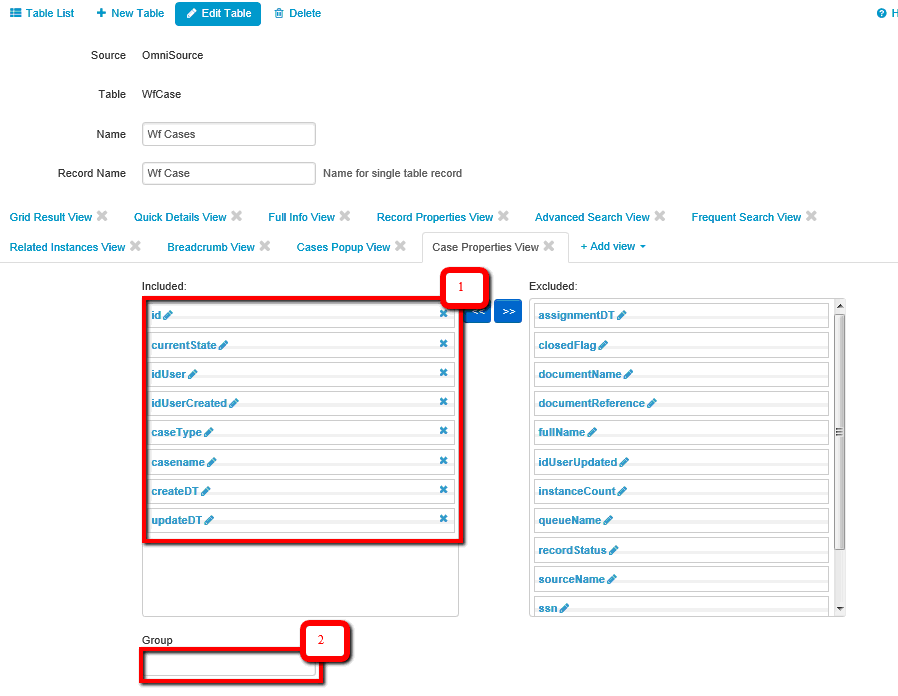
To rearrange the columns in the view, drag the required column from 'Excluded' to 'Included' section in order to include column in the view or click 'X' icon if you want to exclude some column from the view (1).
If you want columns to be separated in Groups – Administrator has to add appropriate group to 'Included' section (2).
Note: For this view, the names of groups will not be displayed. Instead of names, a horizontal line will appear.