Issues Page
|
Topics: |
In order to configure the appearance of the grids on the Issues Page, the Administrator should navigate to the Tables tab and select the WF Cases table from the list of tables if the Parent grid needs to be configured, or select the WF Tickets table if the Inline (Tickets) grid needs to be configured.
Case Issues Grid
In order to configure the appearance of the Case grids on the Issues Search Page, the administrator should navigate to the Tables tab and select the WF Cases table from the list of tables. That table should consist of four views:
- My Filter Issues Grid
- All Filter Issues Grid
- Advanced Search View
- Case Issues Grid View
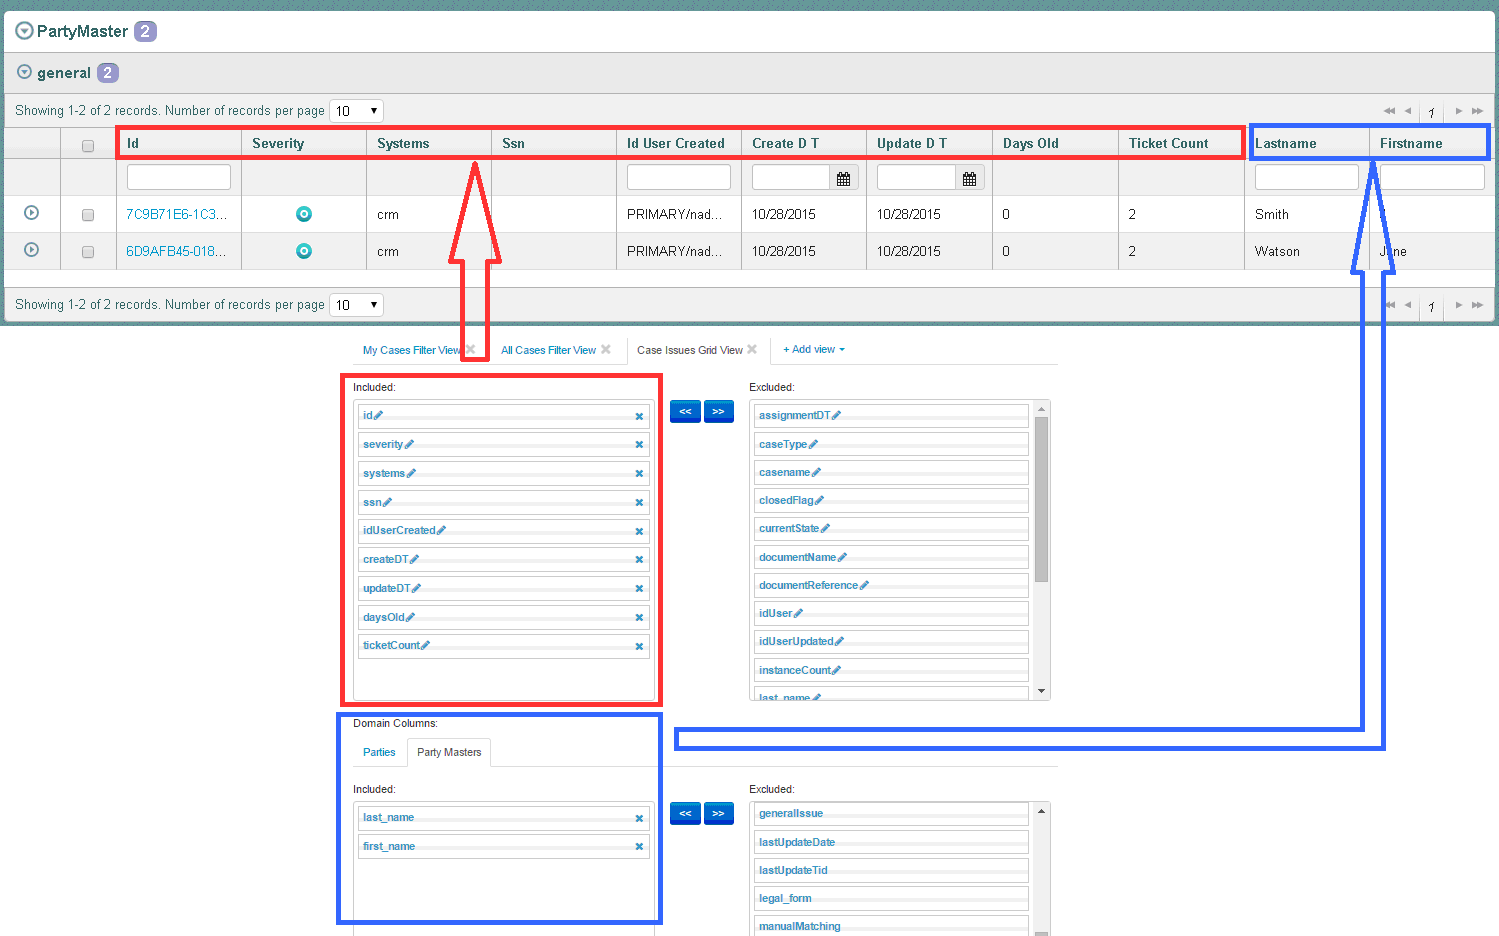
The Case Issues Grid view is responsible for the appearance of the Case Grid on the All Cases tab and My cases tab on the Issues Search page. The view consists of two parts:
- General columns, which includes columns that are common for all domains and are configured in the main area of the Case Issues Grid View.
- Domain columns, which are displayed next to the general columns in the grid and can be preconfigured for each available domain for the current user.
First of all, administrator should check if current mdata contains a particular View in Views list. If Case Issues Grid view is not created yet, administrator should delete the existing Master Issues Grid View, then click '+ New View' button and fill in needed fields in the following way:
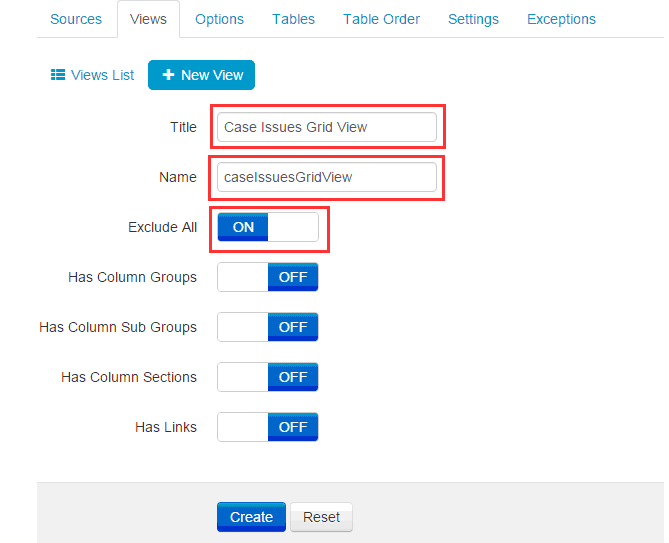
After that administrator should click Create and navigate to Tables tab, open WF Cases table and click edit Table.
Add needed Views from '+Add View' drop-down list and exclude unneeded. To rearrange the columns in the view – just simply drag needed column from 'Excluded' to 'Included' section in order to include column in the view or click 'X' icon if you want to exclude some column from the view.
Ticket Issues Grid
Ticket Issues Grid view is responsible for looks of the inline grid which used to displaying of Tickets details. In order to configure looks of the inline grids on Issues Search Page administrator should navigate to Tables tab and select WF Tickets table from the list of tables. That table should consist of 3 views: My filter Issues grid, All Filter Issues Grid and Ticket Issues Grid view.
Administrator should check if current mdata contains particular View in Views list. If Ticket Issues Grid view is not created yet, administrator should delete existing Instance Issues Grid View, then click '+ New View' button and fill in needed fields in the following way:
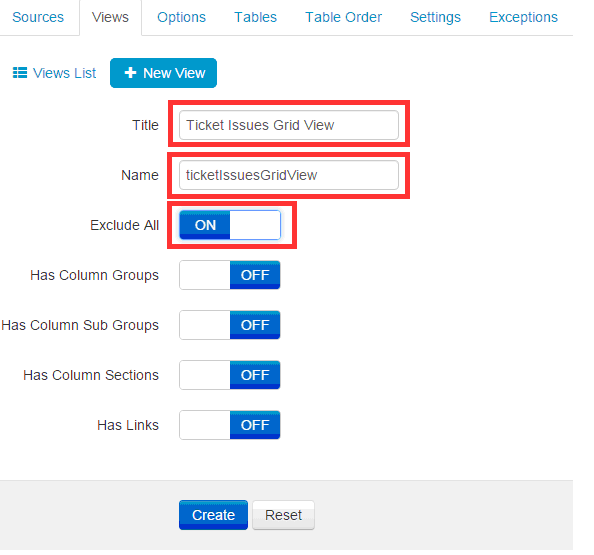
After that, administrator should click Create and navigate to Tables tab, open WF Tickets table and click edit Table.
Add needed Views from '+Add View' drop-down and exclude unneeded. To rearrange the columns in the view – just simply drag needed column from 'Excluded' to 'Included' section in order to include column in the view or click 'X' icon if you want to exclude some column from the view.
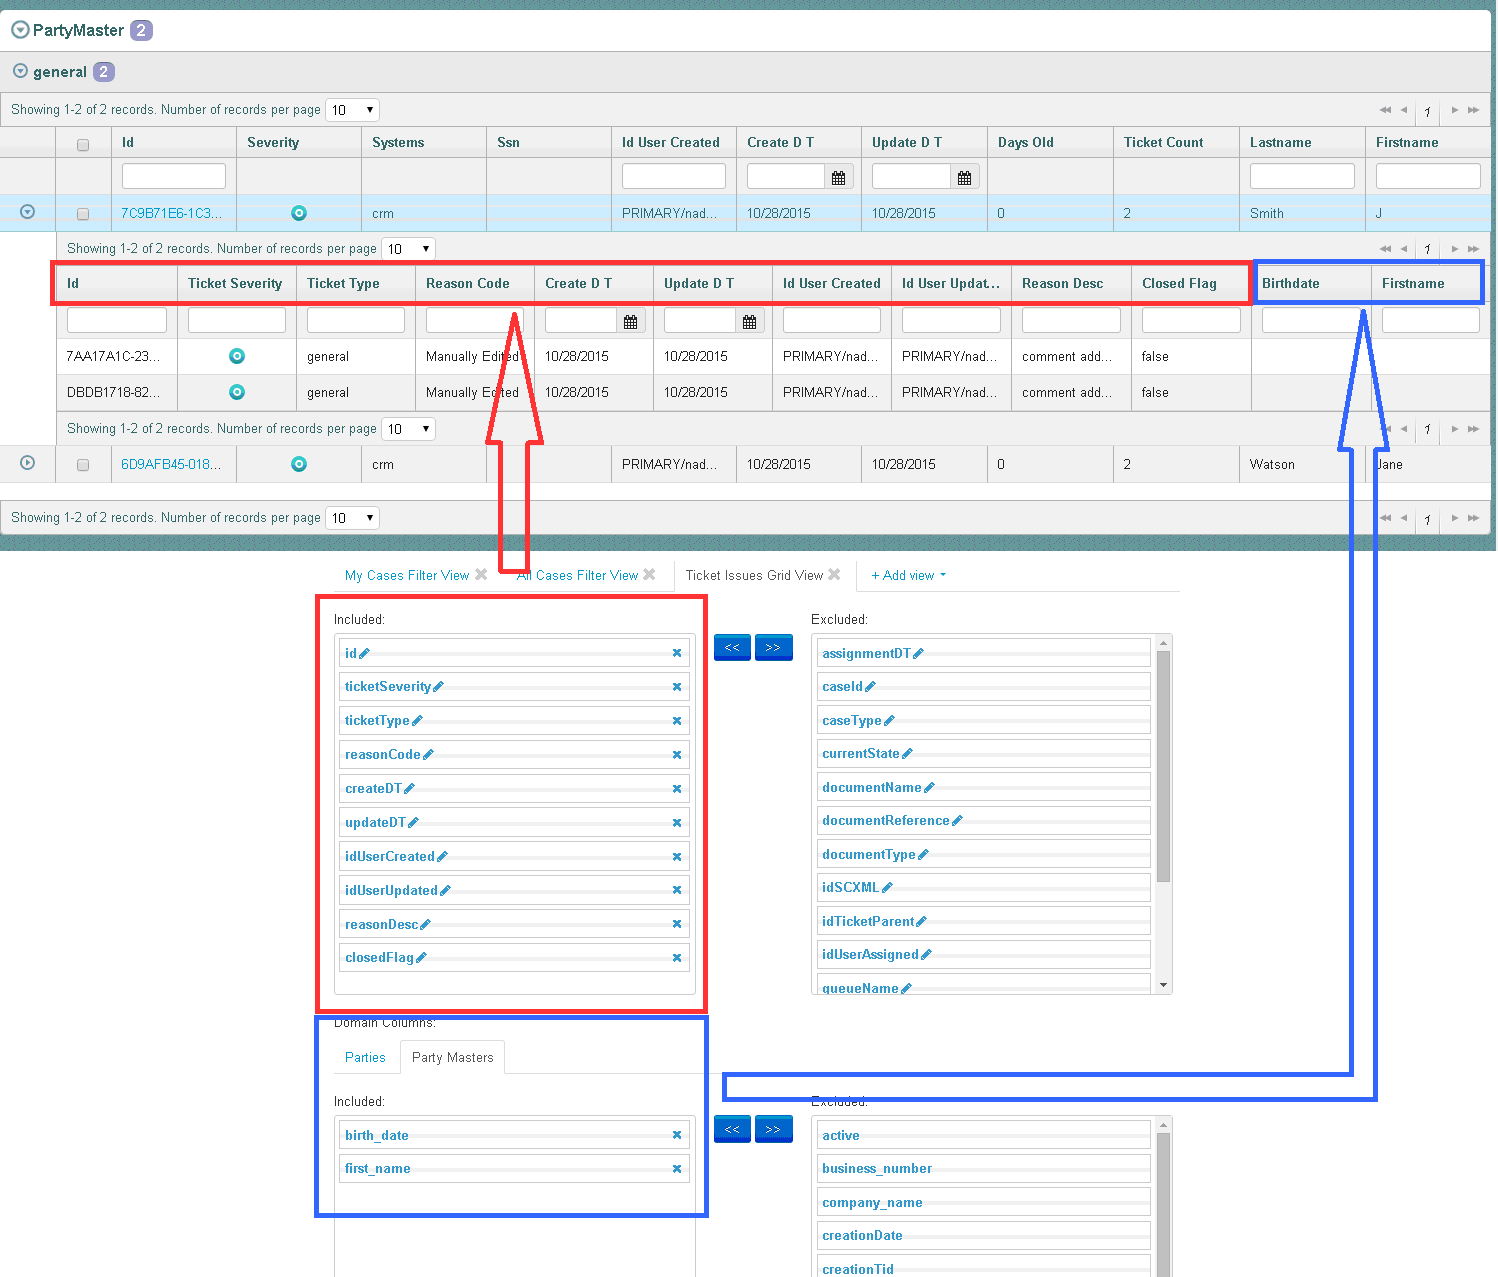
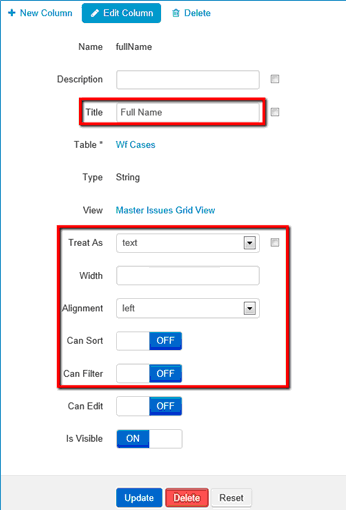
Also, configuration of nested columns (e.g. display name, sortable, filterable) is available via clicking the 'Pencil' icon for appropriate columns and updating corresponding options.
Filtering Panel on My Cases Tab
In order to configure Filtering Panel for cases on Issues Page Administrator should navigate to Tables tab and WF Cases table from the list of tables. If the Filtering panel for tickets needs to be configured, then the WF Tickets table should be edited.
My Cases Filter view is responsible for the list of filtering criteria displayed in Filtering panel on 'My Cases' tab.
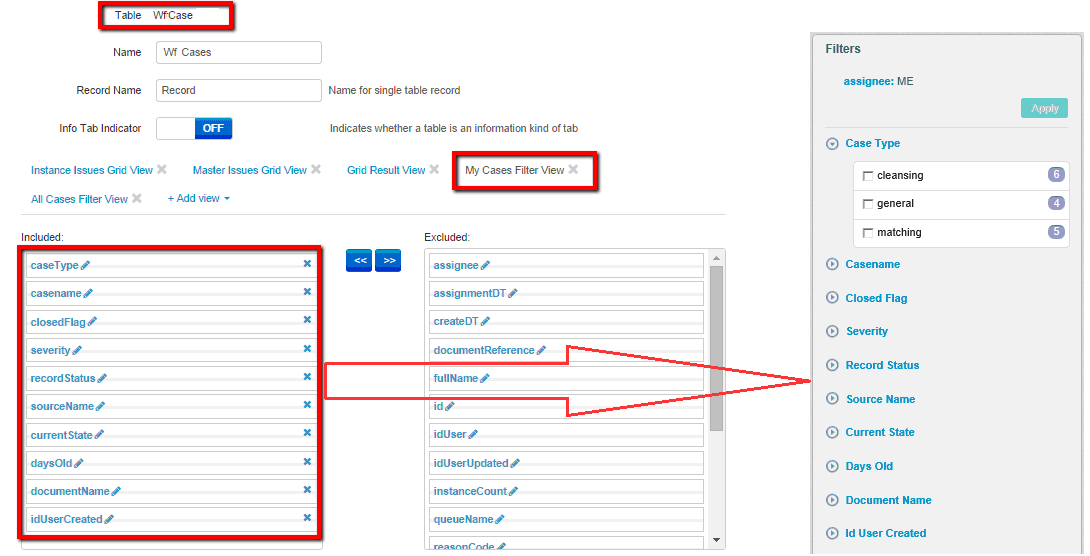
To rearrange the columns in the view – just simply drag needed column from 'Excluded' to 'Included' section in order to include column in the view or click 'X' icon if you want to exclude some column from the view.
Filtering Panel on All Cases Tab
In order to configure Filtering Panel for cases on Issues Page Administrator should navigate to Tables tab and WF Cases table from the list of tables. If Filtering panel for tickets needs to be configured - WF Tickets table should be edited.
All Cases Filter view is responsible for the list of filtering criteria displayed in Filtering panel on 'All Cases' tab.
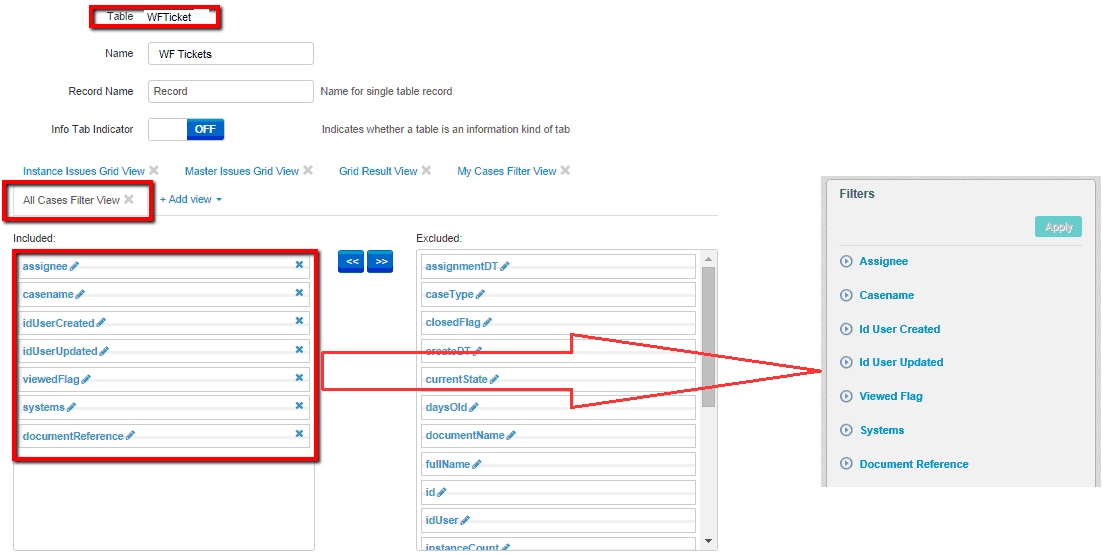
To rearrange the columns in the view – just simply drag needed column from 'Excluded' to 'Included' section in order to include column in the view or click 'X' icon if you want to exclude some column from the view.
Number of Filtering Criteria Sections Expanded by Default
In order to change the number of Filtering criteria's sections expanded by default Administrator should navigate to Settings tab and select Issue Filter Sections Count setting from the list.
The number entered in 'Value' field corresponds to the number of sections to be expanded by default in Filtering Panel on Issues page.
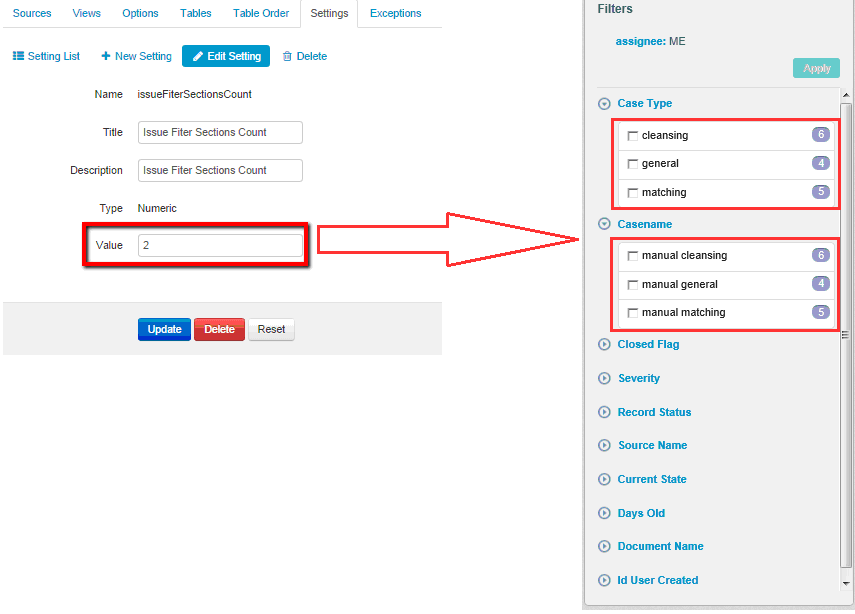
This setting is applied to Filtering panels on both 'My Cases' and 'All Cases' tabs.
Default Filtering on My Cases/All Cases Tabs
In order to have default filters on issue search page – Administrator have to create appropriate options: DefaultFiltersMyCases and DefaultFiltersAllCases.
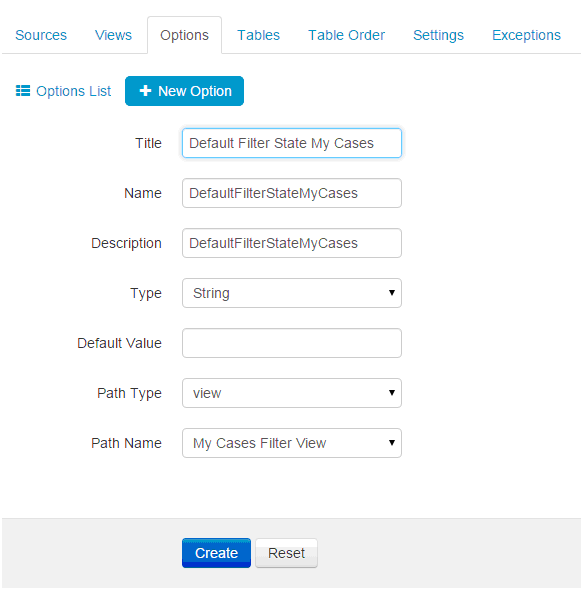
Same should be done for All Cases tab.
When options are created – they appear in the list of options:
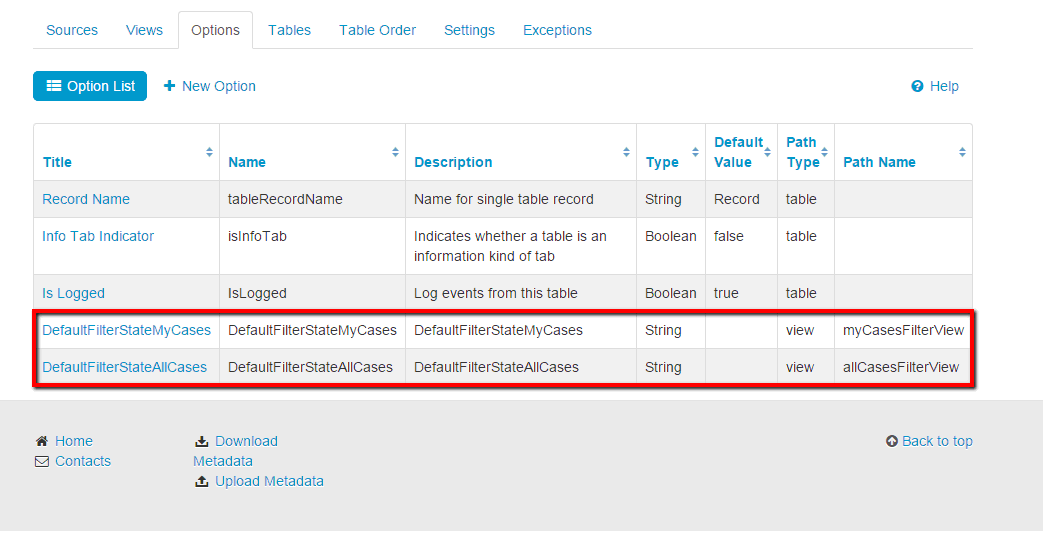
After options are added – administrator should add needed values to Default filtering section for appropriate tab of WF Cases table. Columns that are in Included section of My/All cases filter view:
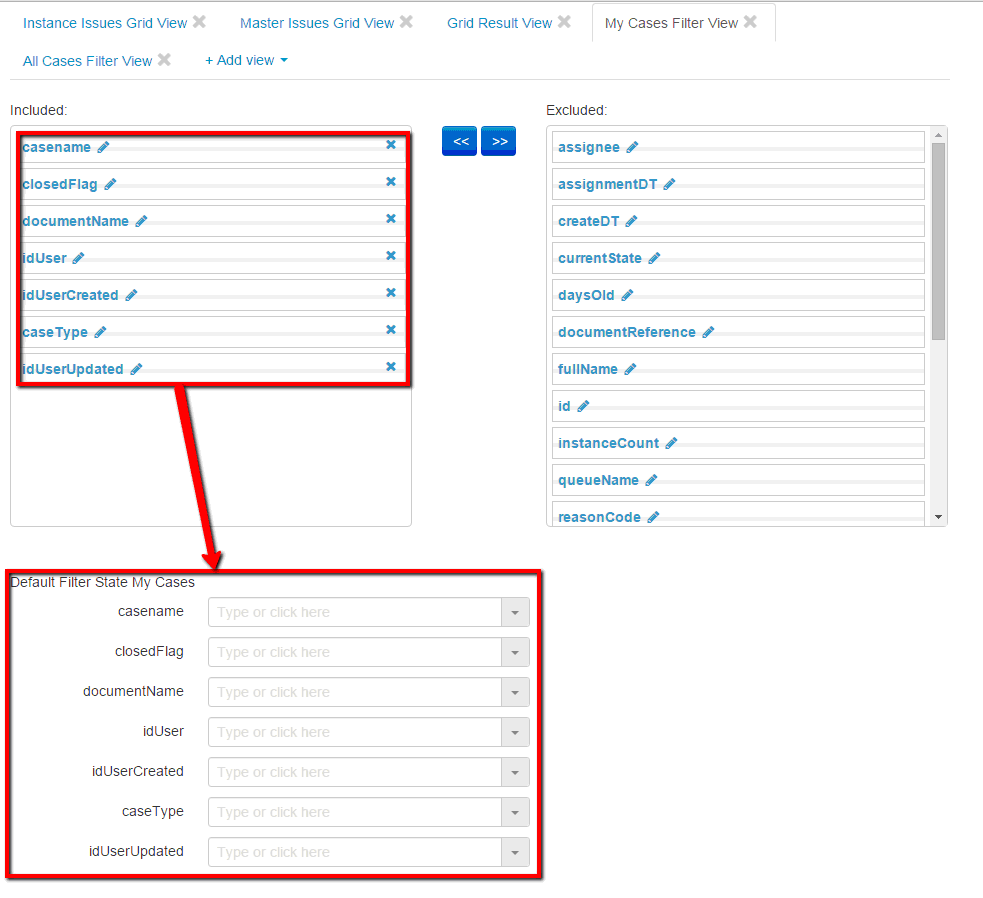
If some column is moved to Excluded section – it will automatically disappear from Default Filtering section.
Administrator can select any needed value for the field from the drop down. Or they can start typing in the field and will see all of the results that satisfy the filtering criteria:
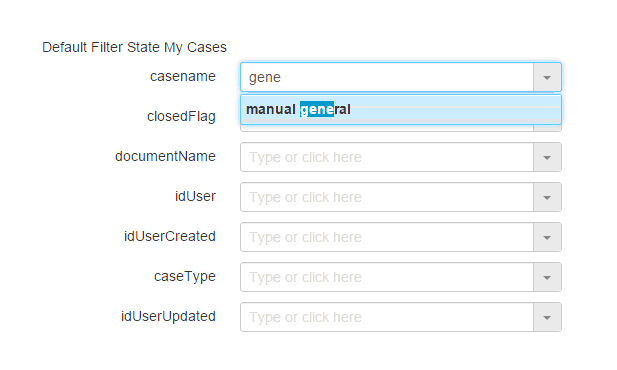
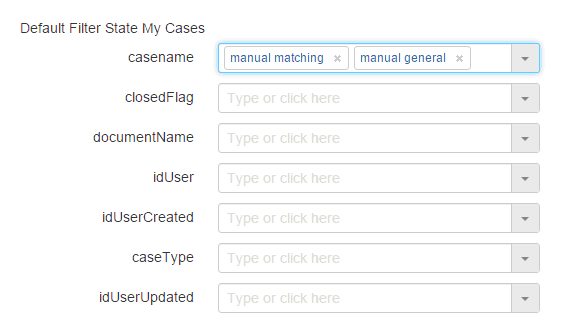
More than 1 value can be selected for 1 field if needed:
After needed values are set – Administrator should click 'Update' button in order changes to be applied.