Deploying Omni-Patient Management Central
|
How to: |
Omni-Patient Management Central (OPMC) is packaged with the following web archive files:
- omni360.war
- OmniDomain.war
- OmniService.war
- RemediationService.war
- OmniDictInstall.war
A copy of this Omni-Patient Management Central Installation and Configuration Guide is included. In addition, a backup copy of the default database is also included, which holds templates of the Omni-Patient 360 Viewer screen definition metadata.
Procedure: How to Deploy a New Version of Omni-Patient Management Central
- Using a terminal emulator (for example, Putty), connect to the Linux system where OPMC will be deployed.
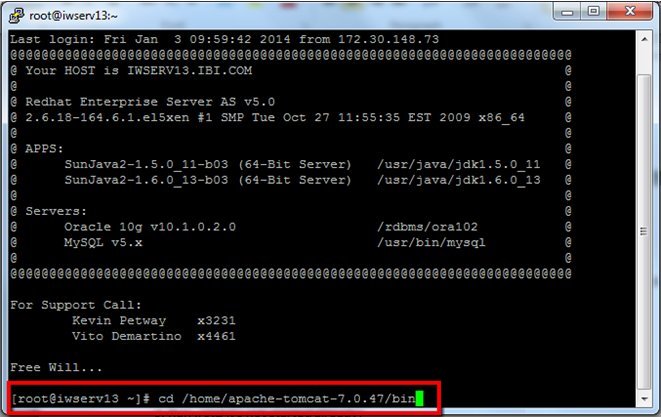
- Navigate to the /bin directory where Apache Tomcat is
installed. For example:
/home/apache-tomcat-7.0.47/bin
The following image shows a terminal emulator window that is connected to a Linux system and where the cd command is being used to navigate to the /bin directory where Apache Tomcat is installed.
- Run ./startup.sh to start Apache Tomcat application server if it has not been started.
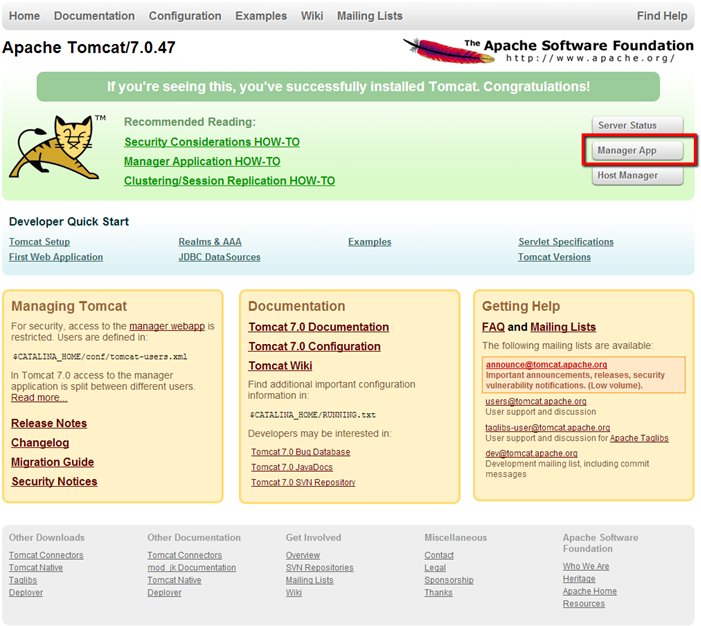
- Launch the Apache Tomcat web console in your browser.
- Click Manager App, as shown in
the following image.
- Log in as required and then browse to the Deploy area
of the console, as shown in the following image.
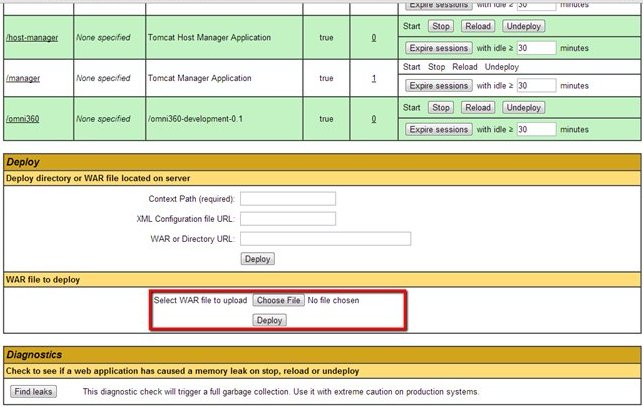
- Click Choose File, navigate to the location where the omni360.war file is located, and then select this file.
- Click Deploy.
- Click Choose File, navigate to
the location where the OmniService.war file is located, and then
select this file.
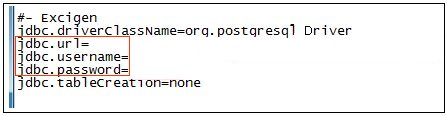
Note: If the database connection settings need to be changed, edit the OmniService.xml file in the OmniService.war file (\\OmniService\WEB-INF\OmniService.xml) and provide the correct settings before deploying this file. For example:
- Click Deploy.
- Click Choose File, navigate to the location where the OmniDomain.war file is located, and then select this file.
- Click Deploy.
Omni-Patient Management Central (OPMC), including the Omni-Patient 360 Viewer application is now deployed to the Apache Tomcat application server.