Installing a New Version of Omni-Patient Management Central
|
How to: |
This section describes how to install a new version of Omni-Patient Management Central (OPMC).
Procedure: How to Install a New Version of Omni-Patient Management Central
- Copy the four .war files (omni360.war, OmniDomain.war, OmniService.war, and RemediationService.war) from drive:\OPMC_2.5.x to [catalina_home]\webapps.
- Use WinZip or WinRar to open the OmniService.war file, which has been copied to [catalina_home]\webapps.
- In the OmniService.war file, edit the OmniService.properties file (located in WEB INF\) using a text editor.
- Specify the JDBC driver, location, and access properties
that are specific to each: the Omni-Patient database, the OmniWorkflow
database, and the Omni (Data) Dictionary database.
Modify the jdbc.url, jdbc.username, and jdbc.password properties, as shown in the following example.
#- Omni
#workflow.jdbc.driverClassName=net.sourceforge.jtds.jdbc.Driver
#workflow.jdbc.url=jdbc:jtds:sqlserver:etc
#workflow.jdbc.username=sa
#workflow.jdbc.password=testpwd
#workflow.jdbc.tableCreation=none
- Save the changes to the OmniService.properties file and
close the text editor.
WinZip displays the following prompt:
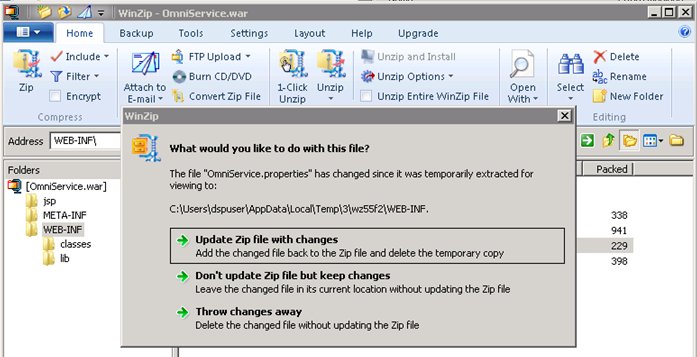
- Select Update Zip file with changes.
- Create the following folder at the root of your drive:
C:\OPMC_Home\Workflow
- Copy the omni_home folder (and all of its subfolders
and files in those folders) into the following folder:
C:\OPMC_Home\Workflow
- Open the RemediationService.properties file with a text
editor (for example, Notepad, WordPad, and so on). The RemediationService.properties
file is located in the following folder:
C:\OPMC_Home\Workflow\omni_home\properties\
- Configure the Remediation Service.properties file as described in Deploying the Remediation Server.
- Edit the <Catalina_Home>\conf\context.xml as described in Deploying the Remediation Server.
- Start the Apache Tomcat service from the Windows Service window.
- Configure the iSM embedded in the Remediation Server.
Procedure: How to Configure iSM Embedded in the Remediation Server
Previously, the RemediationService.war file was copied into the Tomcat 7.0.x\webapps folder from which it could be, and now has been, deployed. The RemediationService.war file contains an embedded iWay Service Manager (iSM) instance, which serves as the Remediation Server. iSM requires a user name and password that is valid for Windows OS level access to the Windows OS, which is hosting the OPMC Remediation Server. A pre-configured user name and password is shipped in iSM, within the RemediationService.war file. Until that user name and password is changed to a valid user name and password on the Windows machine, the Remediation Server will generate an error when invoked due to denied access to an invalid user name and password.
To modify the embedded iSM Data Provider user name, password, and URL of the Remediation Server:
- Enter the following URL in your web browser:
http://[opmc_hostname]:8080/RemediationService
An iSM console logon dialog displays and prompts you for the iSM user name and password, as shown in the following image.
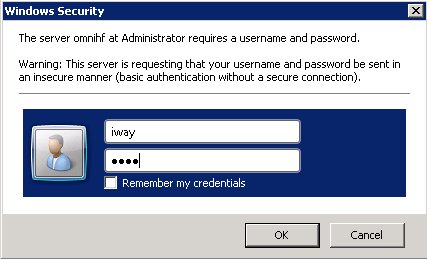
- Type iway for the user name, iway for
the password, and then click OK.
The iSM Administration Console opens, as shown in the following image.

- In the Providers category on the left pane, click Data Provider.
The Data Provider pane opens.
- In the JDBC Connections table, which lists the available
JDBC Data Providers that have been configured, click Omni-Workflow.
The Data Providers - JDBC pane opens for the selected provider (Omni-Workflow), as shown in the following image.
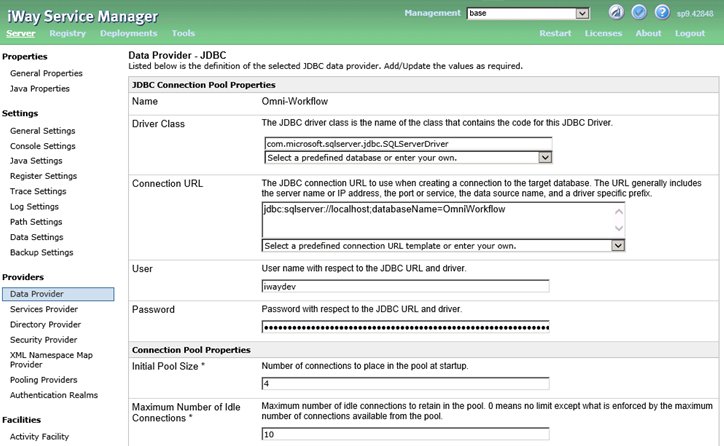
- Enter the valid values for the User, Password, and Connection URL parameters, where User is the user name, Password is the password, and Connection URL is the URL that specifies the name (and sometimes instance name) of the workflow database for the Remediation Server, typically named OmniWorkflow.
- Examine the Driver Class parameter value, and ensure
that it is set to:
com.microsoft.sqlserver.jdbc.SQLServerDriver
- Scroll down to the bottom of the pane where the Update and Test buttons are located.
- Click Test.
This will test the JDBC connection you specified for the User, Password, and Connection URL parameters that you specified. If these parameter values are valid, then a success message is displayed in red text, as shown in the following image.
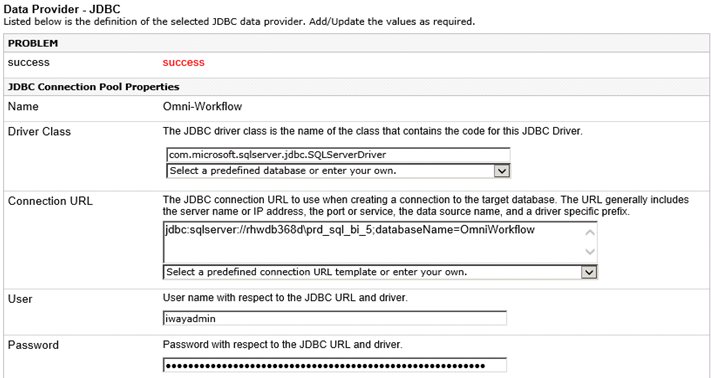
Note that when database names also include instance names (schemas), then the JDBC Connection URL string has the following syntax:
jdbc:sqlserver://rhwdb368d\prd_sql_bi_5;databaseName=OmniWorkflow
The following is another JDBC driver sample (relationships):
driverClassName="com.microsoft.sqlserver.jdbc.SQLServerDriver" url="jdbc:sqlserver://rhwdb368d\prd_sql_bi_5;databaseName=OmniWorkflow
"maxActive="10" maxIdle="10" initialSize="75"/>