|
|
|
Procedure: How to Install Omni-Gen Server and Omni Governance Console on Windows
This procedure assumes that a database server (for example, an MS SQL Server), a Repository Server (for example, SVN), and iWay Data Quality Suite (DQS), are already installed.
- Verify that the JAVA HOME environment variable (for Java Development Kit version 8) is defined properly and that %JAVA HOME%\bin is the first element in your PATH.
- Download the installer (OmniGenInstallerWindows-CUSTOMER-3.5.0.exe) from the Information Builders Technical Support Center.
- In the File Explorer, right-click the downloaded OmniGenInstallerWindows-CUSTOMER-3.5.0.exe file and select Run as administrator.
The InstallAnywhere window appears, as shown in the following image.
When the install is ready to begin, the Install New Omnigen window opens, as shown in the following image.
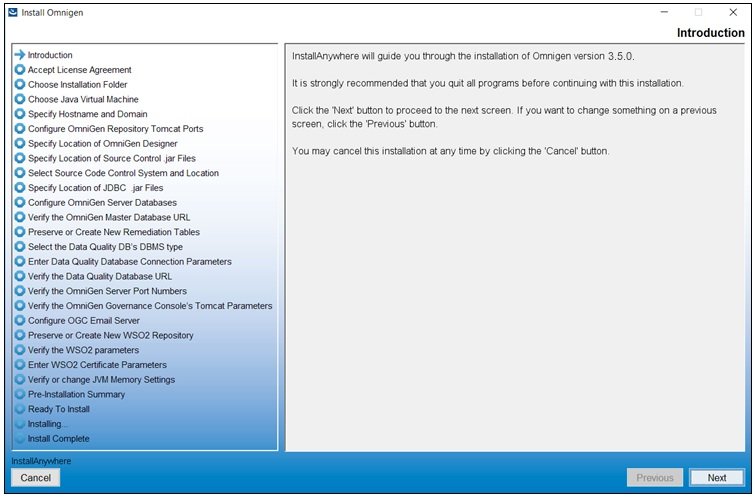
- Click Next.
The License Agreement Terms and Conditions pane opens, as shown in the following image.

- Read the License Agreement, select the I accept the terms of the License Agreement check box, and then click Next.
The Choose Installation Folder pane opens, as shown in the following image.
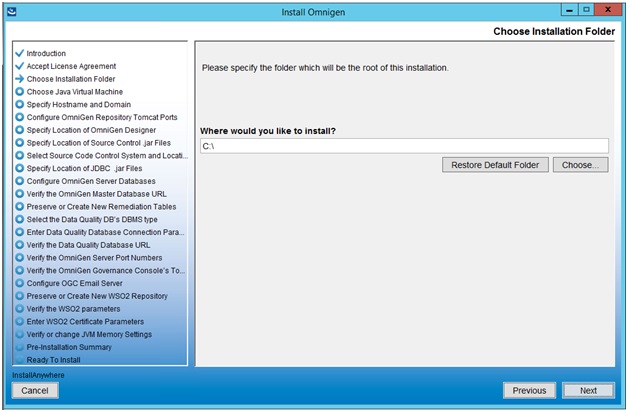
- In the Where would you like to install field, enter the location where you wish to install all of the required files for Omni-Gen.
The installer will create a file tree named OmniGen at the location you have specified. For example, if you accept the default location as C:\, then the installer will install Omni-Gen to:
C:\OmniGen
- After you have indicated an installation directory, click Next.
The Choose Java Virtual Machine pane opens, as shown in the following image.
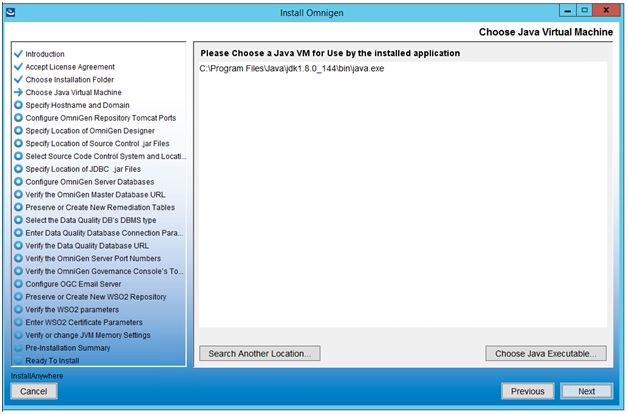
- Ensure that the Java version located is version 1.8 or higher, then click Next.
The Specify Hostname and Domain pane opens, as shown in the following image.
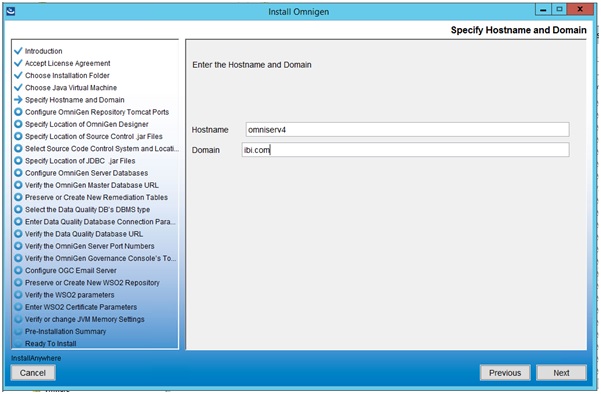
The default host name is this machine on which you are currently installing.
- Enter the host domain in the Domain field and then click Next.
The Configure OmniGen Repository Tomcat Ports pane opens, as shown in the following image.
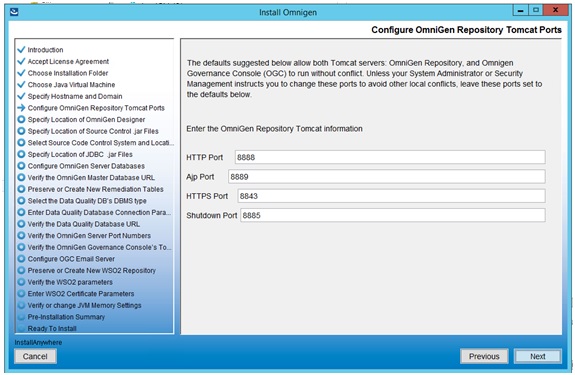
- Verify the ports that are indicated by default and modify accordingly if required.
- Click Next.
The Specify Location of OmniGen Designer pane opens, which prompts for the parameters that define the location of Omni Designer, as shown in the following image.

- Accept the default parameters and click Next.
The Specify Location of Source Control .jar Files pane opens, which asks you to select a folder containing the Source Code Control System (SCCS) .jar files, as shown in the following image.
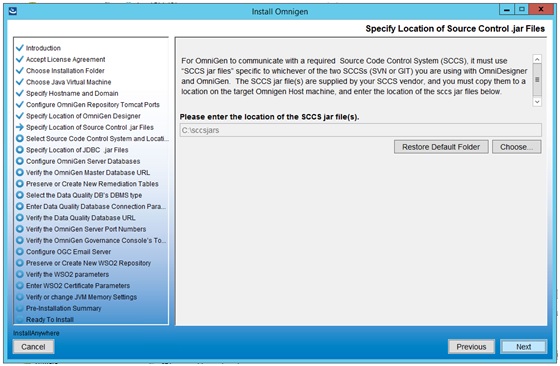
- Change the location of the SCCS .jar files if necessary, then click Next.
If you have not created a folder for the SCCS .jar files, then the following error message is displayed:
If you receive this message, click Cancel and then create a new folder. Place the SCCS .jar files in that folder and click Choose in the Specify Location of Source Control .jar Files pane to navigate and select that new folder.
The Select Source Code Control System and Location is the next pane that opens, as shown in the following image.
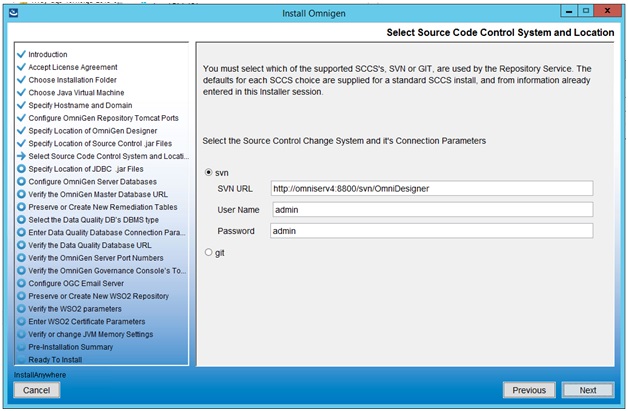
- Define the location and credentials for your source control repository by selecting either svn or git.
- Click Next.
The Specify Location of JDBC .jar Files pane opens, as shown in the following image.
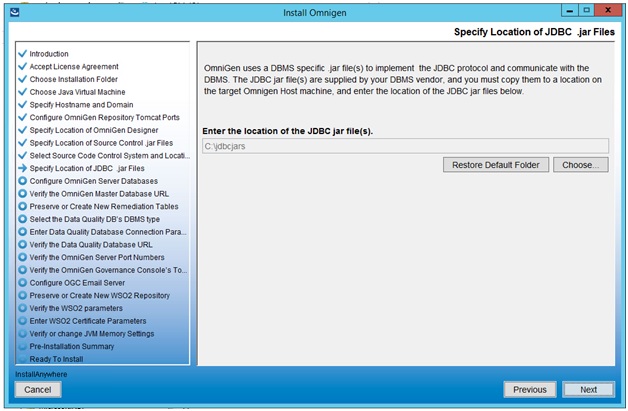
- Specify the location of your JDBC .jar file(s) and click Next.
The Configure OmniGen Server Databases pane opens, which provides an overview regarding Omni-Gen databases and configuration parameters, as shown in the following image.
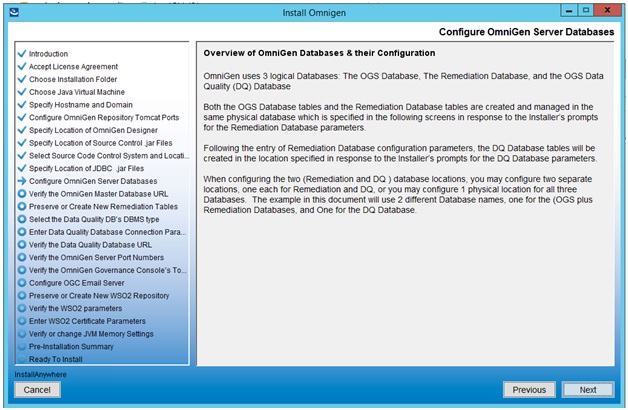
- Review this information and click Next to continue.
The Select the DBMS type of the Remediation Database pane opens, as shown in the following image.
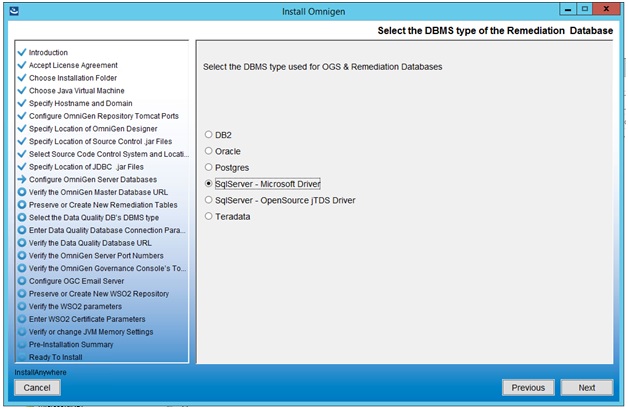
- Specify the database that you want to use for Omni-Gen Server (OGS) and the Remediation database.
- Click Next.
The Enter OGS Database Parameters: SQL Server with Microsoft or Open driver pane opens, as shown in the following image.
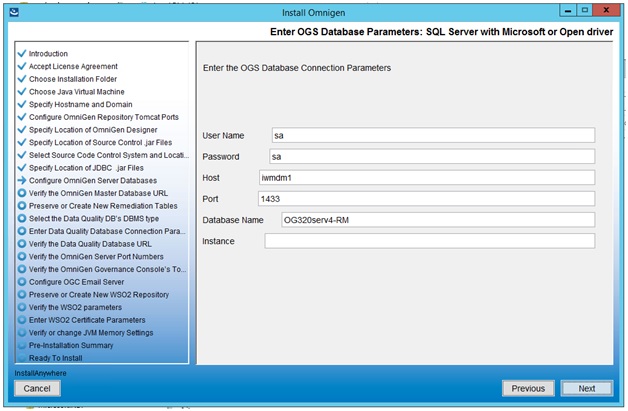
- Specify the DBMS-specific parameters for the combined OGS and Remediation database, and then click Next.
The Verify the OmniGen Master Database URL pane opens, as shown in the following image.
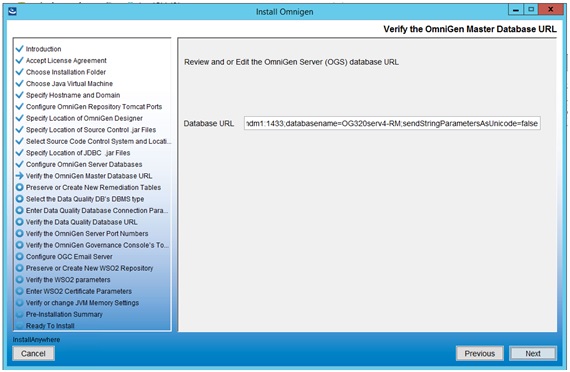
- Verify the database URL and click Next.
The following image shows test connection results for the specified database.
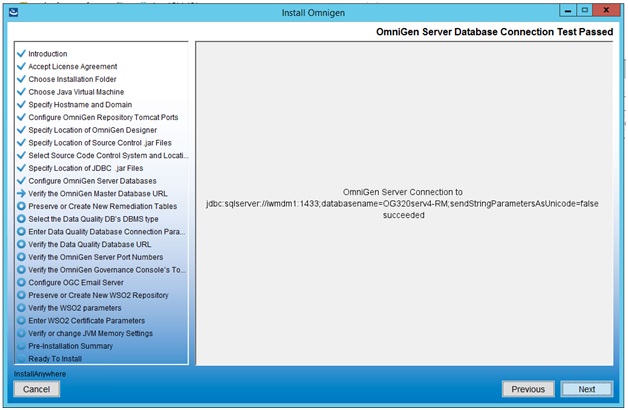
- Click Next to continue.
The Preserve or Create New Remediation Tables pane opens, as shown in the following image.
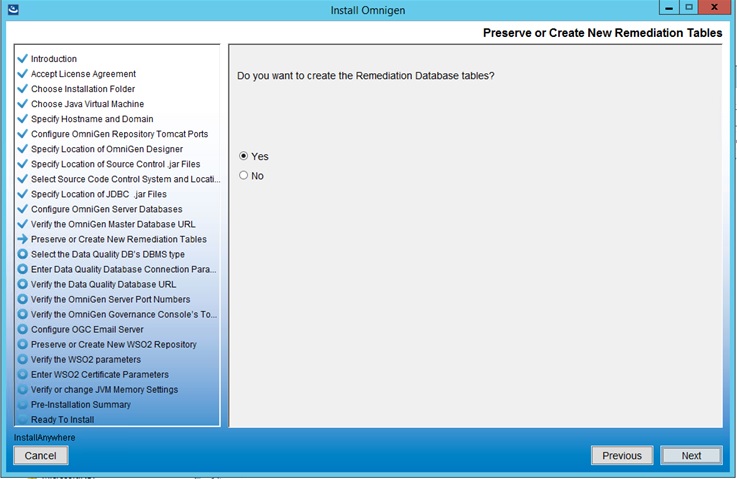
- Select Yes and then click Next.
The Select the Data Quality DB's DBMS Type pane opens, as shown in the following image.
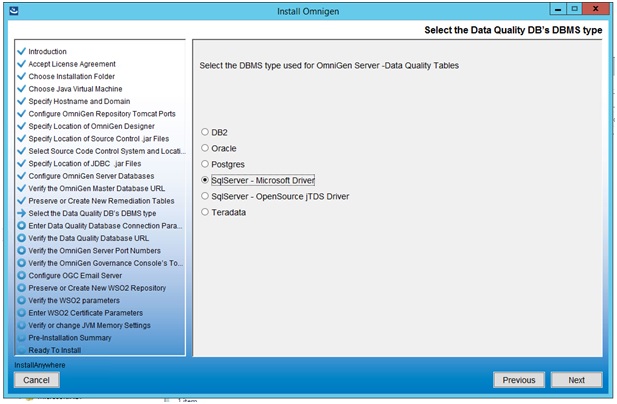
- Select the DBMS type used for the Data Quality (DQ) database and click Next.
The Enter DQ Database Parameters: SQL Server with Microsoft or Open driver pane opens, as shown in the following image.
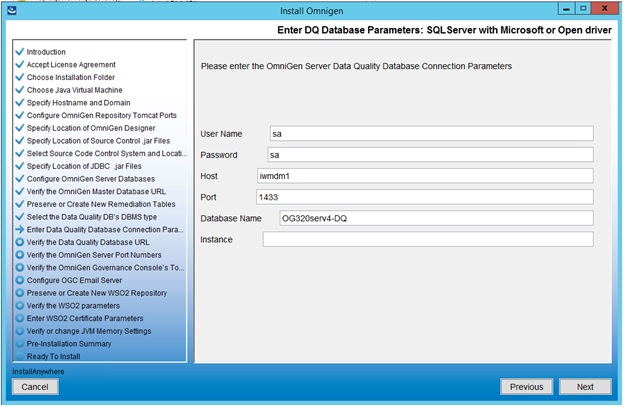
- Enter the parameters for the DQ database, then click Next.
The Verify the Data Quality Database URL pane opens, as shown in the following image.
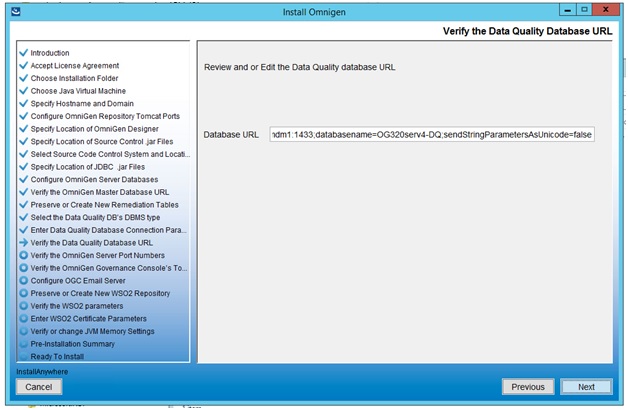
- Verify the database URL and click Next.
If the test is successful, then the Data Quality Database Connection Test Passed pane opens, as shown in the following image.
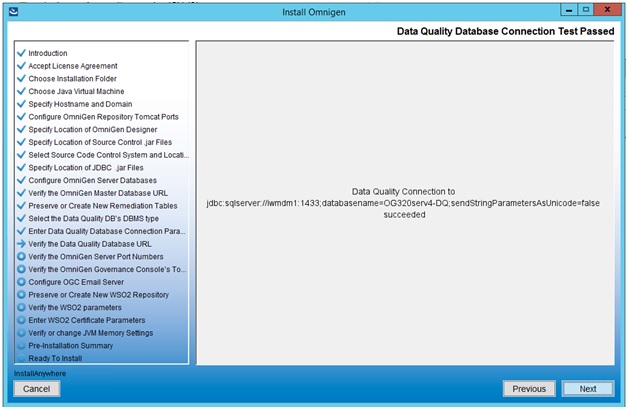
If the test is not successful, click Previous twice, correct the connection parameters, and retest the URL.
- Click Next to continue.
The Verify the OmniGen Server Port Numbers pane opens, as shown in the following image.
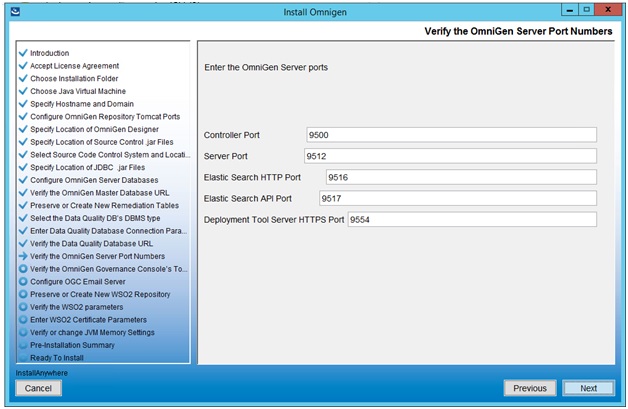
- Accept the default values, but change them if the infrastructure manager informs you of a conflict and recommends change(s) to an alternate available port(s).
- Click Next.
The Verify the OmniGen Governance Console's Tomcat Parameters pane opens, as shown in the following image.
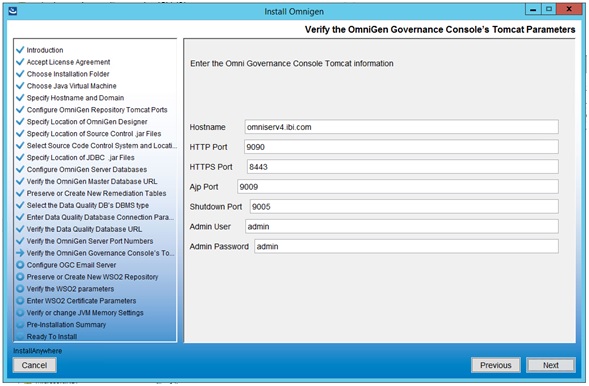
The Hostname parameter defaults to the machine on which you are currently installing Omni-Gen.
- Accept the default values and click Next.
The Configure OGC Email Server pane opens, as shown in the following image.
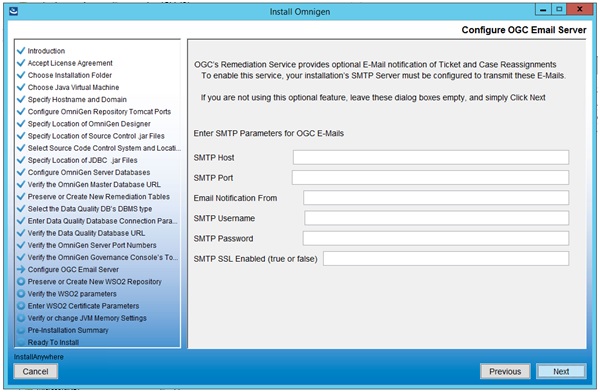
- Unless you are adding the e-mail option, leave the parameter values blank, click Next, and proceed to the Preserve or Create New WSO2 Repository pane in the installer (skip to Step 33).
- To enable the e-mail option, provide values for the following parameters as they apply to your SMTP, e-mail server:
- SMTP Host. Host name of your SMTP server (for example, smtp.ibi.com).
- SMTP Port. SMTP port on that server (usually port 25).
- Email Notification From. E-mail address from which the Assignment e-mails will originate (for example, OmniGen_Remediation@ibi.com).
- SMTP Username. User name for accessing the e-mail server.
- SMTP Password. Password associated with the user name for accessing the e-mail server.
- SMTP SSL Enabled (true or false). Specify, true if your e-mail server supports or requires SSL authentication.
In addition, each user who will receive e-mail notifications must have a valid e-mail address in their WSO2 user profile.
- Each LDAP user with the Data Steward or Data Supervisor role, and who will receive Assignment e-mails, must have a valid e-mail address in their Active Directory profile. When it makes the LDAP connection, WSO2 will bring back those email addresses to its Local User Store profile of the user.
- Each hardcoded user in the WSO2 Primary domain must have an email in their WSO2 user profile.
Following the Configure OGC Email Server pane, the Preserve or Create New WSO2 Repository pane opens, as shown in the following image.
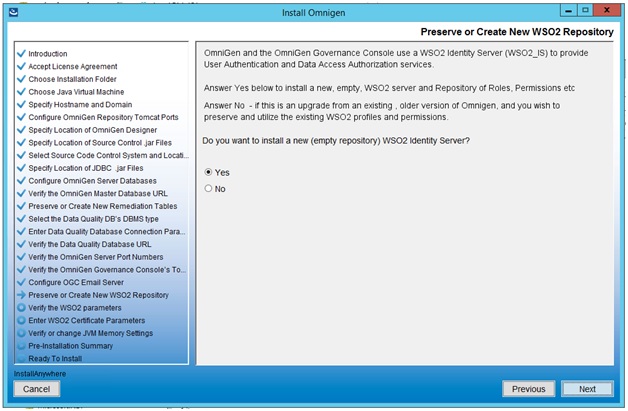
- For new Omni-Gen installations, ensure that Yes is selected, and then click Next.
The Verify the WSO2 parameters pane opens, as shown in the following image.
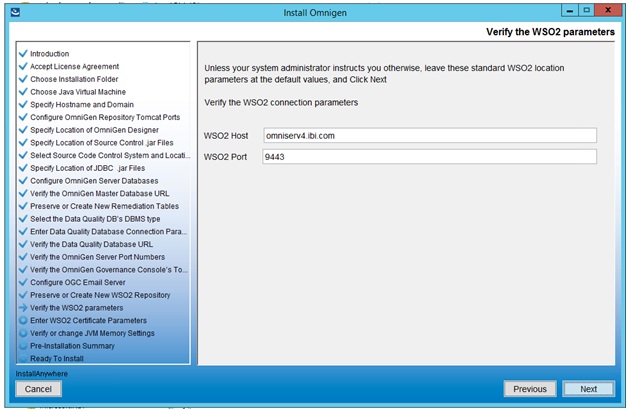
- Confirm the WSO2 parameters and then click Next.
The Enter WSO2 Certificate Parameters pane opens, as shown in the following image.
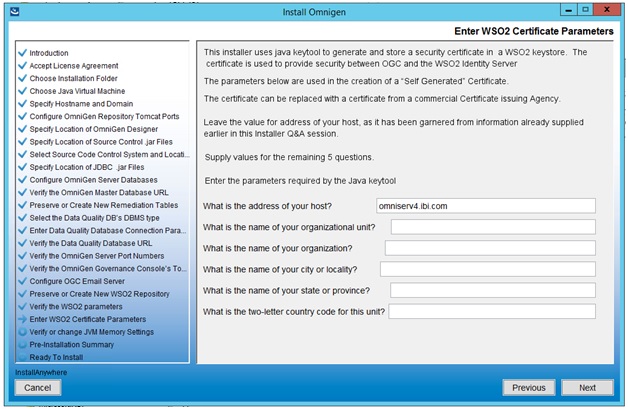
- Collect the parameters to generate the certificate for WSO2.
The parameters are used to build a unique certificate to secure the Omni Governance Console to the WSO2 communication.
- Ensure that the address of your host is correct (not localhost), and then enter the other parameters. For example:
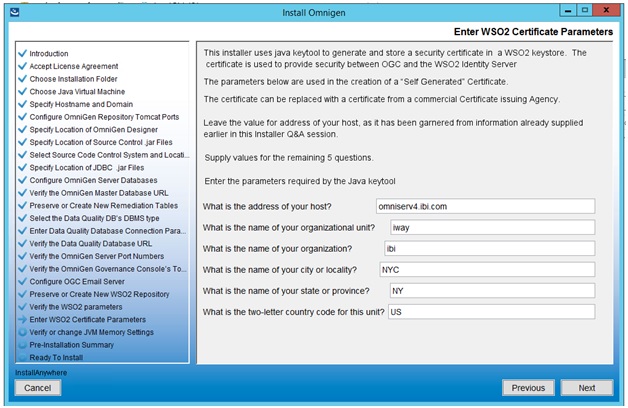
- Click Next.
The Verify or change JVM Memory Settings pane opens, as shown in the following image.

- Change the values only if you are instructed by Information Builders or iWay Support analysts, otherwise, click Next.
The Pre-Installation Summary pane opens, as shown in the following image.
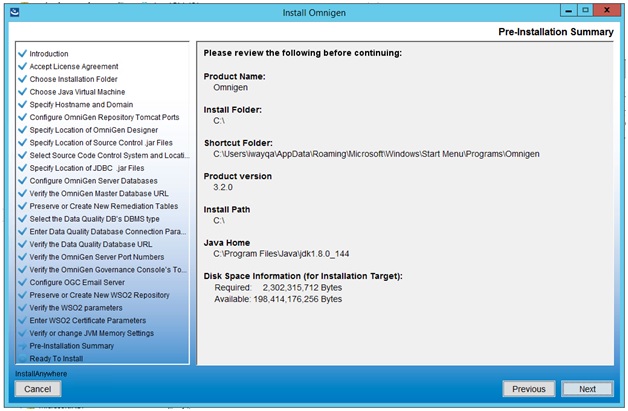
- Review all of the settings in the Pre-Installation Summary pane and then click Next.
The Ready To Install pane opens, indicating that the configuration for installation is complete, as shown in the following image.
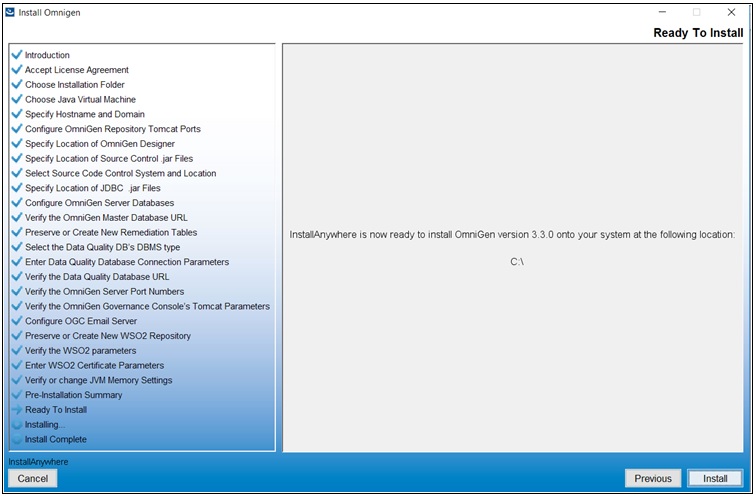
- Click Install to proceed with installation.
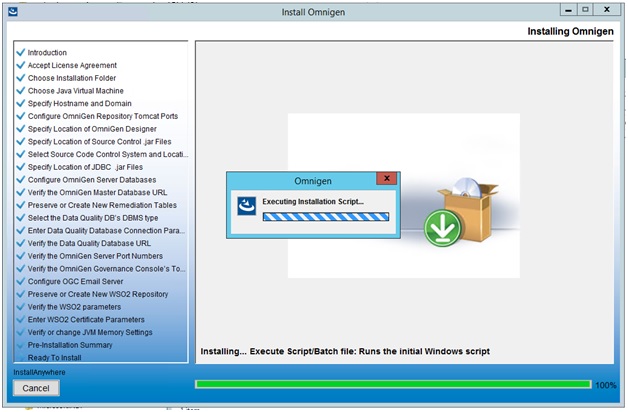
Progress of the installation is shown on the Installing OmniGen pane, as shown in the following image.
The Omni-Gen installation is complete when the Install Complete pane is displayed, as shown in the following image.
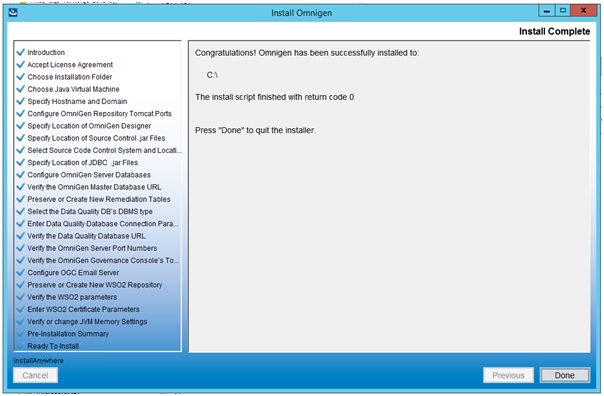
You are now ready to configure Omni-Gen™ for Customer. For more information, see Configuring Omni-Gen™ for Customer.