Verifying Omni Services and Deploying a Bundle
Before you begin using Omni-Gen Consumption View, you must ensure that several Omni services are started and then deploy a bundle.
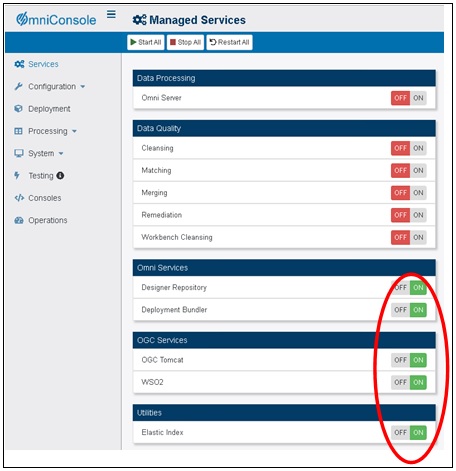
- In the Omni Console, click the Services tab in the left pane and verify that the following Omni Services, OGC Services, and Utilities are started (On).
- Omni Services:
- Designer Repository
- Deployment Bundler
- OGC Services:
- OGC Tomcat
- WSO2
- Utilities:
- Elastic Index
Note, if you need to start these services, this process may take a few minutes to complete.
When you have verified that these services are started, you can proceed with deploying a bundle.
- Omni Services:
- Click Deployment in the left pane and then Install Bundle, as shown in the following image.

- Select the desired bundle you want to deploy.
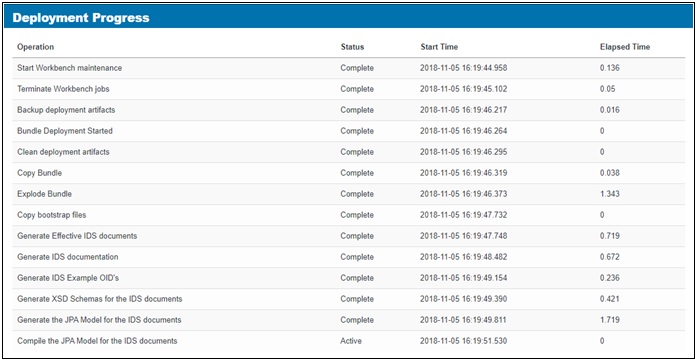
The Deployment Progress status pane opens, as shown in the following image.
Note, this process may take a few minutes to complete (depending on the bundle size).
When your bundle has been deployed, the successfully installed message is displayed, as shown in the following image.

- Click the X on the right-hand side to close this message, as shown in the following image.

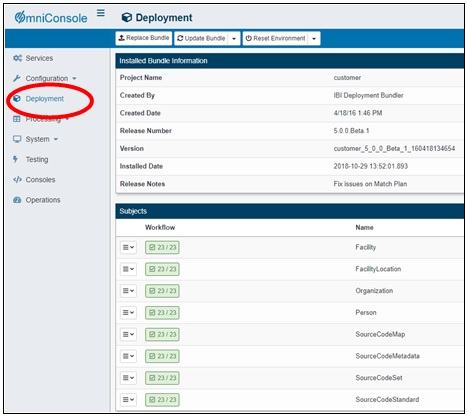
Information regarding your installed bundle is displayed, as shown in the following image.
-
Click the Services tab in the left pane and start the following Data Processing and Data Quality services.
- Data Processing:
- Omni Server
- Data Quality:
- Cleansing
- Matching
- Merging
- Remediation
- Workbench Cleansing

- Data Processing:
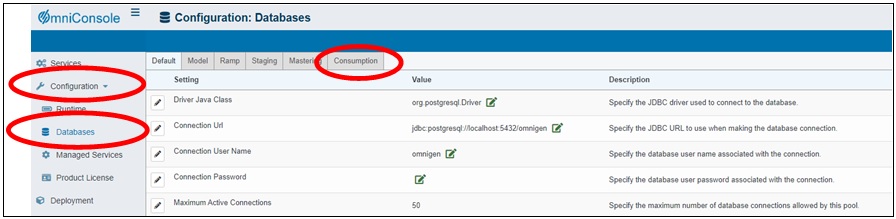
- To view the Consumption View database settings, values, and descriptions, click the Configuration tab in the left pane, select Databases, and then click the Consumption tab, as shown in the following image.