Downloads
|
How to: |
The Downloads section, available as of Version 3.14, enables you to download the Omni Designer, as well the necessary security certificates and profiles to connect to the remote Omni Designer Repository server. This enables Omni Designer in Cloud installations and access to remote Omni Designer repositories.
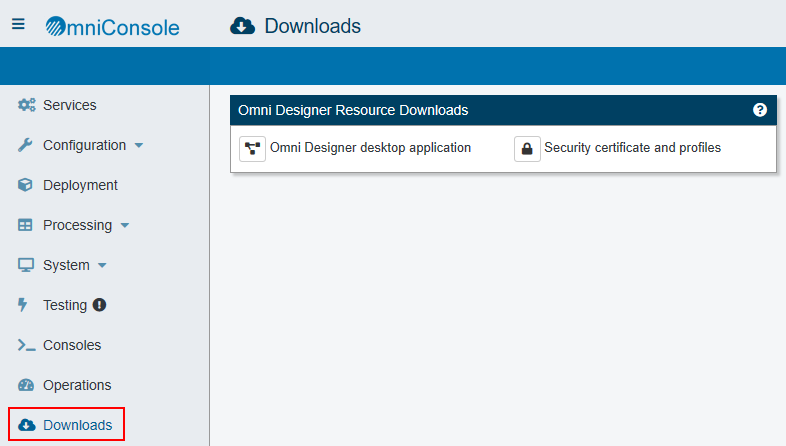
In the left pane of the Omni Console, click Downloads, as shown in the following image.
The Downloads page provides support for those users working with a remote instance of Omni-Gen who need the Omni Designer functionality in their local environment. It provides two different options, depending on the use case.
Configuration. The download configuration option is for users who already have Omni Designer installed on their local machine, but need to update their configuration. It contains all of the settings, profiles, and necessary security certificates for accessing a remote Omni Designer Repository.
Executable. The download executable option is for users who do not have Omni Designer installed. It contains all of the configurations mentioned for Configuration, in addition to the actual Omni Designer application. You specify the appropriate operating system (Windows or Linux/UNIX) after clicking the Downloads button.
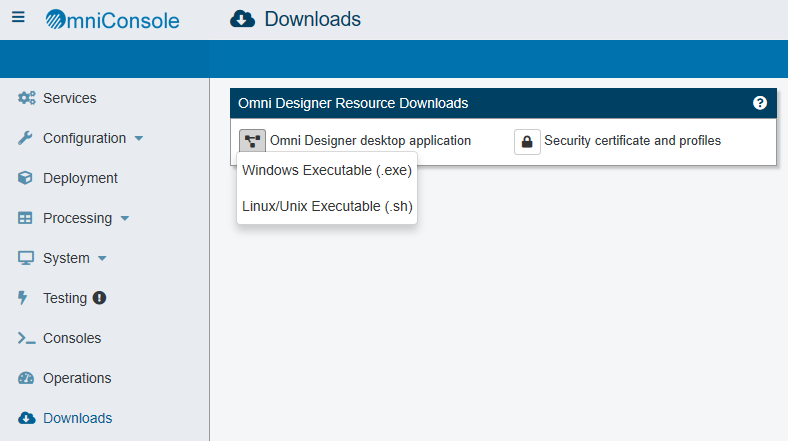
To download the zip file that contains the Omni Designer installation and configuration files, click the Omni Designer desktop application icon and select the platform, as shown in the following image.
The necessary security certificate and profiles to access a remote Omni Designer repository will be downloaded. A status bar displays until the download is fully buffered and ready to be saved. The download is approximately 160MB.
Procedure: How to Update an Existing Installation of Omni Designer
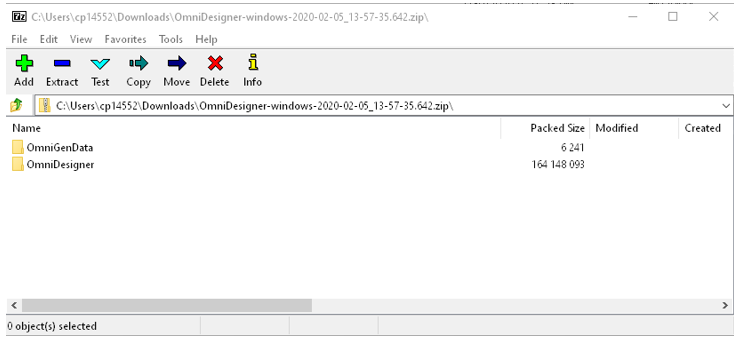
- Unzip the zip file that contains the Omni Designer installation and configuration files (for example, OmniDesignerConfiguration-datetime.zip) to a specific location. You will point to this location using a setting in a configuration file. After unzipping the
file, you will see the directory structure, as shown in the following image.
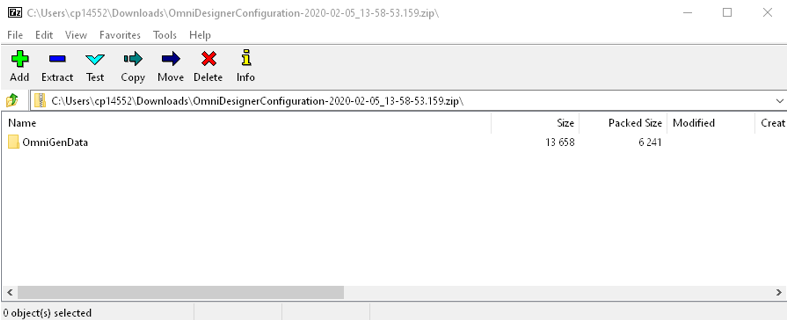
Note: You only need to keep the OmniGenData/emfstore subdirectory.
- Navigate to the omnigen/OmniDesigner directory, as shown in the following image, and edit the OmniDesigner.ini file.
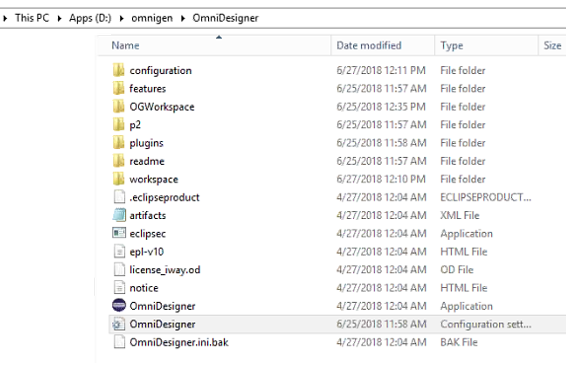
Note: In earlier versions, for example, 3.1.x, the OmniDesigner.ini file was called eclipse.ini, as shown in the following image.

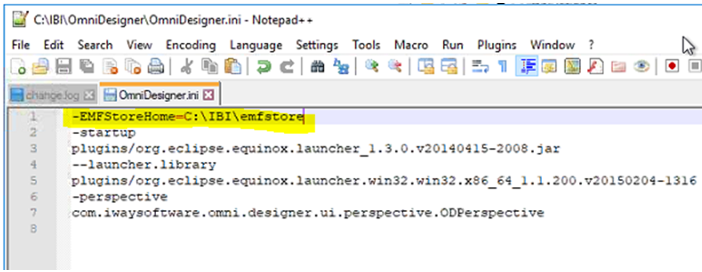
- Ensure that the OmniDesigner.ini file points to the local directory where you copied the OmniGenData/emfstore (for example,
C:\IBI\emfstore), as shown in the following image.
- If Designer is already running, restart it.
Procedure: How to Set Up a New Installation of Omni Designer
- Unzip the OmniDesigner-windows-datetime.zip file to a specific location. After unzipping the file, you will see the directory structure, as shown in the following
image.
- Copy the Omni Designer directory (this is the application) to any location on your machine.
- Copy the the OmniGenData/emfstore directory to any location on your machine.
You will point to this location using a new setting in a configuration file.
- Navigate to the omnigen/OmniDesigner directory and edit the OmniDesigner.ini file.
- Ensure that the OmniDesigner.ini file points to the local directory where you copied the OmniGenData/emfstore (for example, C:\IBI\emfstore).
- If Designer is already running, restart it.