Installing Omni-Gen Integration Edition
|
How to: |
This section describes how to install Omni-Gen Integration Edition. This procedure assumes that a database server (for example, PostgreSQL) and a repository server (for example, SVN) are already installed.
Procedure: How to Install Omni-Gen Integration Edition on Windows
- Verify that the JAVA HOME environment variable (for Java Development Kit version 8) is defined properly and that %JAVA HOME%\bin is the first element in your PATH.
- Download the installer, omnigen-installer-3.14.*-Windows-IE.exe from the Information Builders Technical Support Center.
- In the File Explorer, navigate to the downloaded omnigen-installer-3.14.*-Windows-IE.exe file, right-click this file, and select Run as administrator.
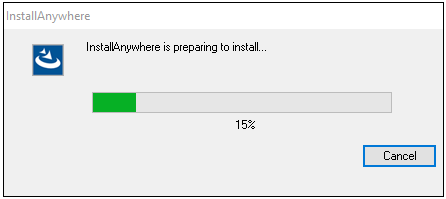
The InstallAnywhere startup window appears, as shown in the following image.
When the installation is ready to begin, the Introduction pane opens, as shown in the following image.
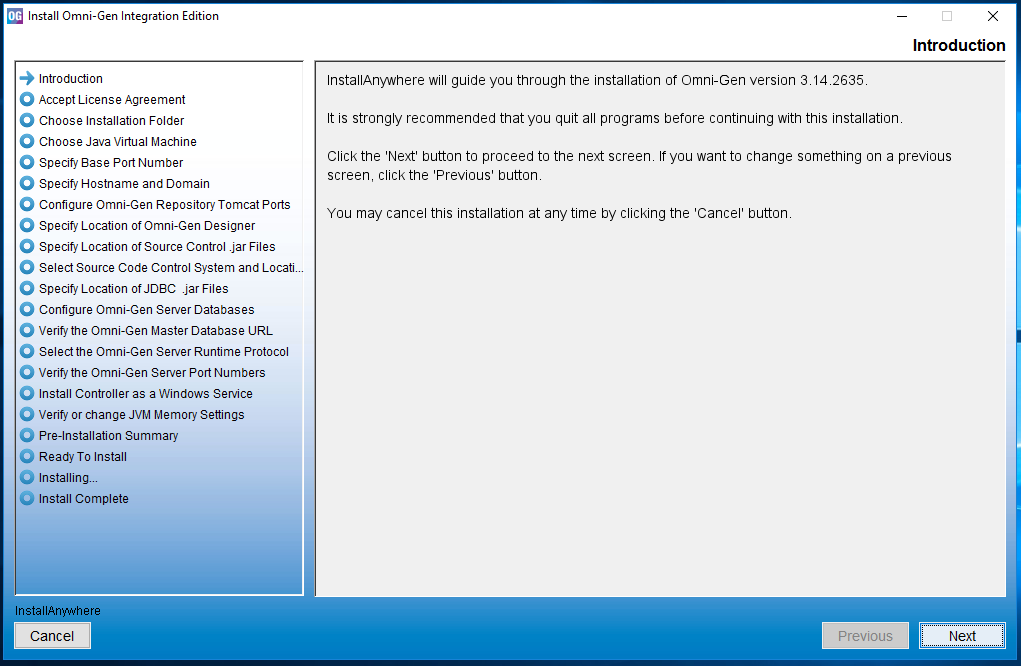
- Click Next.
The Accept License Agreement pane opens, as shown in the following image.
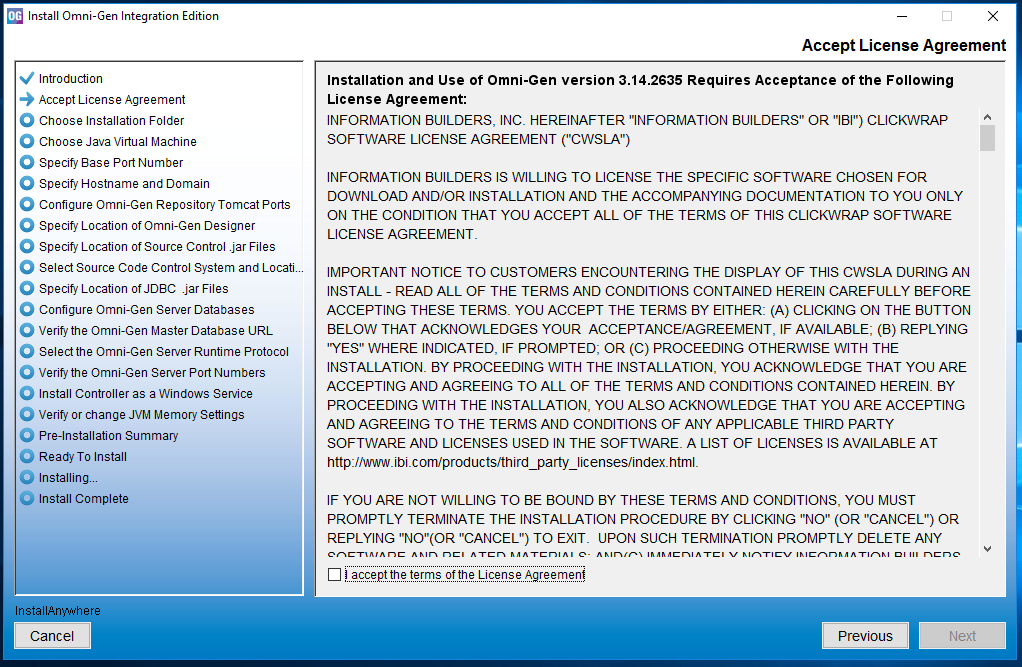
- Read the License Agreement, select the I accept the terms of the License Agreement check box, and then click Next.
The Choose Installation Folder pane opens, as shown in the following image.
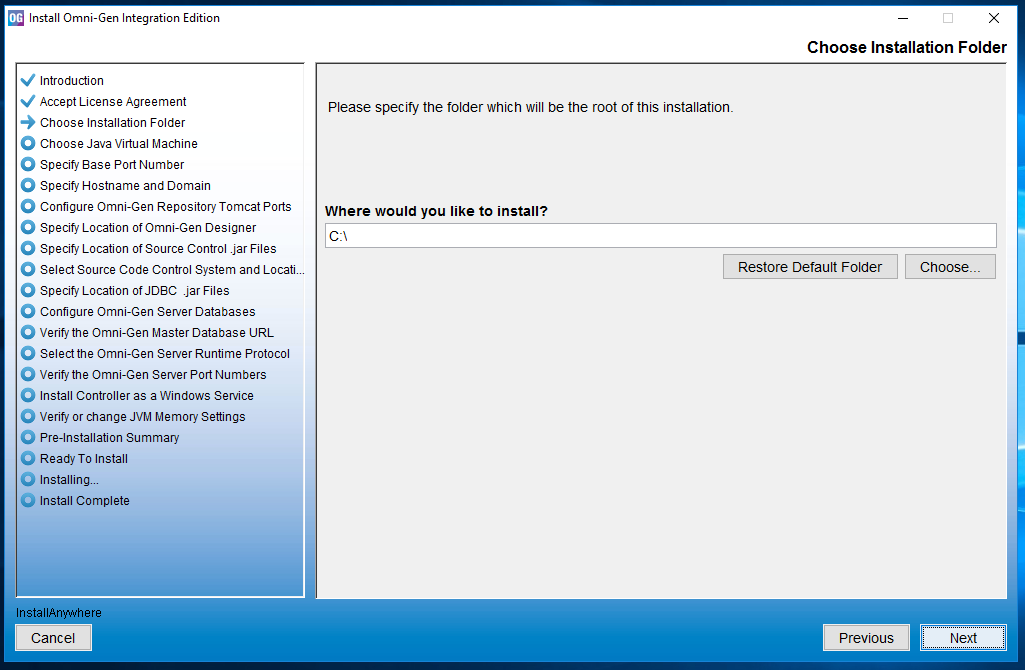
- In the Where would you like to install field, specify a location (path) on your system where you want to install all of the required files for Omni-Gen Integration
Edition.
The installer will create a directory named OmniGen in the location you specified. For example, if you accept the default location as C:\, then the installer will install Omni-Gen to:
C:\OmniGen
- Click Next.
The Choose Java Virtual Machine pane opens, as shown in the following image.
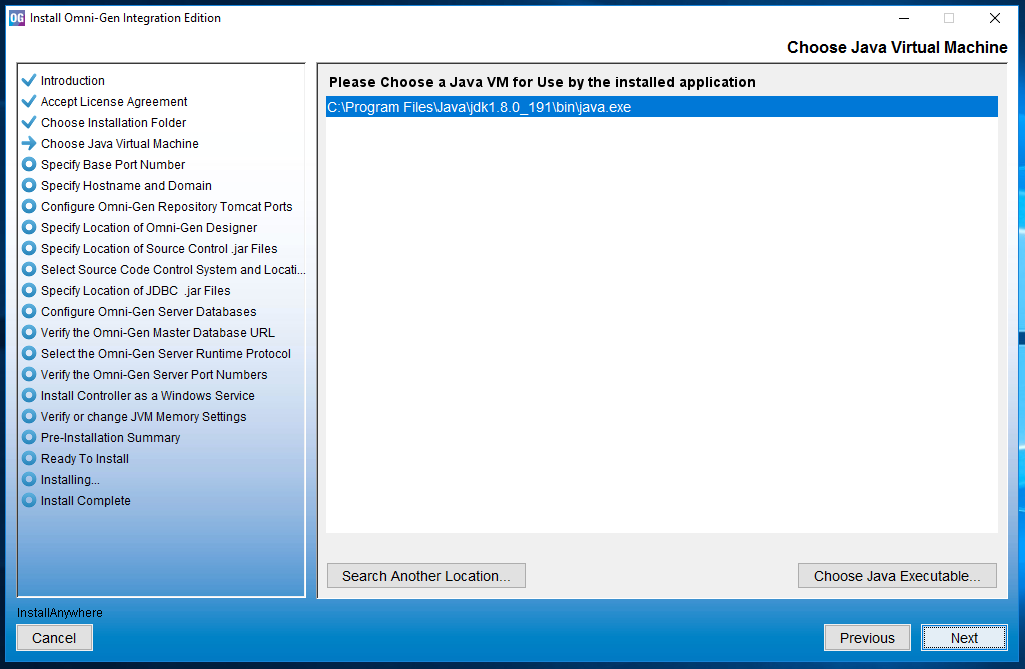
- Ensure that the Java version located is version 1.8 or higher, and then click Next.
The Specify Base Port Number pane opens, as shown in the following image.
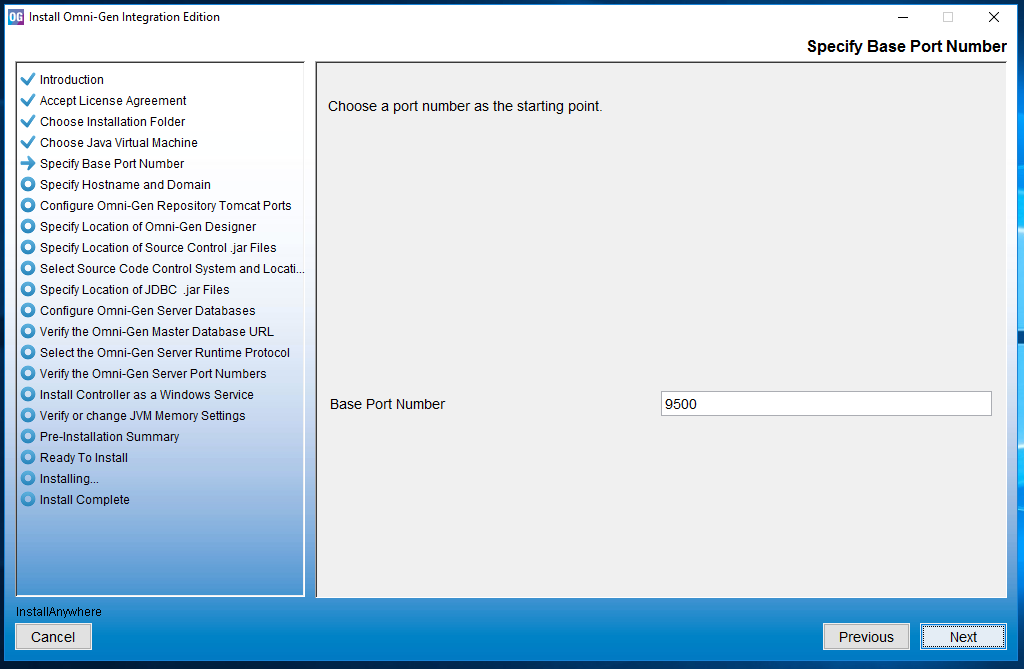
- Specifying a base port number automatically assigns a set of port numbers for use by Omni-Gen Integration Edition components,
and is used when installing more than one instance of Omni-Gen Integration Edition on a single machine. If you are installing
a second instance of Omni-Gen Integration Edition, or need to configure different ports to avoid conflicts with systems already
deployed on your Omni-Gen Integration Edition host, then see your system administrator. Otherwise, click Next to continue.
The Specify Hostname and Domain pane opens, as shown in the following image.
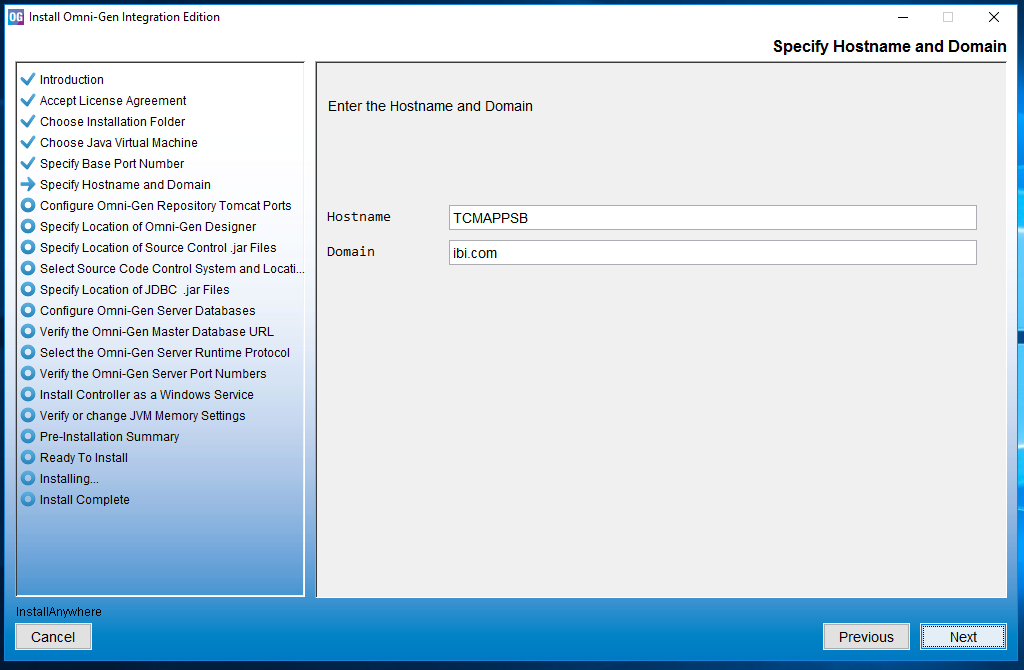
The default host name is the machine on which you are currently installing.
- In the Domain field, type the host domain, and then click Next.
The Configure Omni-Gen Repository Tomcat Ports pane opens, as shown in the following image.
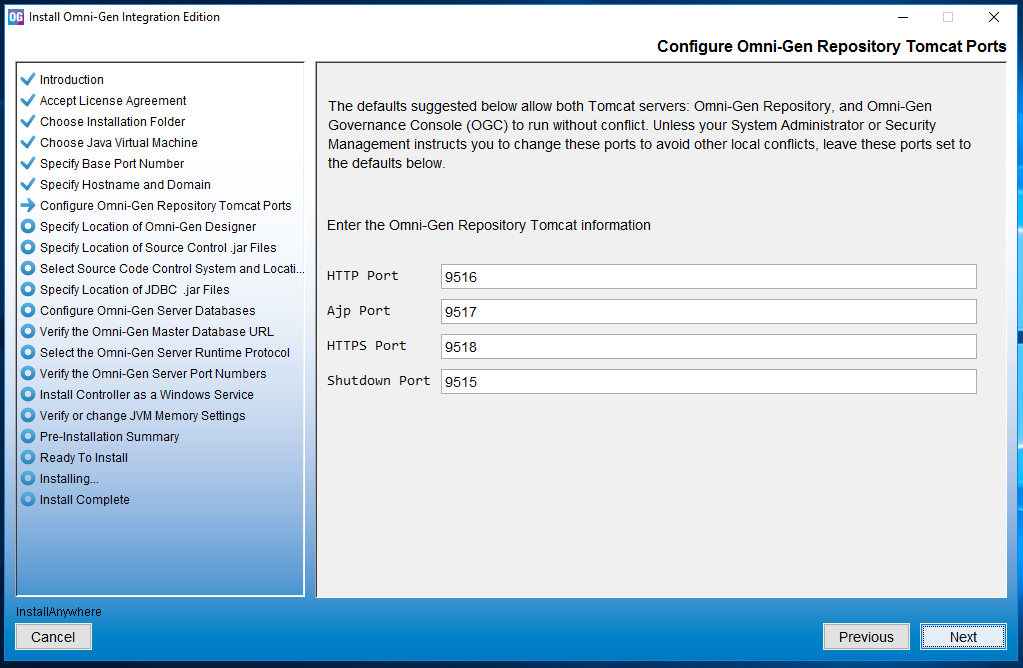
- Verify the ports that are indicated by default and modify accordingly, if required.
- Click Next.
The Specify Location of Omni-Gen Designer pane opens, which prompts for the parameters that define the location of Omni Designer, as shown in the following image.

- Accept the default parameters, and then click Next.
The Specify Location of Source Control .jar Files pane opens, which prompts you to select a folder containing the Source Code Control System (SCCS) .jar files, as shown in the following image.
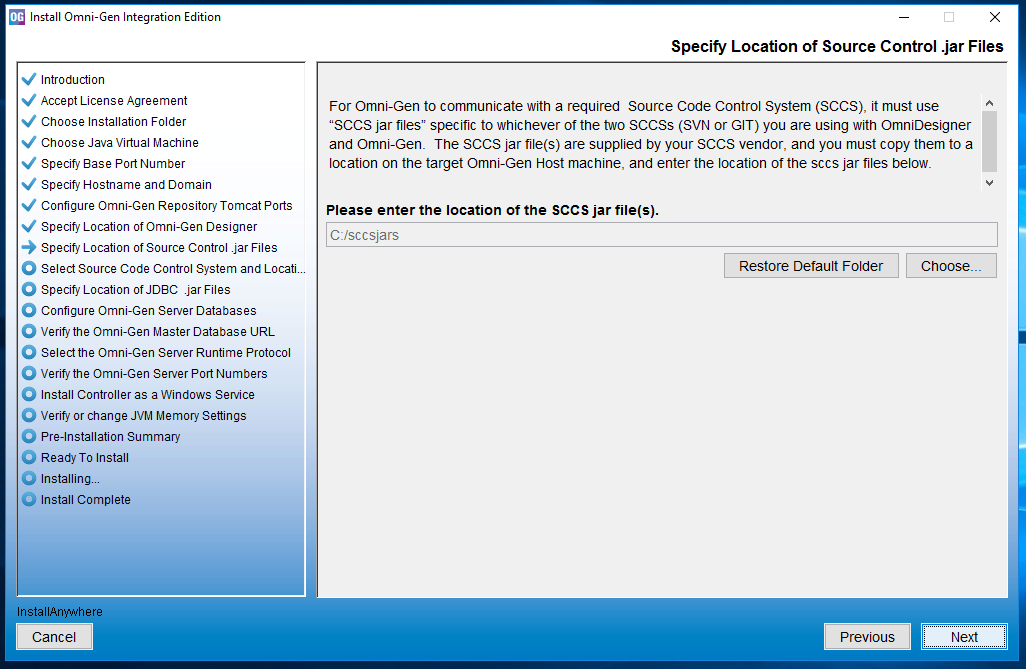
- Change the location of the SCCS .jar files, if necessary, and then click Next.
If you have not created a folder for the SCCS .jar files, then the following message displays:
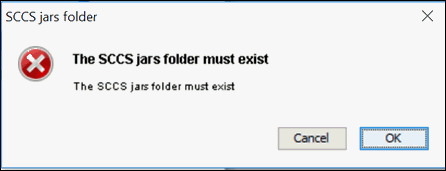
If you receive this message, click Cancel and then create a new folder. Place the SCCS .jar files in that folder and click Choose in the Specify Location of Source Control .jar Files pane to navigate and select that new folder.
The Select Source Code Control System and Location pane opens, as shown in the following image.
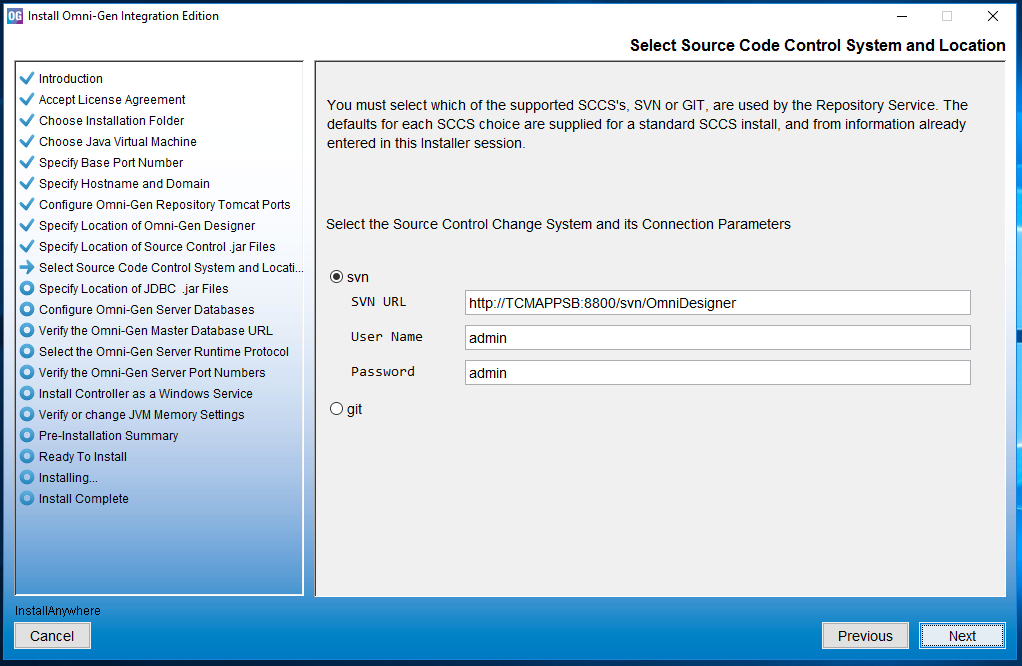
- Define the location and credentials for your source control repository by selecting either svn or git.
- Click Next.
The Specify Location of JDBC .jar Files pane opens, as shown in the following image.
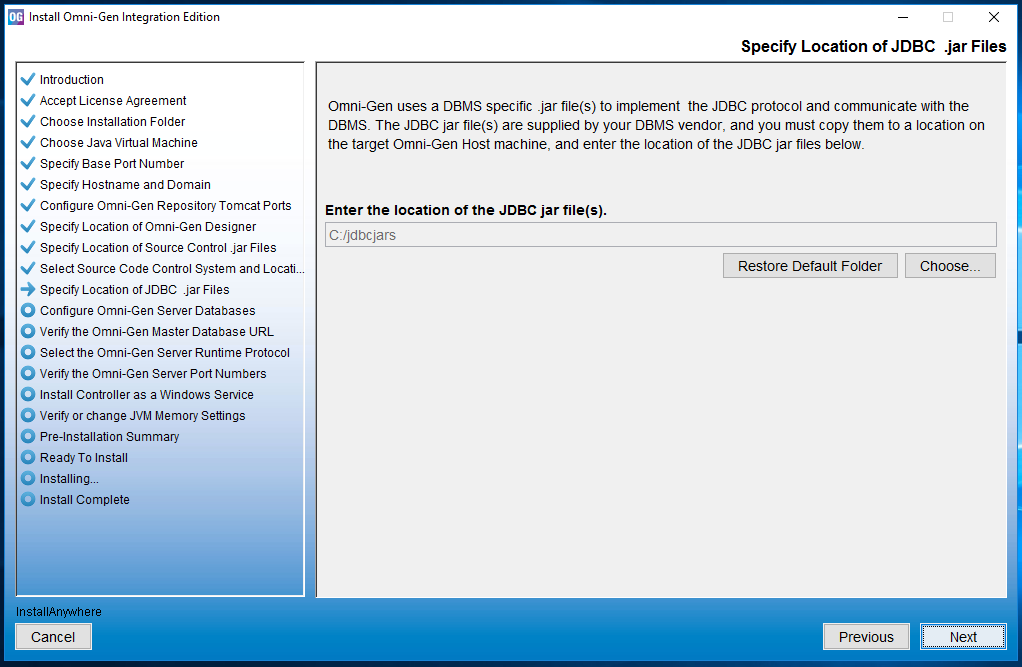
- Specify the location of your JDBC .jar files, and then click Next.
The Select the DBMS type of the OGS Database pane opens, as shown in the following image.

- Specify the database that you want to use for the Omni-Gen Server (OGS).
- Click Next.
The Enter OGS Database Parameters: Oracle, Postgres, Teradata pane opens, as shown in the following image.
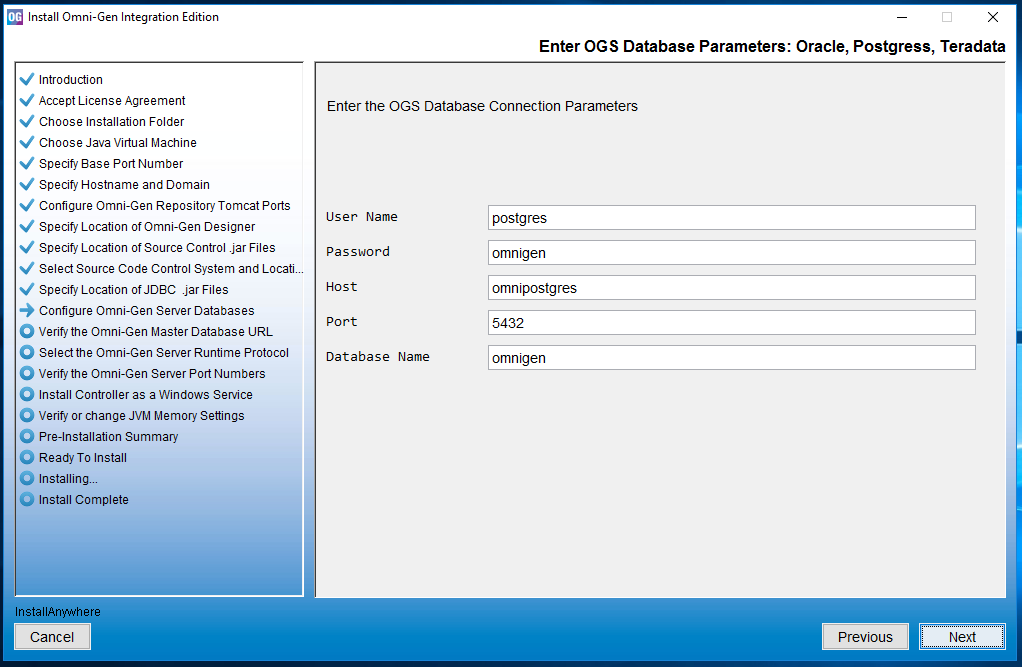
- Specify the OGS parameters for the OGS database, and then click Next.
The Verify the Omni-Gen Master Database URL pane opens, as shown in the following image.
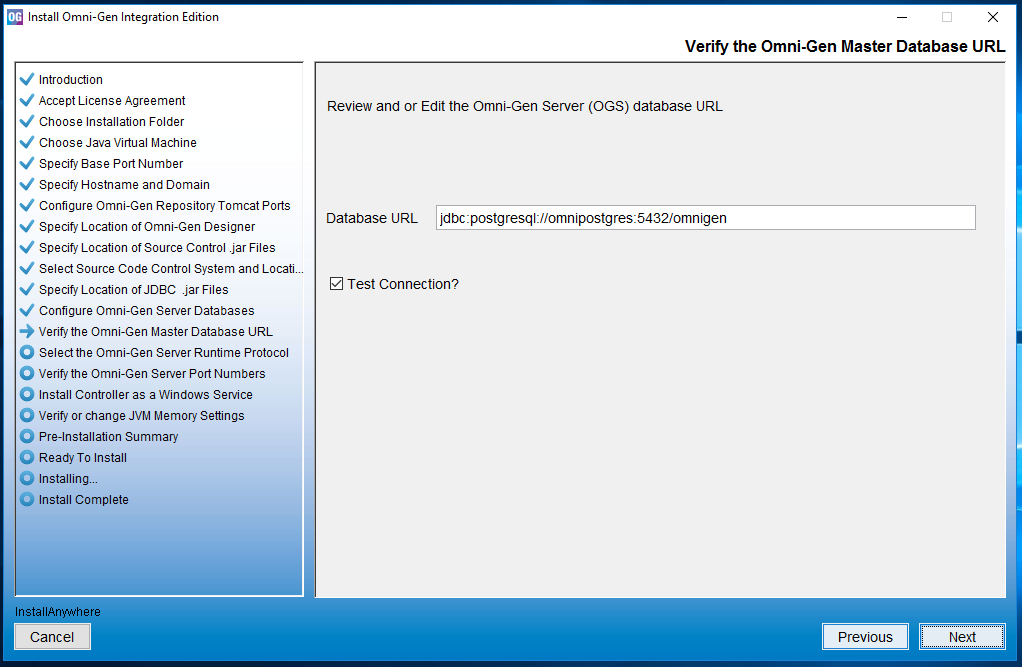
- Verify the database URL, ensure the Test Connection check box is selected, and then click Next.
If you receive a message indicating that your connection test failed, verify that your database name exists in SQL (or the DBMS you are using).
When your database exists and the user name, password, and host are correct, the following message appears, indicating that your connection test passed for the specified database.
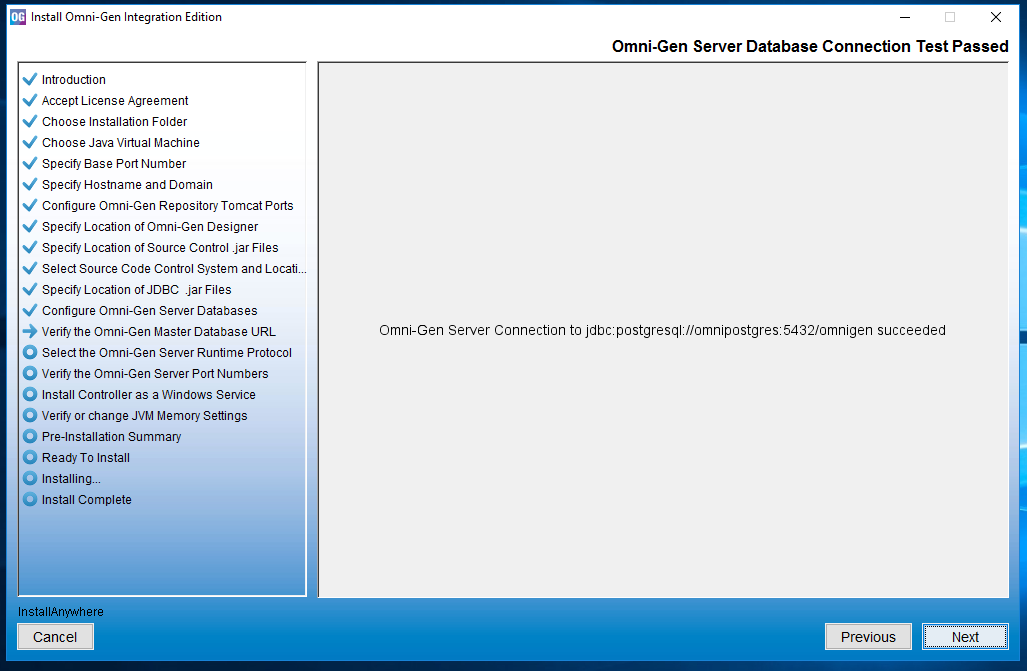
- Click Next to continue.
The Select the Omni-Gen Server Runtime Protocol pane opens, as shown in the following image.
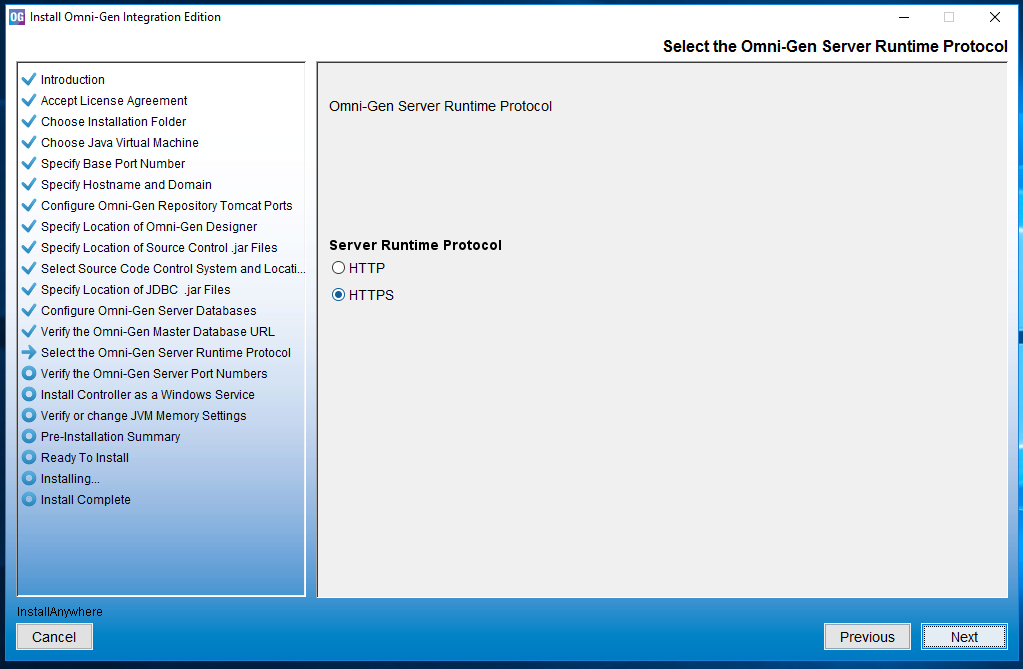
- Select the HTTP or HTTPS protocol, and then click Next. The default value is HTTPS.
The Verify the Omni-Gen Server Port Numbers pane opens for your selected runtime protocol, as shown in the following image.
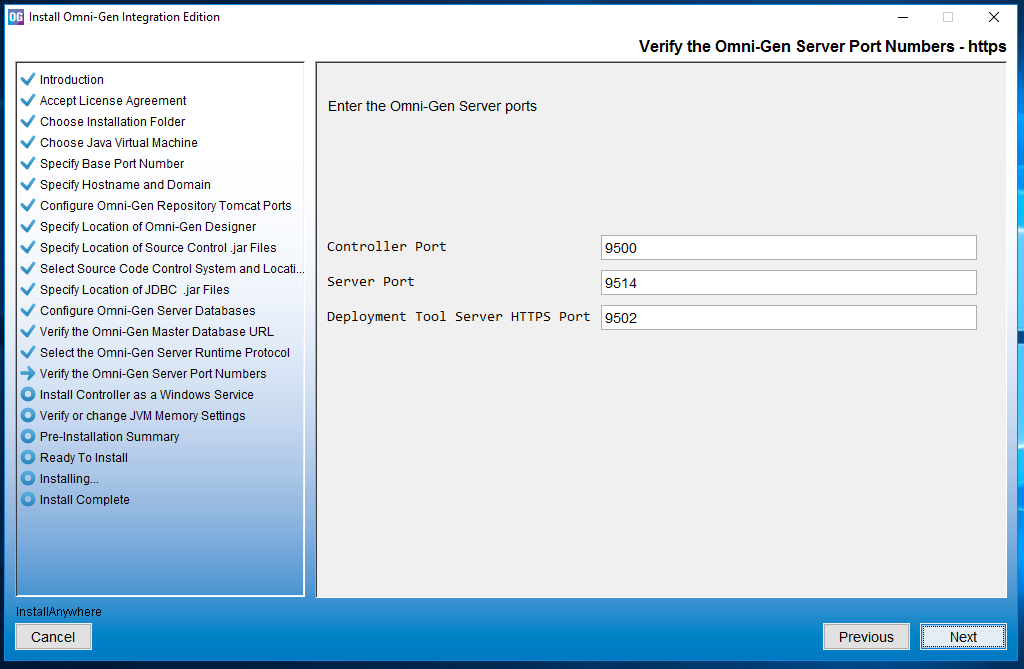
- Accept the default values, but change them if the infrastructure manager informs you of a conflict and recommends changes to alternate available ports.
- Click Next.
The Install the Controller as a Windows Service pane opens, as shown in the following image.
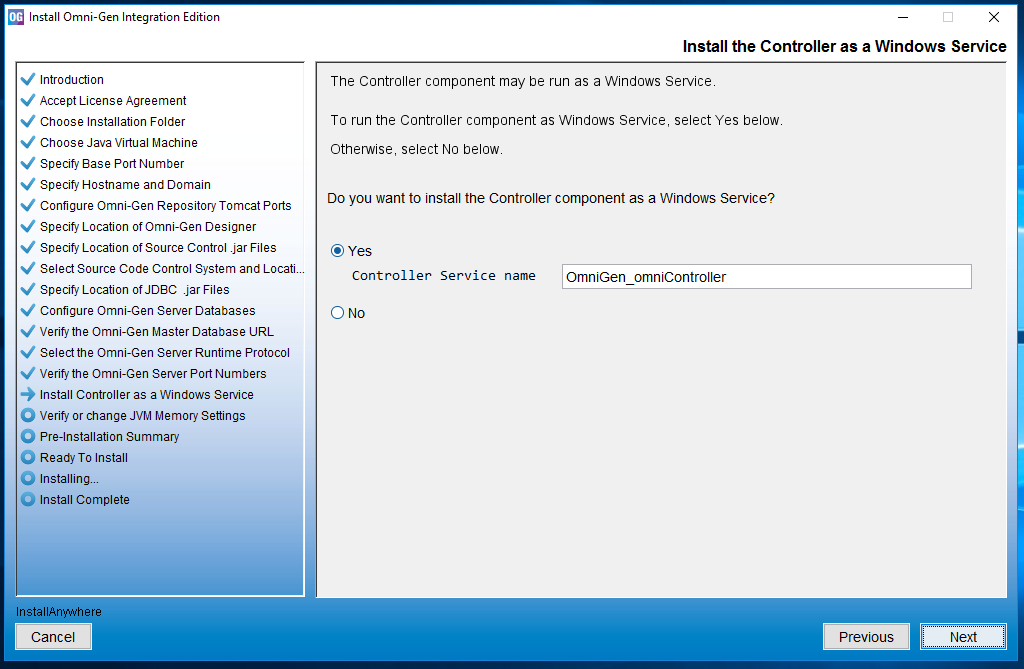
- Select whether you want to install the Omni-Gen Controller as a Windows service. The default value is No.
Note: It is strongly encouraged that you select Yes for ease of administration. If you select Yes, you will be prompted for the service name. You may type the service name in the Controller Service name field, or accept the default value, OmniGen_omniController.
- Click Next.
The Verify or change JVM Memory Settings - IE pane opens, as shown in the following image.

- Change the values only if you are instructed by Information Builders or iWay Support analysts, otherwise, click Next.
The Pre-Installation Summary pane opens, as shown in the following image.
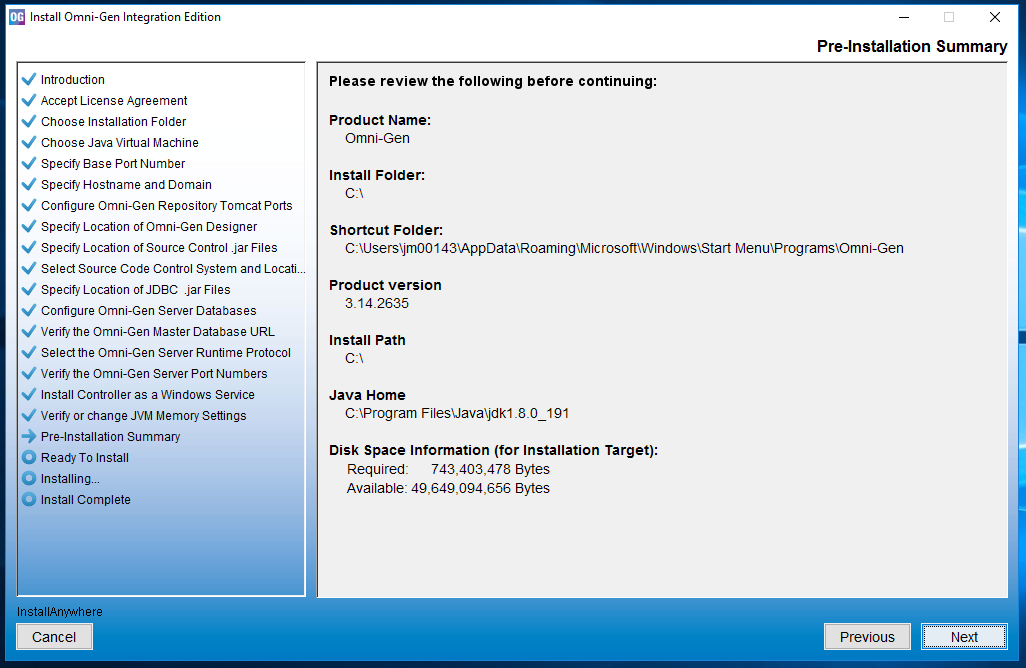
- Review all of the settings in the Pre-Installation Summary pane, and then click Next.
The Ready To Install pane opens, indicating that the configuration for installation is complete, as shown in the following image.
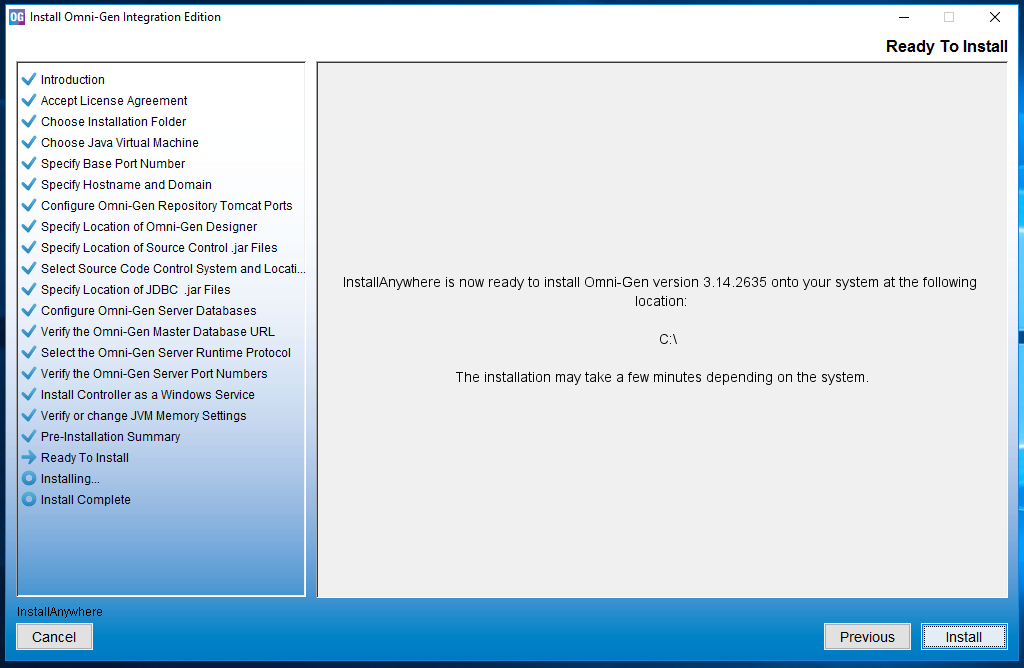
- Click Install to proceed with installation.
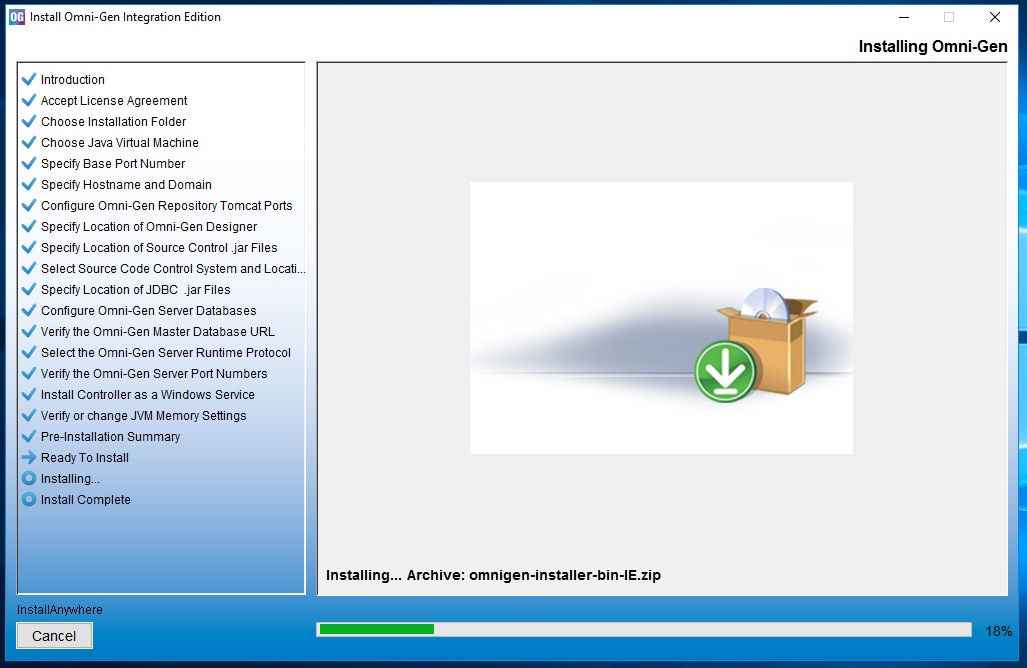
Progress of the installation is shown on the Installing Omni-Gen pane, as shown in the following image.
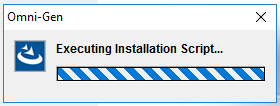
The Executing Installation Script popup displays towards the end of the installation process, as shown in the following image.
The Omni-Gen installation is complete when the Install Complete pane displays, as shown in the following image.

- Click Done to exit the Omni-Gen installer.
- Running the Command Prompt as administrator, start the Omni-Gen Controller by typing the following command:
cd \omnigen\omniserver
- Press Enter, then type the following command:
omni start-controller
- Press Enter again.
Note: When the installation completes, a BUILD Successful message appears, but the startup processing continues for a few minutes. You must wait for the processing to complete before proceeding to the next step.
- Using your browser (Google Chrome is recommended), open the Omni Console by typing the following address:
https://yourhost.yourdomain.com:9500
For example:
https://tcmappsa.ibi.com:9500
Note: You cannot use localhost in the URL.
- Log on using the following credentials:
- Username: ibi
- Password: ibi
- Deploy a bundle by clicking Deployment on the left side of the navigation bar.
The Deployment Bundle Not found message displays, as shown in the following image.
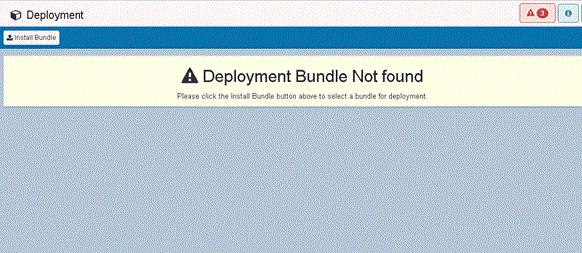
Note: The deployment bundle is created outside of the Omni Console. It is created using the Deployment Console based on a model created in Omni Designer. The following steps assume that a deployment bundle is already created and available in your environment.
- Click Install Bundle.
The Open dialog box displays.
- Navigate to the location of your deployment bundle file.
The deployment bundle was created using Omni Designer after rules and definitions were configured.
- Select your deployment bundle file and click Open.
A blank Deployment Progress window displays.
The window will start to show information and progress during the deployment process.
When the process is complete, a message displays in a banner indicating that the bundle was successfully installed.
- Close the banner by clicking X in the top right corner.
- Start the Omni-Gen Server and the related services by clicking Services in the left navigation bar of the Omni Console and then clicking Start All.
If the memory of your computer is insufficient, you can also start each individual service one at a time starting from the Utilities section and working upwards.
Procedure: How to Install Omni-Gen Using Silent Mode
As a prerequisite, the Omni-Gen installer must be run at least once prior to installing Omni-Gen using silent mode. The Omni-Gen installer creates the OmniGenInstall.properties file, which is used by the silent mode installer. The Omni-Gen installer can then be run again in silent mode and it will use the existing properties file as input.
The silent mode installer requires the installation folder as input to locate the properties file. The installation folder is the same folder as specified in the Choose Installation Folder pane of the Omni-Gen installer. However, the folder must already exist and contain the OmniGenInstall.properties file. The folder structure can exist from a previous installation, or it may be newly created. No other folders are required.
Use the following command to run in silent mode:
OmniGenInstaller*.exe -i silent -DUSER_INSTALL_DIR=<installation folder>
For example, if the OmniGenInstall.properties file is located in the c:\omnigen\install folder, then you would execute the following command:
OmniGenInstaller*.exe -i silent -DUSER_INSTALL_DIR=c:\
To install Omni-Gen using silent mode:
- Save the OmniGenInstall.properties file from a previous installation.
- Create a folder called omnigen on your c:\ drive. For example:
c:\omnigen
- Create a subfolder called install. For example:
c:\omnigen\install
- Copy the OmniGenInstall.properties file to the c:\omnigen\install folder.
- Open a command prompt window and execute the following command:
omnigen-installer-3.14.*-Windows-IE.exe -i silent -DUSER_INSTALL_DIR=c:\