Understanding the Context Menu
|
Topics: |
Context menus with specific content are displayed for different nodes in the Omni Designer Project Explorer, depending on whether the project has been shared, and the specific item or multiple items that have been selected.
Context Menu Options for a New Project
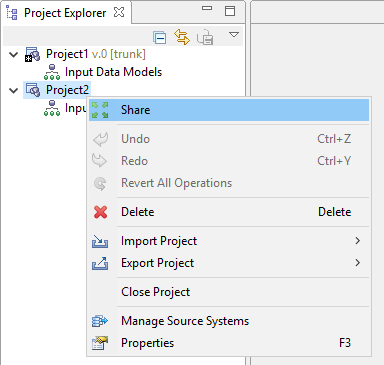
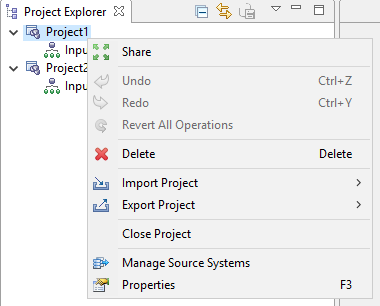
The context menu for the created (not shared and not checked out) Omni Designer Project has the following options:
- Share. A project can be shared with the localhost
server or another server so users can make a copy (check out project)
and work with that copy at their own computer.
After you select the Share option, you will be asked to select a server to host the share, as shown in the following image.
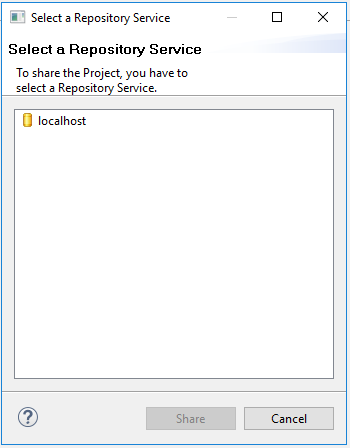
To share a project, select a server and click Share. If you are not logged in to this server, an additional message to log in appears. If you are logged in, a confirmation message appears.
The project is then shared with the selected server and appears in the Repository browser.
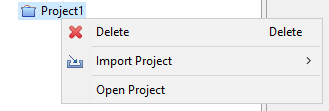
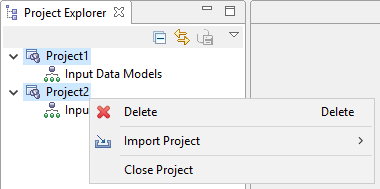
The following image shows the context menu for a closed Omni Designer project.
- Undo. The last change that was made in a project (after
the last commit or sharing) can be canceled using this option or
by pressing Ctrl+Z. A corresponding option from the Eclipse menu
can also be used for this.
Once the project is committed or shared, changes cannot be canceled. If changes were not made (for example, new Project), then the Undo option is disabled.
- Redo. The last change that was undone using the Undo option
in a project (after the last commit or sharing), can be returned
using this option or by pressing Ctrl+Y. A corresponding option
from the Eclipse menu also can be used for this.
If changes were not undone, the Redo option is disabled.
- Revert All Operations. All changes that were made in
a project (after the last commit or sharing) can be canceled using
this option. Once the project is committed or shared, changes cannot
be canceled. If changes were not made, then the Revert All Operations option
is disabled.
After selecting the Revert All Operations option, a confirmation message appears.
- Delete. This option removes a project and all of its content from the Omni Designer Project Explorer. After selecting the Delete option, a confirmation message appears.
- Import Project from XMI File. This option is used to import a project
from an XMI file to the Omni Designer Project Explorer.
From the Open dialog box, select the XMI file with the exported project and click Open. The Omni Designer Project window opens.
The name of the exported project is predefined in the Project name field. The At (@) character and version are added for shared or checked out projects. You can change and add any description you wish, then click Finish.
A confirmation message displays.
The project is imported to the Omni Designer Project Explorer. The whole project structure and data are recovered. Imported projects can be used as any created project.
- Import Project from XMI/UML Data Model. This option is used to import projects from the XMI/UML data model to Omni Designer.
From the Open dialog box, select the XMI file with the exported project and click Open. The Omni Designer Project window opens.
The name of the exported project is predefined in the Project name field. The At (@) character and version are added for shared or checked out projects. You can change and add any description you wish, then click Finish.
A confirmation message displays.
- Import Project from Release Bundle. This option is used to import projects from a Repository Service.
When you select this option, the Select a Repository Service dialog box open, where you will need to select a Repository Service.
Log in to the Repository Service, if not already connected.
After you click Import, navigate to and select the bundle and click Open.
- Export Project. This option is used to export a project
in an XMI file. The Save As dialog box opens.
The project name is predefined in the file name field. The At (@) character and version are added for shared or checked out projects. The XMI extension is set by default and cannot be changed.
To export a project, select a location to save the file, update the file name, and click Save.
A confirmation message appears.
The XMI file is saved in a selected location and can be imported to the Omni Designer Project Explorer by any user.
- Close Project. This option is used to close the project
(archive). If the project has some validation errors, they will
disappear from the Problems tab after closing the project. The errors
will reappear in the Problems tab after opening the project again.
Once the Omni Designer project is closed and all of its panels are hidden, they will be available again after reopening the Omni Designer project. The Properties tab for the closed project contains the information section with the non-editable Name and Description fields of the project. A closed project can be deleted or opened.
- Properties. This option will open Project Properties (Project Editor) on the General tab. Properties can also be opened by pressing the F3 key.
Context Menu Options for a Shared Project
The following list describes the additional context menu options that appear for shared projects.
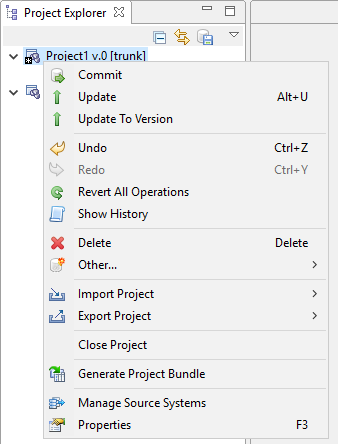
- Commit. This option is enabled and can be performed for saving changes you made with a project (for example, Create, Rename, and Delete subjects or Input Data Models). Once changes are made, a committed version of the project is updated and displayed near the Project name in the Omni Designer Project Explorer. After additional commits, the version is automatically increased. If no changes were made, then the Commit option is disabled.
- Update. This option is used for updating a project and
synchronizing it to the latest version. For example, if there are
several users working on the same project (one is a shared project
and the other is checked out), and a user made and committed changes
to the shared project, clicking Update will update the checked
out version.
To update the project, select a version and click OK.
- Update To Version. Similar to Update, this version
updates multiple shared project versions and prompts you to select
which version you would like your project updated to.
Select a version to update your project to and click OK.
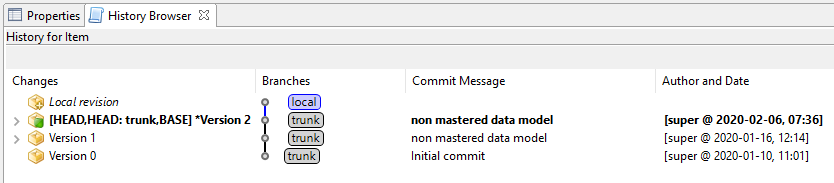
- Show History. This option opens the History browser tab
at the bottom of Eclipse and displays all changes regarding new
versions or branches, as shown in the following image.

- Other. Creates a new branch or merges the version of the project with the created branch.
- Create Branch. This option creates a new branch for the
current project and provides possibilities to make different changes
in a separate branch. If no changes were made, then the Create
Branch option is disabled.
After selecting this option, the Create Branch window appears, as shown in the following image.
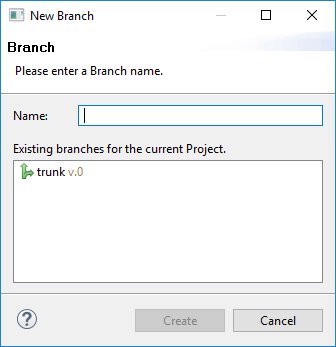
Type a new branch name in the Name field and click OK.
- Merge with Branch. This option merges (incorporates)
the version of your project with the created branch and combines
your project with changes made in the branch. If no changes were
made, then the Merge with Branch option is disabled.
After selecting Merge with Branch, the Branch Selection window appears, as shown in the following image.
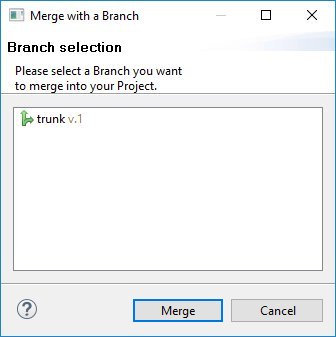
To merge with a branch, select a branch from the list and click OK.
- Create Branch. This option creates a new branch for the
current project and provides possibilities to make different changes
in a separate branch. If no changes were made, then the Create
Branch option is disabled.
- Generate Project Bundle. This option opens a dialog box to release a project. For more information, see Using the Repository Browser.
Other options from the context menu for shared projects (for example, Undo, Revert All Operations, and Delete) work in the same way as projects that are not shared.
Context Menu Options for the Input Data Models Node
The following image shows the context menu for the Input Data Models node.
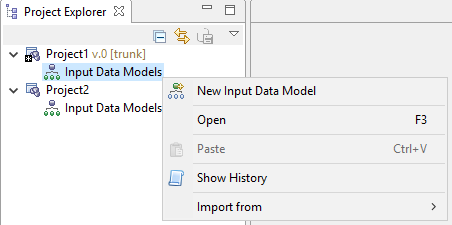
The following list describes the context menu options.
- New Input Data Model. This option is used for creating new Input Data Models for the current project.
- Open. This option is used to open the Input Data Models editor.
- Paste. This option is used for pasting previously copied
input data models into the input data models of the current project.
You can paste input data models copied from the same project, as
well as those copied from a different project.
The Paste option is disabled if there are no copied or cut input data models in the clipboard. The Ctrl+V key button or the corresponding option from the Eclipse menu can also be used for the Paste option, as well.
- Show History. The Show History option works in the same way that is listed in the context menu for the shared Omni Designer project. The option is available only if the project is shared.
- Import from CVS. This option enables you to create an Input Data Model by importing a CVS file. When you select this option, the Select Data
Source dialog box opens, as shown in the following image.
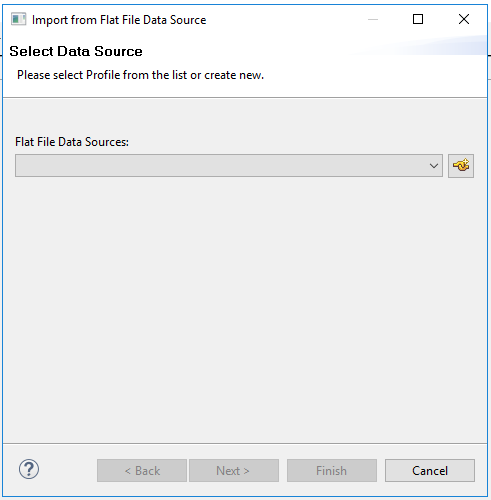
You can select a flat file from the list, or create one by clicking the Create new Flat File Data Source icon. The Create Connection Profile dialog box opens, as shown in the following image.

Type a name for the connection profile and click Next. The Define Folder or a File URI dialog box opens, as shown in the following image.
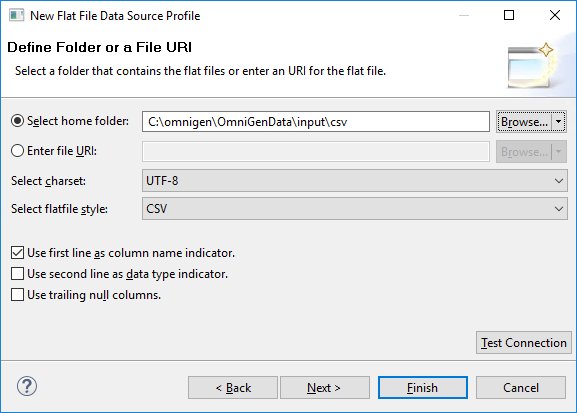
Select a home folder or type a file URI and click Finish to import the CVS as an Input Data Model.
Context Menu Options for Specific Input Data Models
The following list describes the Input Data Models context menu options.
- Open. The input data model and other subjects can be opened in the editor using either the Open option from the context menu, the F3 key on your keyboard, or by double-clicking the requested input data model or subject.
- Rename. The input data model can be renamed using
this option or by pressing the F2 key on your keyboard. If you rename
the input data model, then the root subject will be also be renamed
to the same name.
You can rename the item you wish and then press the Enter key. The name of input data model is changed.
- Cut. The cut option copies the input data model with
all subjects and simultaneously removes it without confirmation.
You can also press Ctrl+X on your keyboard or select the corresponding option from the Eclipse menu.
- Copy. The Copy option copies input data models with all
subjects.
You can also press Ctrl+C on your keyboard or select the corresponding option from the Eclipse menu.
- Delete. The Delete option removes the input data model
with all subjects without confirmation.
You can also press the Delete key on your keyboard or select the corresponding option from the Eclipse menu.
- Show History. The Show History option works the same
way as listed in the context menu for the shared Omni Designer project.
This option is available only if the project is shared.
Context Menu Options for a Subject
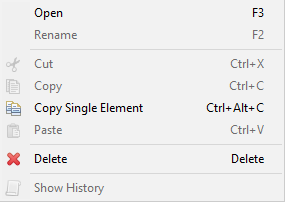
The following image shows the context menu options for a root subject.
The following image shows the context menu for a regular subject.
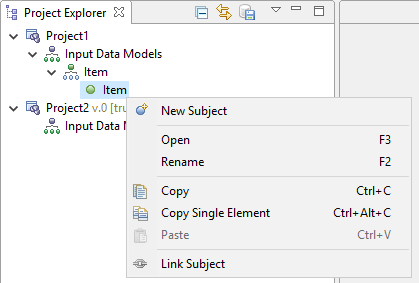
Notice that the context menu for the root subject does not contain the Cut and Delete options.
The following list describes the context menu of the subject.
- New Subject. The Subject option is used for creating a new child subject for the selected parent subject.
- Open. The subject can be opened in an editor using the Open option from context menu, the F3 key, or by double-clicking the required subject you wish.
- Rename. The subject can be renamed using this
option or by pressing F2. If you rename the root subject, then the
parent Input Data Model will also be renamed to the same name. After
selecting this option, the cursor will be set in the field of the
selected item.
After renaming an item, press Enter.
The name of the subject is changed.
- Cut. The Cut option copies and deletes the subject with
all child subjects (if any) and simultaneously moves them to the
Clipboard. This option is disabled for the root subject.
You can also press Ctrl+X or select the corresponding option from the Eclipse menu.
- Copy. The Copy option copies the subject with all child
subjects (if any).
You can also press Ctrl+C or select the corresponding option from the Eclipse menu.
- Copy Single Element. This option copies the subject without
any child subjects (if any).
You can also press Ctrl+Alt+C as an alternative.
- Paste. The Paste option is used for pasting previously
copied subjects (with or without child subjects) to the current
subject. You can paste subjects copied within the same Input Data
Model and project, as well as those copied outside of the current
Input Data Model and current Project.
Previously copied root subjects can be pasted as a regular subject.
The Paste option is disabled if there are no copied or cut subjects in the Clipboard. You can also press Ctrl+V or select the corresponding option from the Eclipse menu.
After pasting the subject to another Input Data Model, fields with Reference and Inherited data types are updated. The Reference values are changed to empty.
- Delete. The Delete option deletes the subject(s) from
the project. This option is not available for the root subject.
You can also press the Delete key or select the corresponding option from the Eclipse menu.
- Link Subject. This option is used to link other subjects with all their children subjects as a local subject (restricted copy). The option is available for any subject including a root subject.
- Show History. This option works the same way as mentioned in the context menu for shared Omni Designer projects.
Context Menu Options for Multiple Selected Nodes
A context menu appears for the same and different Omni Designer Project Explorer items selected together (using Shift or Ctrl keyboard keys). Standard options for selected items are available in the menu. Options that can be applied to all selected items simultaneously are enabled in the context menu (for example, Delete).
Options that cannot be applied to all, are disabled (for example, Rename, Show History, and so on).
Cutting, Copying, and Pasting for Multiple Selected Subjects
The Cut and Copy options are not available for two or more selected subjects. You can use the Copy Single Element option for several selected subjects to copy them or drag and drop the subjects to move them. Note that nodes move together with their children elements, but the Copy Single Element option copies elements without any child subjects.