Using the WSO2/MData-Synchronization Feature
|
Topics: |
This section describes the prerequisites and synchronization usage of the WSO2/MData feature.
Configuring Omni Server Mode
This section describes how configure the Omni Server Mode setting in the Omni Server.
The synchronization functionality is intended for use only in OGS DEVELOPMENT mode, where you must configure the Omni Server Mode setting to DEVELOPMENT, as shown in the following image.
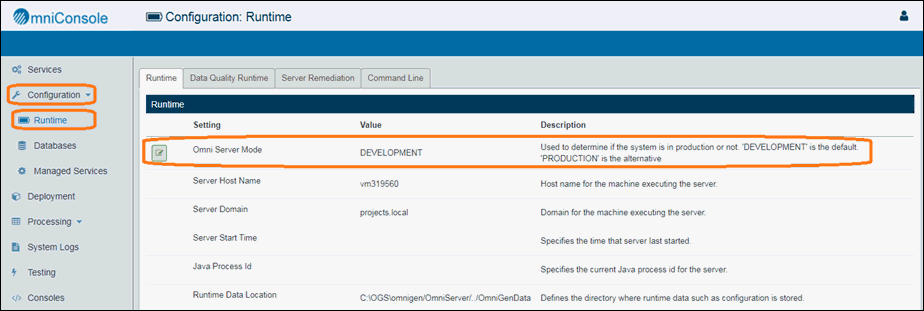
Note: If the OGS is unresponsive (for example, it is not started or in error), the Sync functionality is disabled.
Using the Synchronization
When a new model contains a new subject(s), or a change to the structure of a current subject, a synchronization between the updated data structure and the structure previously existing in OGC is required.
Initialization of the synchronization process is performed using OGC and consists of the following parts:
- Analysis for the sync (and optional customization)
- Actual synchronization using the results of the analysis
The following procedure shows a sample workflow of actions for a user to accomplish the synchronization.
Step 1: Initializing the Analysis for the Synchronization Process.
Using your browser, connect to the OGC Logon page, log on with the credentials containing the System_Administrator role, and then navigate to the Sources tab from Administration, and click the Sync link, as shown in the following image.

Step 2: Analyzing the Progress.
The analysis for the synchronization process begins, where the status bar displays the dynamic progress of the status, as shown in the following image.

Step 3: Summarizing the Analysis.
After the analysis is complete, a summary on the proposed synchronization appears, as shown in the following image.
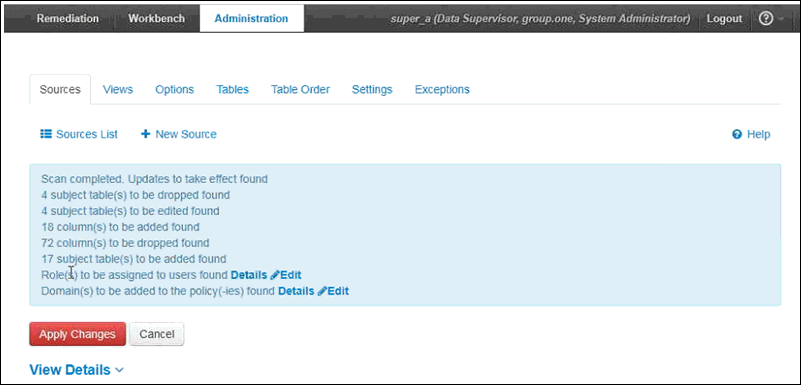
Step 4: Viewing the Details of the Analysis.
You can view the details on the potential update by expanding the View Details link.
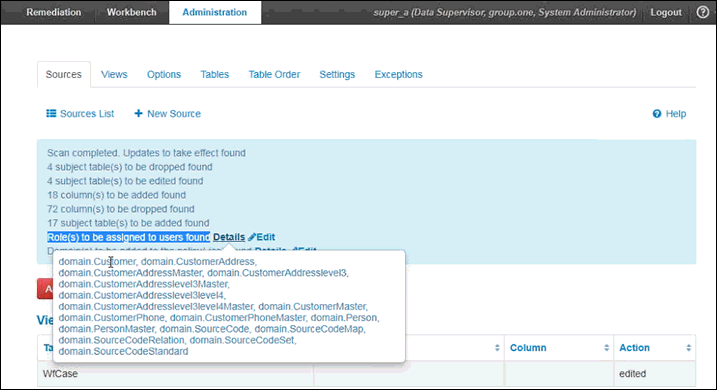
Note: View Details refers only to the action modifying the OGC MData structure. To view the details for WSO2 modification, click the Details link near the respective summary items, as shown in the following image.

The following image shows a sample entry after clicking Details from Role(s) to be assigned to users found.
Step 5: Customizing Roles or Users to be Synchronized (Optional)
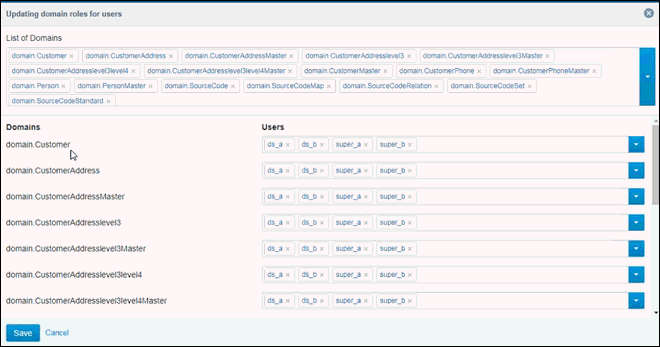
By default, four users (ds_a, ds_b, super_a, and super_b) are granted all the new domain roles (for example, permission to access the new domains or subjects).
To customize those defaults, click Edit. A dialog allowing refinement of the assigned domain roles appears. The user can then add or remove new domain roles and users, as well as the relations between them, as shown in the following image.
Step 6: Customizing Policies to be Updated (Optional
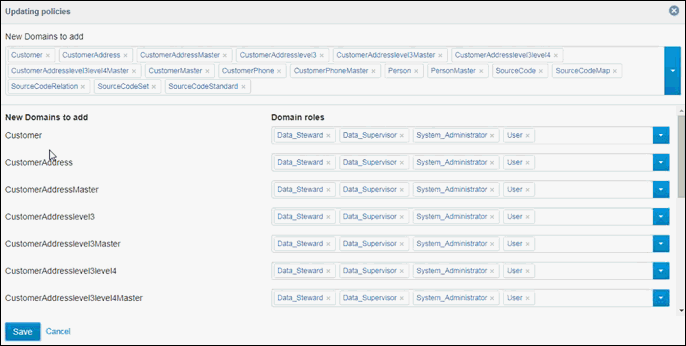
By default, each new domain role will be added to all the role sections in policies.
To change the default settings, click Edit. A dialog defining which domain roles will refer to what role sections in all policies appears. The user can match the new domain roles to the regular roles, as shown in the following image.
Step 7: Executing the Synchronization
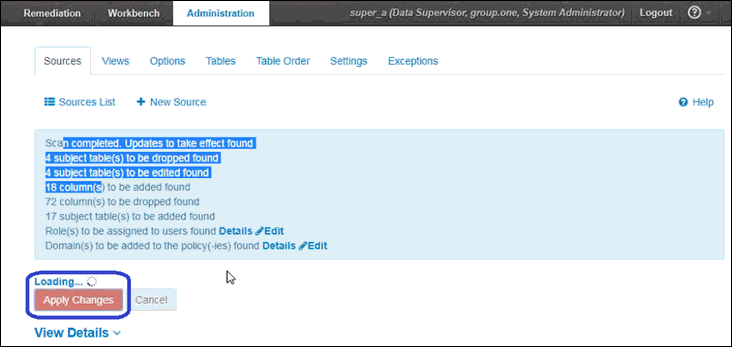
To start the actual synchronization process, click Apply Changes.
A Loading message appears, as shown in the following image.
Step 8: Summarizing the Synchronization
When the synchronization is complete, a summary appears displaying the synchronization details, as shown in the following image.

The OGC Application should now be completely in sync with the new OGS data structure, and fully functional in using the new data.
Developer Environment Considerations
When using the synchronization functionality from a developer environment (for example, IntelliJ IDEA, Eclipse, and so on) with OGS deployed on secured gateway (HTTPS), the configuration of SSL certificates should take place as described in this section.
Note: The following procedure should be performed only if you are running it in your integrated development environment (IDE).
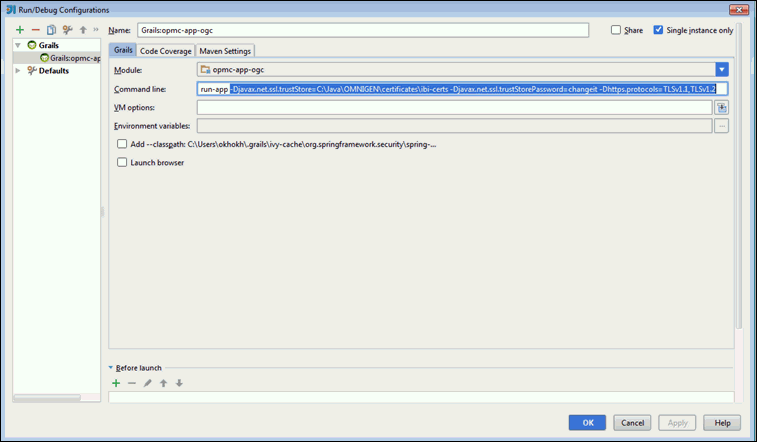
- Add the new VM argument to your running configuration. For example:
-Djavax.net.ssl.trustStore=[path_to_certificates]\ibi-certs -Djavax.net.ssl.trustStorePassword=changeit -Dhttps.protocols=TLSv1.1,TLSv1.2
where:
- ibi-certs
- Is the name of the key storage.
- Open Run\Debug Configurations and append the new arguments to the Command line field, as shown in the following image.
- Copy the required certificate from the OGS location to your computer. For example:
..\[OGS_HOME_DIR]\omnigen\OmniGenData
Ensure that the following files are copied:
- ibi-certs
- omnigenstore
- omnigenstore.pem
Note: The certificate can change from time to time. If this happens, you must update them.
- You must install JDK 1.7 with an update higher than 99, otherwise requests will fail even with correct certificates.
- After installation is complete, open File, select ProjectStructure, and then ensure that Project SDK is configured to the proper location, as shown in the following image.
