Procedure: How to Install the Omni Designer Plugin
Note: If a previous version of the Omni Designer Plugin was already installed, then you must first uninstall the older version and then install the new Omni Designer Plugin version.
- Open your Eclipse environment.
- Click Help in the menu bar, and
then select Install New Software.
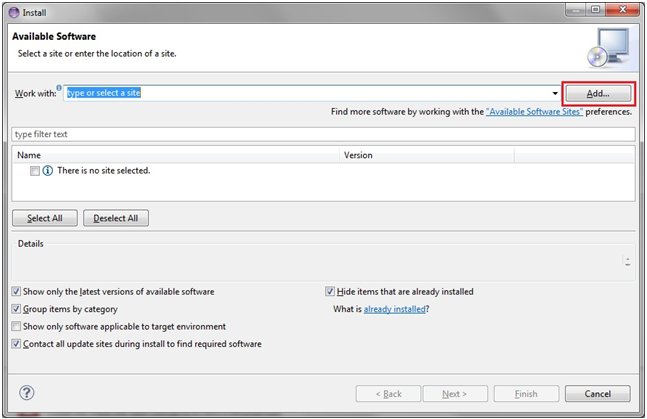
The Install dialog box opens and shows the Available Software pane, as shown in the following image.
- Click Add to add the installation file.
The Add Repository dialog box opens, as shown in the following image.
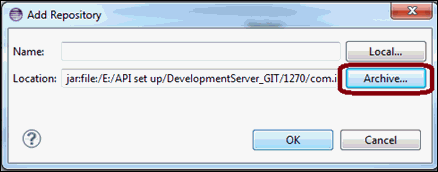
- Click Archive and navigate to the location of the Omni Designer .zip file.
- Click OK.
You are returned to the Install dialog box (Available Software pane), as shown in the following image.
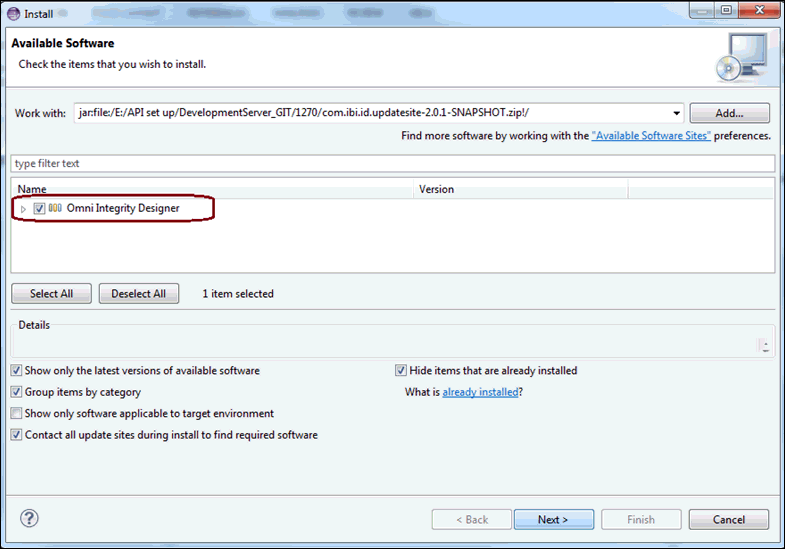
- Click Select All to select all
files that are required for the installation and then click Next.
The Install Details pane opens, as shown in the following image.
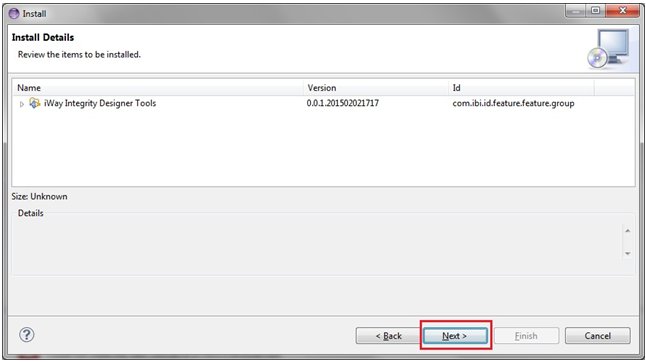
- Click Next.
The Review Licenses pane opens, as shown in the following image.
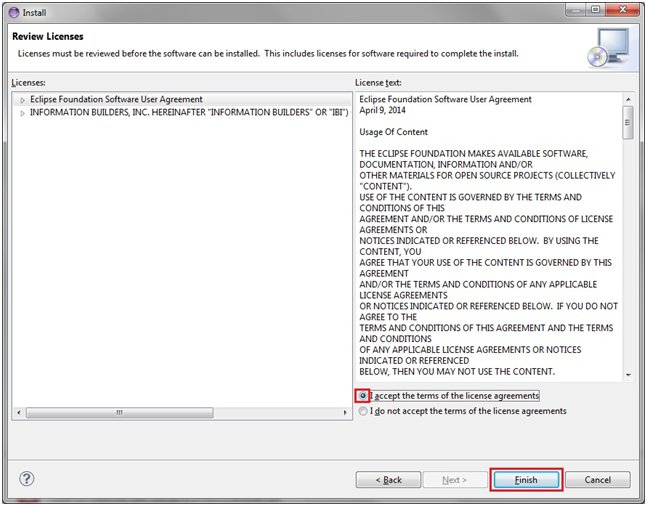
- Select I accept the terms of the license agreement and
then click Finish.
After the Omni Designer plugin installation process has completed, you are prompted to restart your Eclipse environment, as shown in the following image.
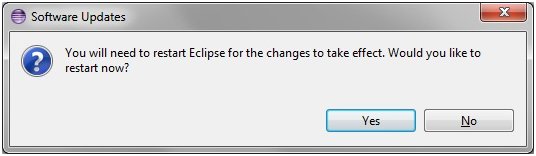
- Click Yes to restart your Eclipse environment.