Working With Telnet Designer Projects
|
Topics: |
|
How to: |
The Telnet Designer offers the following project options:
- New Project
- Open Project
Note: Though Export RPC Repository appears as an option, it is not currently supported.
Procedure: How to Create a New Project
To create a new Telnet Designer project:
- From
the Project menu, select New Project.
The New Project dialog box opens, requesting a name for the project, as shown in the following image.
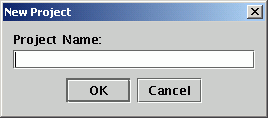
- Type a name for the new project.
- Click OK.
The new project node, with its subfolders, appears in the left pane.
To exit the New Project window at any time, click Cancel.
Procedure: How to Open an Existing Project
To open an existing project:
- From
the Project menu, select Open Project.
The Open Project dialog box opens displaying a list of existing Telnet Designer projects.
- Select a project from the Existing Projects list.
- Click Open.
The selected project, with its subfolders, appears in the left pane. The project tab at the bottom of this pane displays the project name.
Project Tab
When you open or create a project, the project tab in the left pane displays the name of the current project and a series of subfolders are displayed in the pane, as shown in the following image.
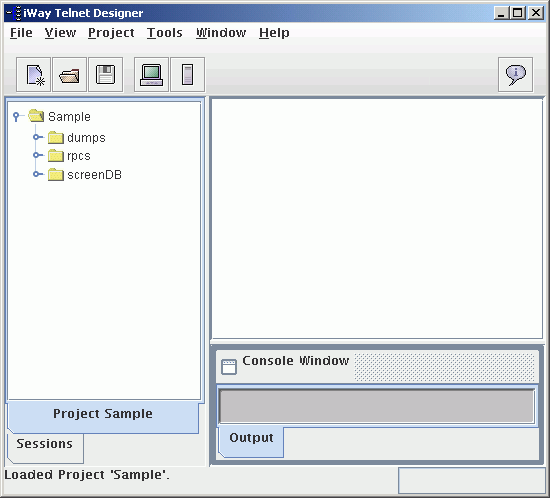
As you design with Telnet Designer, the project items are saved to the following folders:
- dumps. Contains dump files created using Recorder mode.
- rpcs. Contains sessions designed using RPC mode.
- screenDB. Contains screens, with a screen identifier, from all design sessions in the project. Screens that are identical between design sessions are automatically identified when encountered during a new design session.