Using the iWay Service Manager System Tray Application on Windows
|
Topics: |
When iWay Service Manager (iSM) is installed in a Windows environment, an optional icon is added to the System Tray. This icon allows an administrator to control (for example, start, stop, restart, and delete) the iSM configurations that have been defined in the iSM Administration Console.
The iSM System Tray (iwsystray.exe) application also provides a convenient way to access and control iSM services in a Windows environment. An iSM icon that is associated with the application is available from the System Tray.
You can right-click or double-click the iSM icon to manage iSM configurations and services, as shown in the following image.
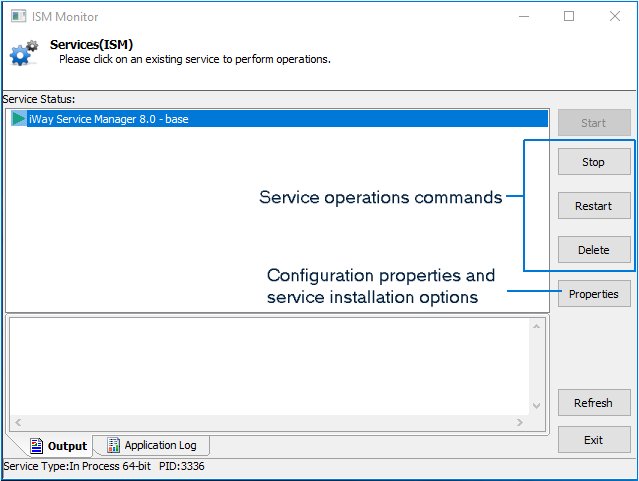
The iSM System Tray allows you to:
- Control multiple iSM instances and managed configurations.
- Monitor iSM configurations and application logs.
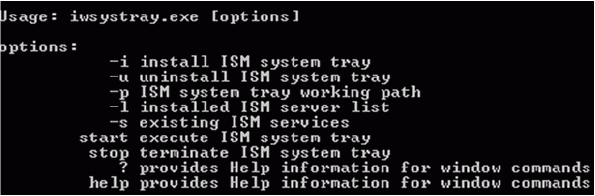
Help for command line options is available by executing the iwsystray.exe file, which is located in the following directory:
<iWayHome>\bin\iwsystray.exe
Configuring a New Service
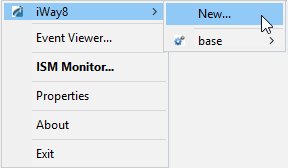
Right-click the iWay icon located in the Windows System Tray, as shown in the following image.
From the context menu that displays, select iWay8 and then click New, as shown in the following image.
The New Service dialog box opens, as shown in the following image.
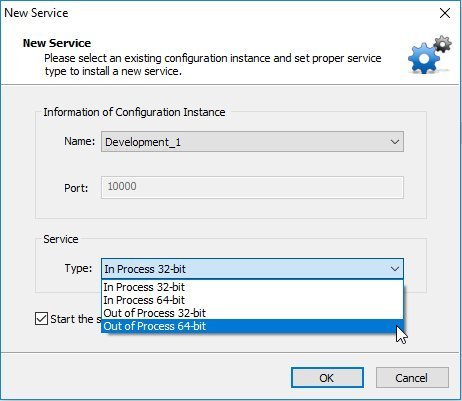
Select the iSM configuration for which you want to create a service from the Name drop-down list (for example, Development_1). The defined port number for the iSM configuration is shown in the Port field.
The Type drop-down list provides the following service types you can assign for the selected iSM configuration:
- In Process 32-bit
- In Process 64-bit
- Out of Process 32-bit
- Out of Process 64-bit
The 32 or 64-bit processing is dependent on the version of Java that was installed in the current Windows system that is being used. If the Java version is only 32-bit, then you will not have the ability to select the 64-bit service types.
After you make your selections, click OK to continue.
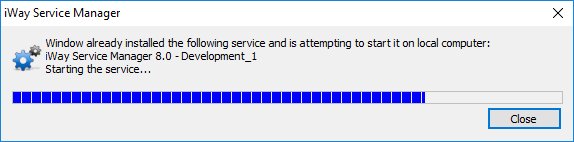
A set of status/progress dialogs appear in the following order:
- The install dialog, as shown in the following image.

- The startup dialog, as shown in the following image.
- The final status dialog, as shown in the following image.
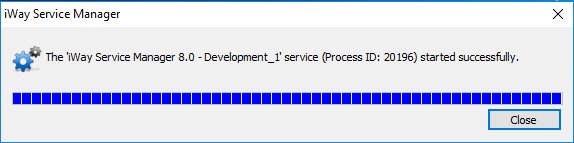
After the new service has installed and started successfully, click Close in the final status dialog.
Right-click the iWay icon located in the Windows System Tray.
From the context menu that displays, select iWay8, and then the name of the iSM configuration (for example, Development_1) for which you created the new service, as shown in the following image.
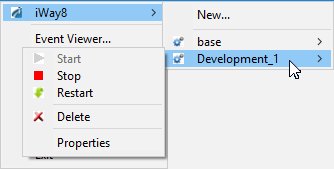
You, as an administrator, can now start, stop, restart or delete any defined iSM configuration in a Windows environment.
Note: When you use the iWay icon located in the Windows System Tray to create a new service for an iSM configuration, the entry that is created will be defined as an automatic startup service. This means that every time that the Windows system is started, this defined service will automatically start. In a Production environment this is probably what is required.
However, In a Development environment, you may want the ability to start and stop the service as needed. It is recommended for iSM services be started in this manner to maintain control. Therefore, after a service is defined, it is recommended that the administrator navigate to the Windows Control Panel (specifically Administrative Tools > Computer Management > Services and Applications > Services) and change the property of a defined iSM service from automatic startup to manual startup. This enables you to start and stop iSM services quickly for any defined configuration using the iWay icon located in the Windows System Tray.