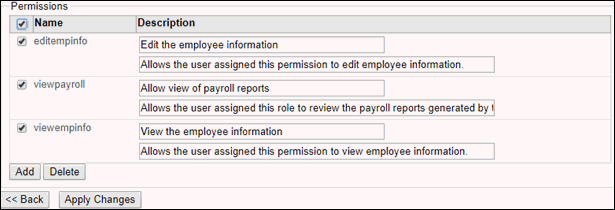
Using Realms, Roles, and Permissions
|
Topics: |
Used in conjunction with the Authentication Realm and console settings of Service Manager, the Security officer can allocate and restrict access of the user to the Service Manager toolsets based on roles and role assignment to users. The following example uses the simplest propsrealm for illustration.
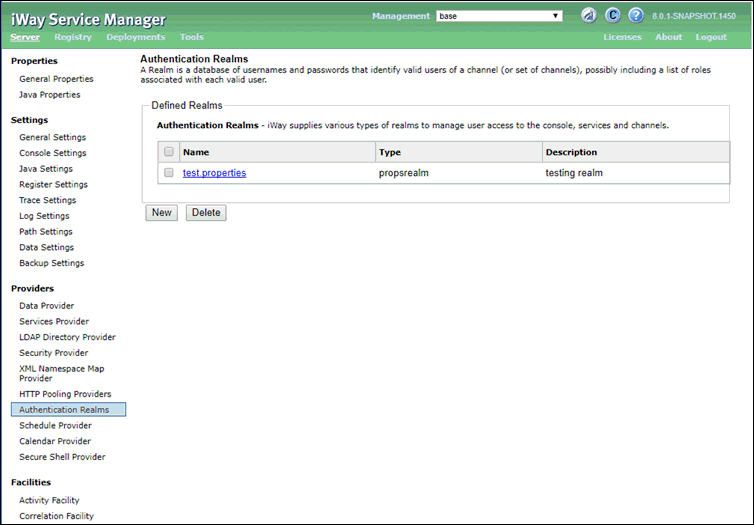
Using Propsrealm
The propsrealm is short for the properties realm. It is a properties file that contains the security information that the Security Officer sets up to control access to iWay Service Manager.
The following image shows the realm parameters for propsrealm.
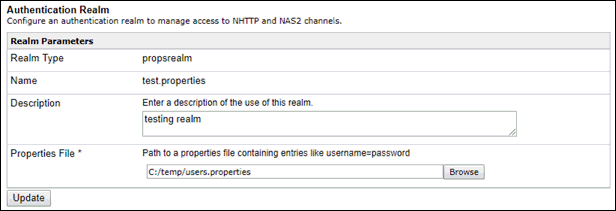
Enter the name and location of the security properties file, and a brief description of the realm.
Using the Security Property File
The security properties file is used by propsrealm to authenticate users and grant those users access to iWay Service Manager functions.
The following image is an example of a security properties file.
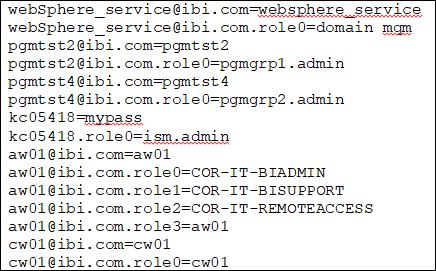
The file contains the following users:
WebSphere_service@ibi.com
pgmtst2@ibi.com
pgmtst4@ibi.com
kc05418
kc05418.role0
aw01@ibi.com
cw01@ibi.com
Each user in the properties file has a password followed by any number of roles (labeled role0 through roleN) that the Security Officer assigns.
For more information on roles, see Server Roles [XREF].
Using the Realm
|
How to: |
Do not change the console realm if your Security Officer has not set up all roles and permissions before this point. If everything is in place (all roles and permissions assigned), you will be ready to replace the Authentication Realm of the console.
To use the newly created propsrealm, it will have to be configured in the Console Settings.
- Under Settings on the left pane of Service Manager, click Console Settings, as shown in the following image.

- From the Authentication Realm drop-down list, select the propsrealm that you created, as shown in the following image.

- Stop and restart Service Manager for the changes to take effect.
Procedure: How to Create User-Defined Permissions
To create user-defined Permissions:
- Click Management on the Service Manager home page, as shown in the following image.

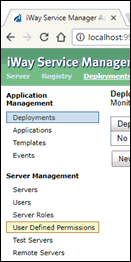
- Under Server Management on the left menu pane, click User Defined Permissions, as shown in the following image.
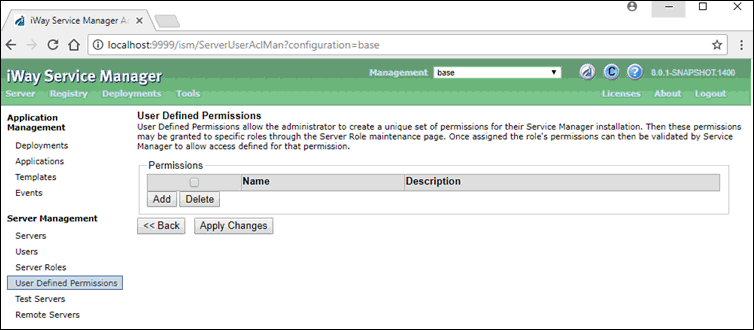
A list of all currently defined User Permissions appears.
The following image shows no permissions defined.
Procedure: How to Add a User-Defined Permission
To add a User Defined Permission to iWay Service Manager:
- Click the Add button.
The new permission is added to the end of the current listing. The following image shows only the new permission added. No other permissions have been defined.

The following table lists and describes the field parameters.
Parameter
Description
Permission Name
The Permission Name field must consist of a lower case string of characters that should not contain any imbedded whitespace characters (for example, spaces, tab, and so on). The name does not necessarily need to describe the permission (for example, allowview, accessforma, viewemppayroll).
Permission Description
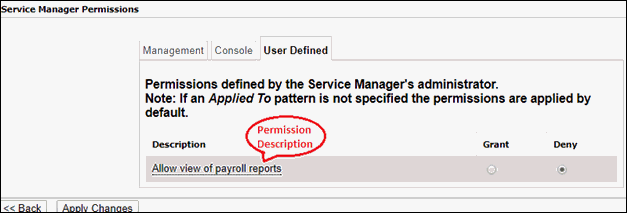
The Permission Description field allows you to provide a detailed explanation of the permission. This explanation will be displayed later in the Server Roles management page. The Permission Description can be phrases such as Allow view of payroll, Allow update of payroll, or View profit report. However, the Permission description must be detailed enough to get the permissions scope understood.
Enter help for this Permission
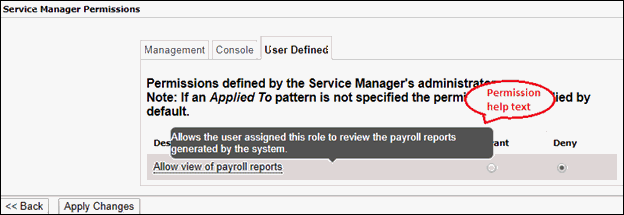
The Enter help for this Permission field allows you to provide a more detailed description of the scope of the permission. This description will be displayed later in the Server Roles management page when the mouse cursor is hovered over the permission description.
The following image shows the Permission Description.
The following image shows the Server Role page displaying the Enter Help for this Permission tool tip.
- Click Apply Changes when you are satisfied that the permission name, description, and help text are complete, as shown in the following image.

If you do not click the Apply Changes button, or exit the screen by selecting another menu option or clicking Back, any changes made will be lost.
Updating Permissions
When the changes have been applied to iWay Service Manager, you will no longer be able to change the name of the permission. The only fields that may be changed are the Permission Description and the Enter help for this Permission, as shown in the following image.

Once you have completed entering the permission description and the permission help text, click Apply Changes.
Similar to adding a permission, if you do not click the Apply Changes button and instead exit the screen either by selecting another menu option or by clicking the Back button, any changes made will be lost.
Deleting a Permission
In general, you can click the Delete button to delete permissions permanently from Service Manager if a single permission or several permissions become obsolete.
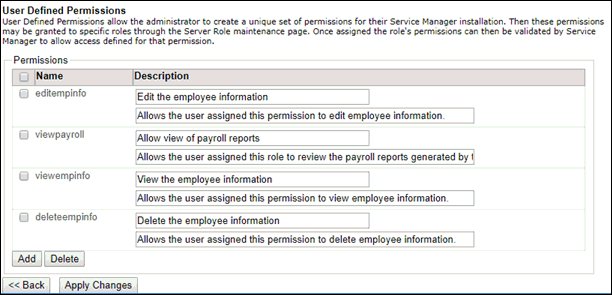
You can delete a single permission by selecting the check box preceding the permission name. For example, the Delete the employee information(deleteempinfo) is no longer a stand-alone permission, but has been combined into the Edit the employee Information (deleteempinfo) permission.
To delete the deleteempinfo permission:
- Select the deleteempinfo permission check box, as shown in the following image.

- Click the Delete button.
The following confirmation dialog box appears:

- Click OK to confirm the deletion of the permission from the list.
The permission no longer appears in the list of permissions, as shown in the following image.

Similar to the Add and Update functions, any deletions are not finalized until you click Apply Changes. When a permission is deleted, any roll with that permission granted will have that permission removed.
Note: Selecting the check box at the top of the list in the heading row of the table either selects all check boxes or clears them from the permission list. The following image shows the heading check box selected, in order to select all permissions from the list.
