Setting Up Accounts for the SQL Server
|
Topics: |
|
How to: |
You can use Active Directory Users and Computers to create two domain user accounts for SQL Server in Active Directory: one for the SQL Server database account, and one (if needed) for the SQL Serve Reporting services.
Configuring User Account Attributes
Perform the following tasks for each of these accounts created for SQL and Kerberos:
- In the User Account property page, in the Active Directory Users and Computers section, ensure that the property check box for Account is sensitive and cannot be delegated is cleared.
- For the encryption types, make sure only the AES encryption
types are selected, as shown in the following image.

Procedure: How to Configure the Active Directory Domain Controller for Delegation
- On the primary Domain controller, log on and start the server manager.
- From the Tools menu, select Active Directory
Users and Computers, then right-click the computer you
wish to set up for delegation (the SQL Server computer), and select Trust
this computer for delegation.
If the computer that is running SQL Server is the last computer contacted, but that computer has a linked server, it must also be granted delegation permissions. If it is not the last computer in the chain, all the computers that are intermediaries must be trusted for delegation.
- Perform the following steps to grant delegation permission
to the SQL Server service account domain user account. You must
have a domain user account for clustered SQL Server installations
(this step is not required for computers that are running SQL Server
and using a local system account).
- In the Users folder, right-click the user account, and then click Properties.
- In the user account properties dialog box, click the Account tab.
- Under Account Options, select the Account is Trusted for Delegation check box, and ensure that the check box for Account is sensitive and cannot be delegated, is cleared for this account.
Configuring User Account Security Attributes
After installing and configuring SQL Server, you are returned to the Active Directory Domain Controller where you will need to configure the account properties of the MSSQL user.
Procedure: How to SQL Server on a Linux Machine
Procedure: How to Install SQL Server on Windows
- Install the SQL Server (Enterprise,
Developer, Evaluation, Business Intelligence, or Standard editions
only) on a server in the same domain as the domain controller.
For more information, see the Microsoft support matrix for additional features at https://msdn.microsoft.com/en-us/library/cc645993(v=sql.120).aspx#Enterprise_security.
You can also see the Microsoft Quick Start Installation guide at https://msdn.microsoft.com/en-us/library/bb500433(v=sql.120).aspx.
- Supply the domain accounts for the SQL Server service
that you created in the previous steps on the domain controller,
and for the SQL Server Analysis Services (if used).
The SQL server must be installed on a Windows or Integrated authentication only. It is not possible to have a secure Kerberos connection mode when there can be a backdoor through a a native mode account. In Integrated mode the SA account is present but disabled.
Procedure: How to Configure SQL Server After Installation
- When the installation is complete, expand
the SQL Server Configuration Manager, expand SQL Server
Network Configuration, then select TCP/IP under
Protocol Name on the right pane, as shown in the following image.
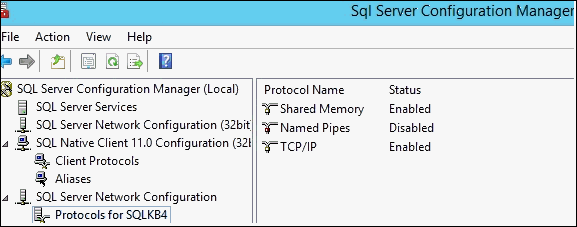
The TCP/IP Properties dialog opens.
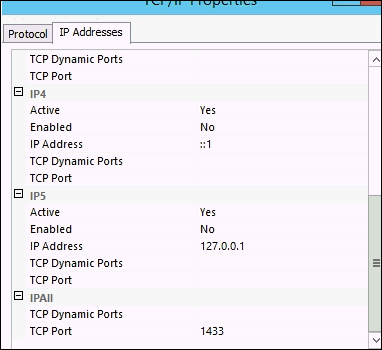
- Click the IP Addresses tab and ensure that the TCP Dynamic
Ports property is blank for all entries, then enter 1433 in
the TCP Port field of the IPALL section, as shown in the following
image.
- Click OK.
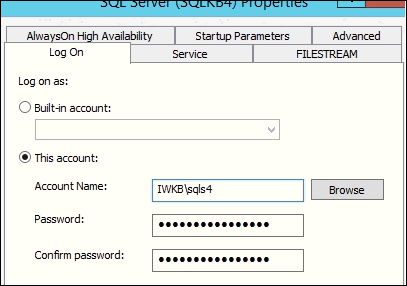
- Click on the SQL Server Services in the same SQL Server
Configuration Window and ensure that the domain account is the account
selected for the SQL Server service, as shown in the following image.
- If a change is made in this property, click Apply then click OK, and restart the service to accept the change in the server.
Procedure: How to Add the SQL Server Domain Account to SQL Server Management Studio
- Log on as an Administrator to the server with SQL Server installed.
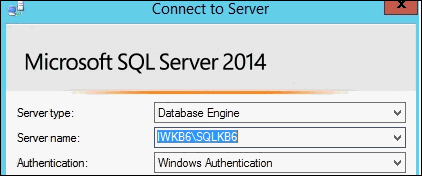
- Open the SQL Server Management Studio application
and select the current server when prompted for the database engine,
as shown in the following image.
The Object Explorer opens, as shown in the following image.
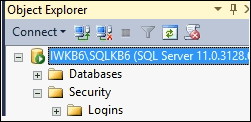
- Expand the Logins folder.
- Right-click on Logins and select New
Login.
The Login New dialog opens.
- Select the Windows Authentication radio button,
then click Search, as shown in the following image.

The Select Window or Group dialog opens, with the current machine name already indicated in the From this location field, as shown in the following image.
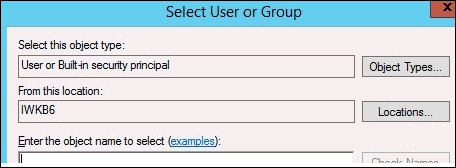
- Click the Locations button, and expand it until the domain of the machine and all of the built-in objects of the domain appear.
- Click Users, and then click OK.
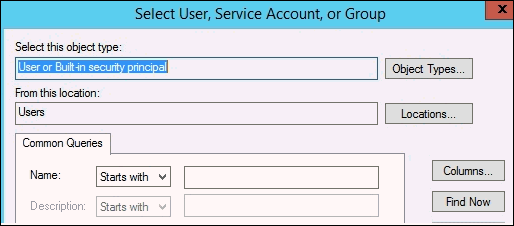
The Select User or Group dialog returns, but the From this location field now shows Users instead of the local machine name, as shown in the following image.

- Click the Advanced button at the
lower left of the dialog.
The Select User, Service Account, or Group dialog opens, as shown in the following image.
- Click the Find now button.
The list box fills with the users of the domain.
- Select the User ID that is running an instance of SQL Server on the current machine.
- Click on the name of the SQL Server domain account name
and click OK.
The Find property page closes and the list box of the Select User, Service Account, or Group dialog now displays the selected account in user principal name format.
- Click OK to close the dialog,
as shown in the following image.
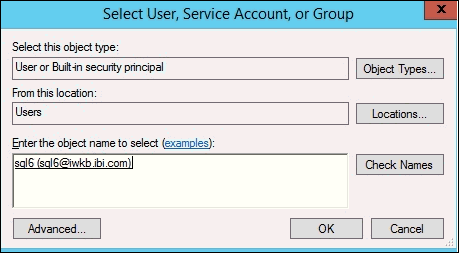
The Login New dialog now shows the SQL server user in Windows 2000 format Domain\User, as shown in the following image.
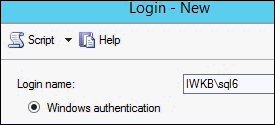
On the left side of the dialog, the Select a page section is positioned on General.
- Click User Mapping and select the database or databases to be used with the ID on remote connection.
- Use the Select a page to move to Securables.
- Click the Search button.
The Add Objects dialog appears, as shown in the following image.
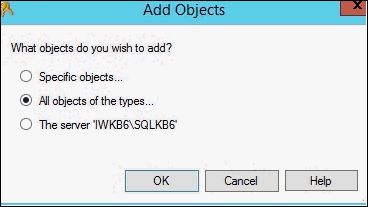
- Select All objects of the types… and
then click OK.
The Select Object types dialog opens, as shown in the following image.
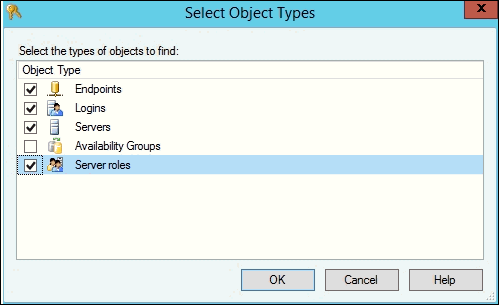
- Select the following check boxes, and then click OK.
- Endpoints
- Logins
- Servers
- Server roles
- In the object selections, ensure that the Permissions for Authenticate Server, Connect SQL, View database, and any other relevant permissions are selected.
- Use the Select a Page tool to move to Status and
make sure that certain options in the Settings section, shown in
the image below, are enabled.
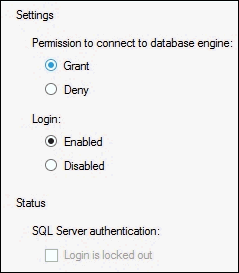
This must be done for the User for SQL Server connection and may be done for additional regular SQL Server users.
Procedure: How to Create Service Principal Names
- Using your web browser, search for and
download the Microsoft Kerberos Configuration Manager for SQL Server,
and then install it to your machine with administrator permissions.
You can install it into the following drive:
C:\Program Files\Microsoft\Kerberos Configuration Manager for SQL Server
No shortcuts or entries are added to the windows Start menu.
- Navigate to the location using the windows File Explorer,
right-click on the KerberosConfigMgr.exe, and select Run
as Administrator.

The Configuration Manager window opens.
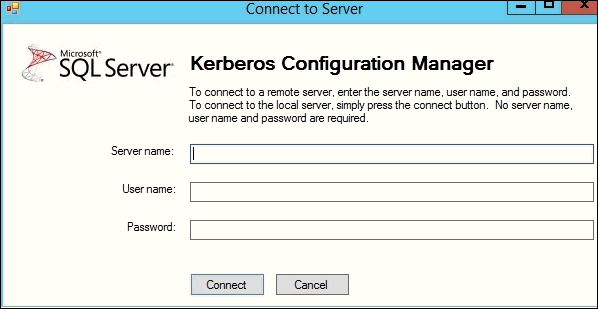
- Click Connect from the menu bar.
A dialog window opens with the connection parameter credential fields. Do not enter anything into the fields, as shown in the following image.
- Click Connect.
The following tabs appear:
- System
- SPN
- Delegation
The System tab shows the connection information on the machine with SQL Server installed.
The SPN tab allows you to see the Instance Name and the associated Service Account. You can scroll to the far right to see the Required SPN. If the SPN is not present in the Active Directory, then the two buttons Fix and Generate will be enabled. The Generate option will dynamically create the SPNs on the system and link them to the account. You can perform this action for as many SPNs as are listed in red (if Fix is selected, the changes are written to a file to be executed at a later time). It can be useful to keep a record of the changes, since the will be generated anyway.

When finished, the Status column will have a green check box and the word Good for all SPNs and accounts.
- Click Exit on the menu bar (the
changes that were made can be saved as an XML document by selecting Save from
the menu bar and providing a file name) to end the utility.

Registering Manual SPN
Enter the following syntax as a template on the Domain controller:
setspn -A MSSQLSvc/myhost.redmond.microsoft.com:1433 accountname
Your host and domain name should be specified. The account name is the domain user account, which uses the principal name format.
For named instances, use the following format:
setspn -A MSSQLSvc/myhost.redmond.microsoft.com:1433 accountname
Procedure: How to Configure Security to the SQL Server Service to Delegate Using SPN
- From the main domain controller in Active Directory
Users and Computers, right-click the computer that you wish to set
up for delegation, and then click Trust this computer
for delegation.
If the computer that is running SQL Server is the last computer contacted (and the computer has a linked server), the it must also be granted delegation permissions. If it is not the last computer in the chain, then all the computers that are intermediaries must be trusted for delegation.
- Grant delegation permission to the SQL Server service
account domain user account.
You must have a domain user account for clustered SQL Server installations.
Note: This step is not required for computers that are running SQL Server and using a local system account.
- In the Users folder, right-click the user account, and then click Properties.
- In the user account properties dialog box, click the Account tab.
- Under Account Options, select the Account is Trusted for Delegation check box and make sure that the Account is sensitive and cannot be delegated check box is cleared for this account.
- In the Delegation tab, select the Trust this user to specified Services only check box, and then underneath, select Use Kerberos only.
- In the Services to which Account can present Delegation list, click Add, and then click the Users or Computers button.
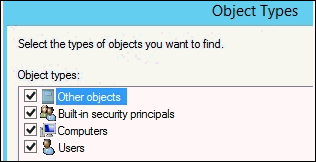
- In the Select Computers or Users Dialog, click the Object Types button
to show the list of object types to select.
The following object types are selected by default.
- In the From this location field, ensure that the current domain (and not the current machine) is selected.
- Click Advanced.
- In the Select Users or Computers dialog that appears, click Find Now to display a list of computers and users.
- Select the user name that was used to run SQL Server,
to map the Service Principal Name to the user object, and complete
the Delegation process.
You are returned to the Delegation page of the Account properties, with one or more entries in the service principal name list.
You can select all or as many entries as you wish, and then click Add to register the selection in Active Directory.
Procedure: How to Configure the SQL Server Service to Create SPNs Dynamically
The JDBC driver needs these permissions. Do not perform step 12 unless dynamic SPNs are enabled throughout the enterprise.
To enable the enterprise, you must grant the following access control settings for the SQL Server service account in the Active Directory directory service:
- Read servicePrincipalName
- Write servicePrincipalName
Important:
- If you use the Active Directory Service Interfaces (ADSI) Edit snap-in, and you incorrectly modify the attributes of Active Directory objects, serious problems can occur. To resolve these problems, you may have to reinstall Microsoft Windows Server and Active Directory. It cannot be guaranteed that these problems can be resolved. Modify these attributes at your own risk.
- You must be logged on as a domain administrator. Alternatively, you must ask your domain administrator to grant the appropriate permissions and the appropriate user rights to the SQL Server startup account.
Perform the following steps to configure the SQL Server service to create SPNs dynamically when the SQL Server service starts:
- Click Start, select Run, then type Adsiedit.msc in the field, and click OK.
- In the ADSI Edit pane, expand Domain [DomainName],
expand DC= RootDomainName, expand CN=Users,
right-click CN= AccountName, and then click Properties.
Notes:
- DomainName is a placeholder for the name of the domain.
- RootDomainName is a placeholder for the name of the root domain.
- AccountName is a placeholder for the account that you specify to start the SQL Server service.
- If you specify the Local System account to start the SQL Server service, then the AccountName is a placeholder for the account that you use to log on to Microsoft Windows.
- If you specify a domain user account to start the SQL Server service, then the AccountName is a placeholder for the domain user account.
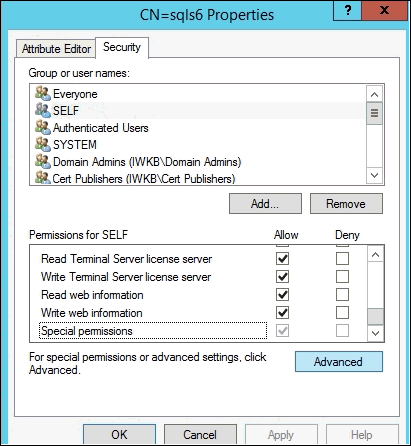
- In the CN= AccountName Properties dialog box, click the Security tab.
- On the Security tab, click Advanced.
- In the Advanced Security Settings dialog box, make sure that SELF is listed under Permission entries. If SELF is not listed, click Add, and then add SELF.
- Under Permission entries, click SELF, and then click Edit.
- In the Permission Entry dialog box, click the Properties tab.
- On the Properties tab, select This object
only in the Apply onto list, and then select
the following check boxes under Permissions:
- Read servicePrincipalName
- Write servicePrincipalName
Important: There are many properties and each must be searched for in the list. If they do not appear, the wrong object is selected or delegation is not enabled on the account.
- Click OK.
- In the next dialog that appears, click OK again.
- In the CN= AccountName Properties dialog box, click Attribute Editor.
- Under Attributes, click servicePrincipalName in the Attribute column, and then click Edit.
- This step is for Dynamic SPNs only: In the Multi-valued
String Editor dialog box, remove the service principle names (SPNs)
for the instances of SQL Server that use this SQL Server service
account.
Important: You should only delete the SPNs for the instances of SQL Server that you are currently working on. The other instances of SQL Server that use this service account will be able to remove the SPNs that are related to these instances the next time that you start these instances.
- Exit the ADSI Edit snap-in.
Dynamic SPNs eliminate problems if you change the TCP/IP port or the domain name for new installations of SQL Server, or for existing instances of SQL Server (though they are harder to diagnose). For more information, see SQL Server Clustered Server Warning.