iWay Integration Tools
|
Topics: |
This section provides a summary of the new features in iWay Integration Tools (iIT) version 8.0. For more information, refer to the online documentation.
Configuration Profiles
Configuration profiles, which provide information on connectivity to various systems are also known as generics. The generics are pointers to the common connectivity/configuration properties that can be shared across many objects of the same type. For example, multiple FTP components can share the same FTP generic with pre-configured connection information, so you will not need to re-create it for each object. An adapter such as SAP, can have multiple SAP nodes in an application project, which shares the same SAP connection information. Using generics prevent you from having to recreate it for each instance. The configuration profiles can be created during when defining an object (or addition of an object to a process flow) by clicking on the plus sign (+) icon next to it. You can also select an existing profile to use for connectivity. The following image shows a sample configuration for the FTP object.
The configuration profiles are saved and managed in the iway configuration file, which is accessible under the Configurations folder of the project. The following image shows the sample iway configuration file, where you can update, delete, or add additional components.

If the generic relies on the user of the provider (for example, a security provider used in secure communication), then the user will have an option to either type in the provider name. This means the user must ensure that the provider exists in the runtime environment and is defined in the deployment template. The user can also create a provider on-the-fly as part of a configuration step for the generic.
This will store the provider in the Providers section of the iway configuration profile. This creates an inline local instance of the provider, which will then be available during runtime.
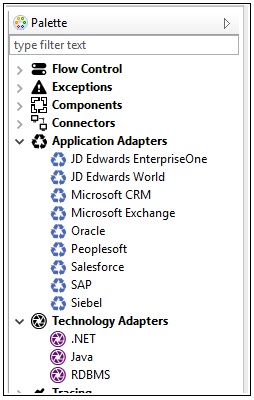
Adapter Configuration
In this release, adapters can be configured in-place for quick and direct access as part of the business logic. There is no need to navigate to the iWay Explorer tab to configure adapters. Most common adapters are available through the Palette of the process flow designer, as shown in the following image.
Once the adapter is added to the process flow, the configuration of the adapter is enabled. You can create multiple connection profiles and then simply reuse them across various adapters of same type in the application. You can set the target for adapter execution, generate request/response schemas, and generate sample request/response documents for quick access to all adapter artifacts.
Note: You are responsible for ensuring that the correct dependency libraries for the adapter in use are available in the iWay installation. The iWay home directory also needs to be set in iIT for the adapter to load and be able to connect to the target system.
Application Creation
An application project is designed to host all of the artifacts that are required for the application. All of the artifacts within the project are automatically packaged into the deployed application and do not need to be added separately. This approach ensures that the application contains all of the necessary components to run properly and eliminates the need for you to create an application manually.
The default application name is bundle and corresponds to the bundling of all of the components. You can change this name value. However, the more important name is the actual deployment name of the application that you assign during the deployment step. To deploy an application, right-click on the application bundle, select Run As, and then select Application Deployment. Provide the required information, such as the deployment template, the deployment name, and the location of the server where the application should be deployed. You may also choose to automatically start the application.
If you want to update the application components, add or remove resources, then you may do so by double-clicking on the application bundle, which will open an editing utility for the application. You can add or remove various components and resources by clicking through the tabs. This is the same view as was available to users in iWay version 7 of the product.
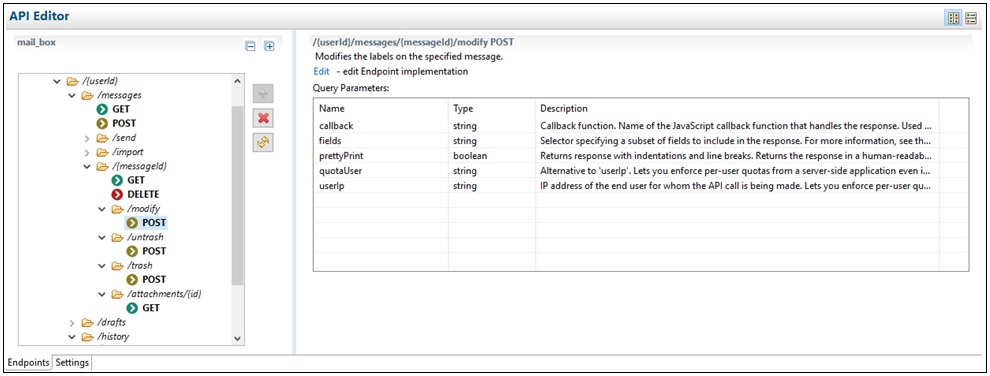
API Hosting
The ability to expose services as callable APIs is critical to a flexible application that enables you to have rapid access to vital callable services. You can create a new API and simply point to a RAML file defining the API endpoints, and then start modifying the associated business logic to each action. For example, the following image shows a mail-box processing API with different end-points. The RAML file is parsed during the load operation. If there are query parameters for a given action, then they are displayed on the right side, along with the description and the full URI call.
The Settings tab enables you to provide information related to the protocol definition, such as port, security, and other related protocol attributes.
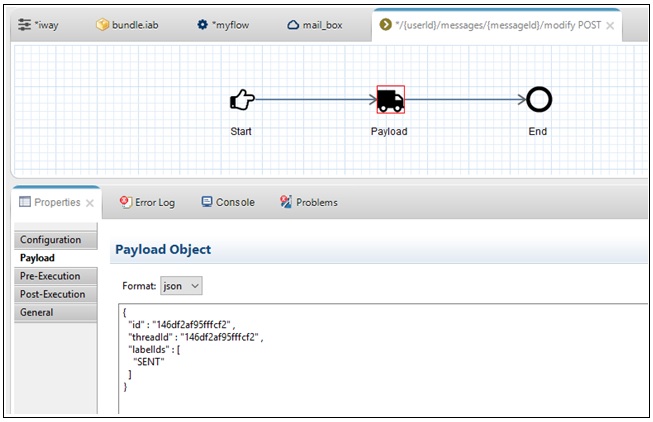
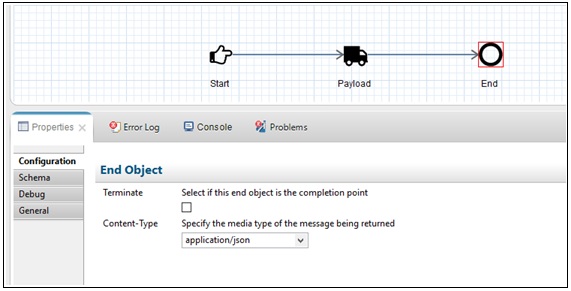
You can click the Edit option on the right to edit the process logic associated with a specific end-point. By default, if the RAML file had a sample response defined, then it will be loaded as a Payload Object in a default process, as shown in the following image. The goal is for you to update the business logic of the process to implement the functionality, which will be hosted by the given end-point.
API Consumption (REST Object)
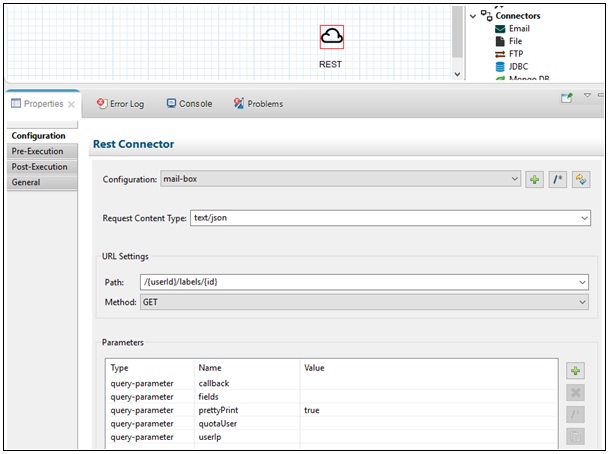
A REST object allows you to call exposed APIs, such acting as a consumer, or simply execute a RESTful call to an external resource. It is configured similar to other objects, where a configuration profile is created. The configuration profile for REST object can point to a RAML file, and if such exists, it is parsed out and yuo can simply select the Path/Method from the drop-down list and provide the requested query parameters. If the RAML file is not available, then you can type in the path and add any URI or Query parameters in the object configuration.
Variable Viewer and Configuration
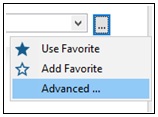
When you configure any property for an object that accepts a parameter, you can click the Advanced… option, as shown in the following image.

This action takes you to the advanced variables viewer. Here you can create an XPath, select defined favorites, or get access to automatically populated and available inbound variables, as shown in the following image.
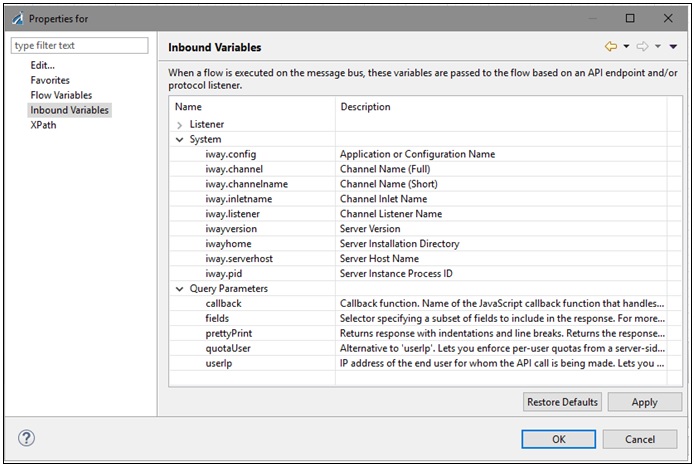
The Inbound Variables are organized into three categories:
- Listener provides a list of all supported listeners and the available registers that are set upon runtime. You can simply pick a variable to access for the configuration parameter without having to guess what is available.
- System refers to system level variables that are set by the system.
- Query Parameters will display for the API end-point and would be available if defined in the RAML file for a given end-point. At runtime they will be predefined and parsed out from the incoming URI. As a result, you are not required to do any parsing on your own, and can simply access the variable directly for further configuration of the process (for example, decision making or a data retrieval query).
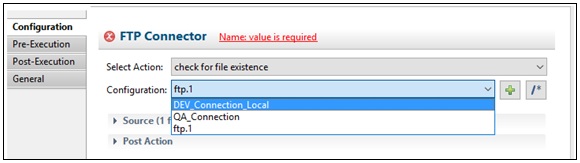
Action-Driven Configuration
In this release, the technique used to configure all objects has changed. Instead of having to rely on the knowledge of which service to call, the product expands on the available direct object. Execution objects in the palette provide different action selection that are more user intuitive, such as reading or writing a file. Based on your selection, a proper set of parameters for configuration are presented. The system will automatically choose and configure the proper underlying services based on your selection. You do not need to keep track or have extended knowledge of what services are available. For example, the following image shows various actions available for the FTP connector. Based on the selection, the required properties will be made available.

Transformer
Transformer provides full support for inbound/outbound transformations with JSON. You can easily convert into and out of the JSON format by building a customized transform manually or by pointing to the JSON schema. This enables direct transformation across various formats.
To access available transformations, drag the Transformer object into the process flow design view. You have the option of selecting default JSON/XML transformations, or user created transforms. If you choose to execute an iWay Transform, you will be able to select an existing transform from the drop-down list, or provide a name of the transform to be accessed during runtime, creating a dynamic lookup.
Process Flow Testing
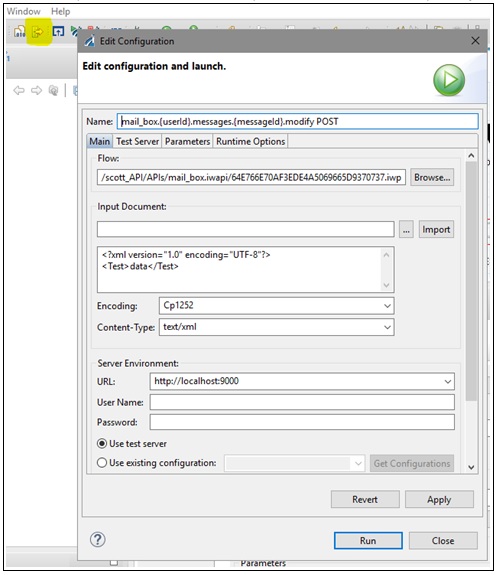
The process flow, which is not attached to the API end-point, can be tested by right-clicking and selecting Test Run. If the process flow is attached to the API end-point, then it is not listed in the project folder, but can still be tested. While the process flow is open, click the Run Flow icon, as shown in the following image, and the test view is opened. The same approach can be used for any process flow testing, but is required for API testing. In this view, you can provide all of the details for the test-run environment. You also have an option to provide parameters (simulating different test calls), which would normally originate from an incoming URI call.
You can select different request types and provide the proper document associated for testing and in a proper format. This is critical if the testing is done using the JSON format or any other non-XML based format.
Response Content Type
The END object used in process flows now includes an additional option to provide the response content type. This enables control of the response type based on the given execution path within the same process flow. This is also critical when hosting API endpoints, which can return different response types. As a result, the configuration of this option must be unique to each end-point (process flow) and not centralized on the protocol (listener) definition.
Library Deployment
To enable component sharing and accessibility from different applications (which can be achieved using the _fetch() function), users need the ability to deploy a given component directly into the runtime environment. For example, you can deploy a transform or a process flow by right-clicking on it, and selecting the Library and Deploy option. Provide the location of the runtime server and the artifacts will be deployed into the selected configuration. This resource is accessible to any other components within its runtime environment or to components outside its runtime environment through the _fetch() function call.
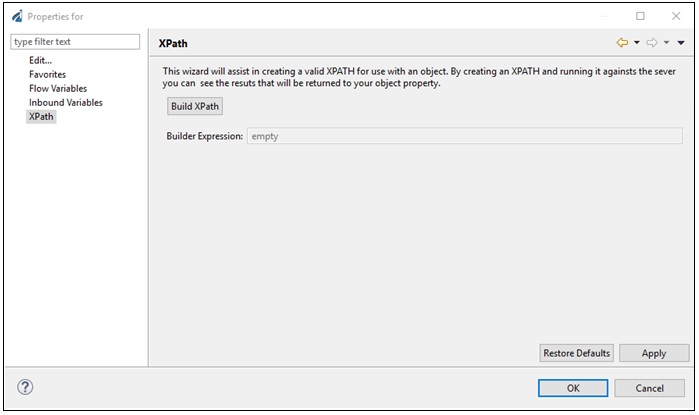
XPATH Builder
iIT provides access to the XPath Builder from the toolbar. This option enables you to load an XML document and create an XPath statement visually, which can then be copied into the variable, configuration parameter, or any location that accepts XPath.

You can also access XPath Builder at any point during any component configuration. For any parameter that accepts properties, you can click the ellipses button (…) to access Advanced settings.
In the Advanced settings, you can create your XPath, select existing variables, or your favorites for the configuration parameter.