Process Flow Designer
The Process Flow Designer in iWay Integration Tools (iIT) allows you to design orchestrations, visual representations of your business, and application processes, which run within the iWay Service Manager (iSM) run-time environment. Many of the most complex integration patterns can be easily solved using a wide variety of components, including iWay Adapters and iWay Connectors.
The Process Flow Designer provides process flow objects, the executables within a process flow that direct and act upon the input to the process flow. The process flow is graphically represented in the workspace as a box and line diagram. The boxes are the objects you add, and the lines are the relationships you define between those objects. Process Flow Designer includes executable objects. For example, a Transform object converts a document from one format to another. Other objects control the flow of a document. For example, a Decision Test object routes a document based on a true or false condition. As you build a process flow, you will configure each object and the relationships between them to meet your requirements. Once the process flow is created and saved, you can validate the structure and then test the process flow in a run-time environment.
To create a new process flow:
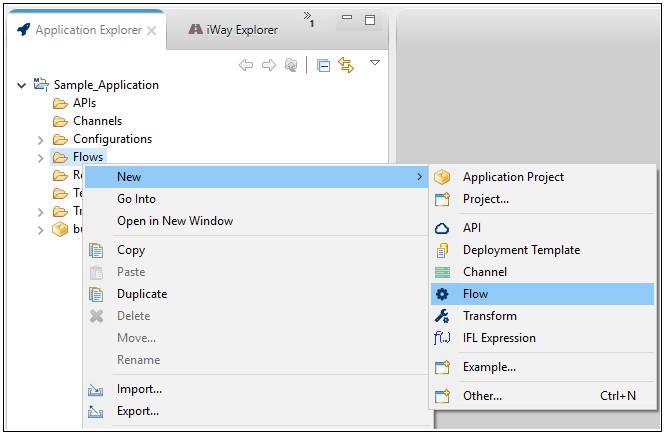
- In the Application Explorer tab, expand your application project. Right-click the Flows folder, select New and then click Flow, as shown in the following image.
The New Flow Wizard dialog opens, as shown in the following image.
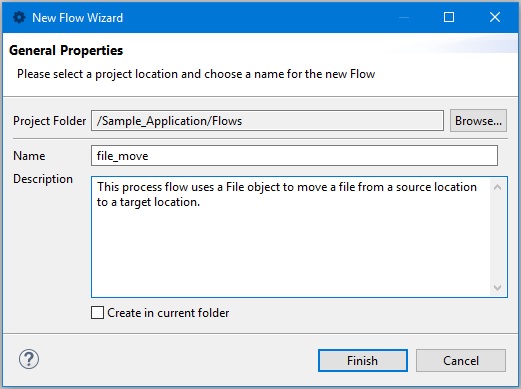
- Enter a name for your process flow (for example, file_move) with a description (optional), and then click Finish.
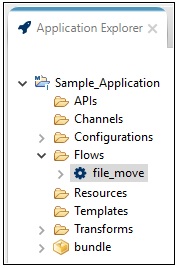
Your new process flow (file_move) is added to the Flows subfolder within your application project, as shown in the following image.
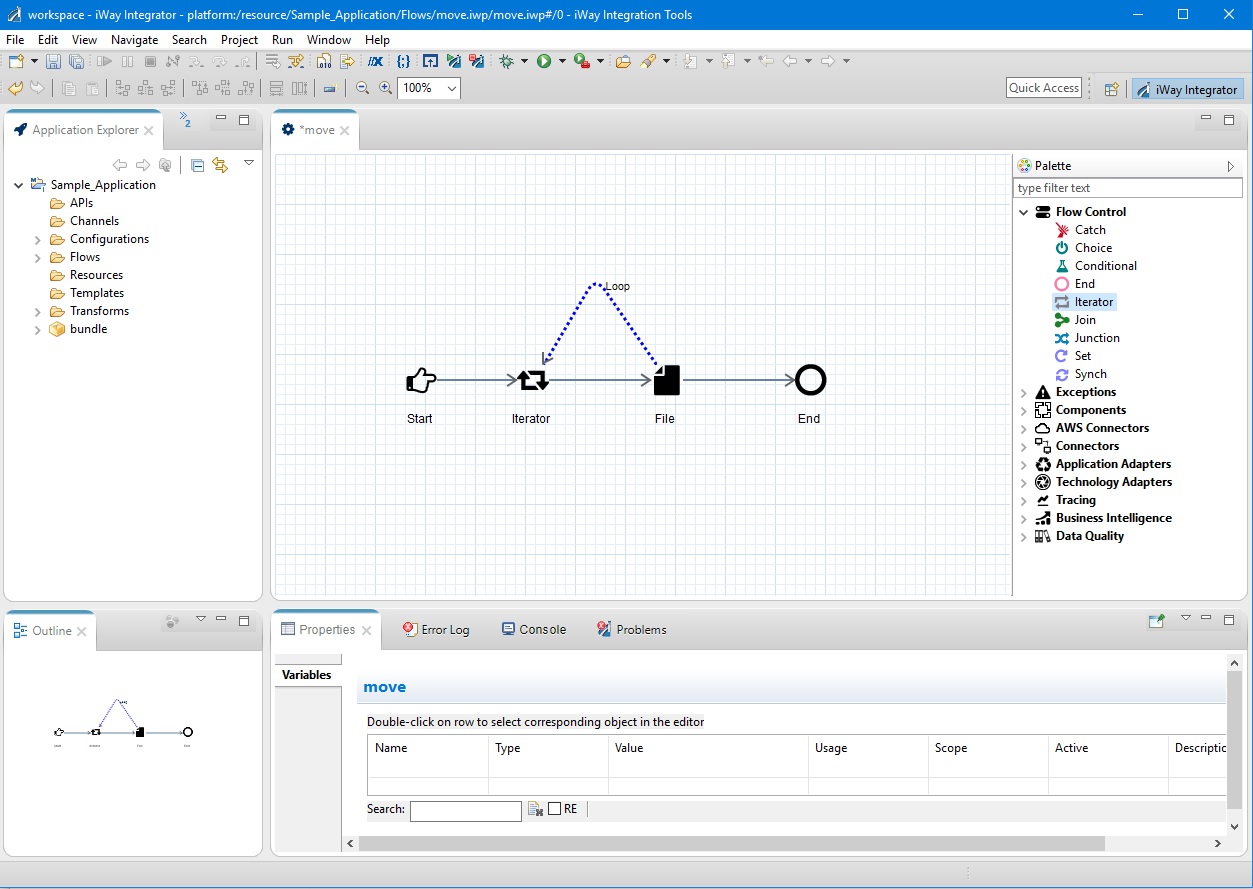
Your process flow also opens as a new tab in the workspace area where you can start building the application logic for processing data, as shown in the following image.

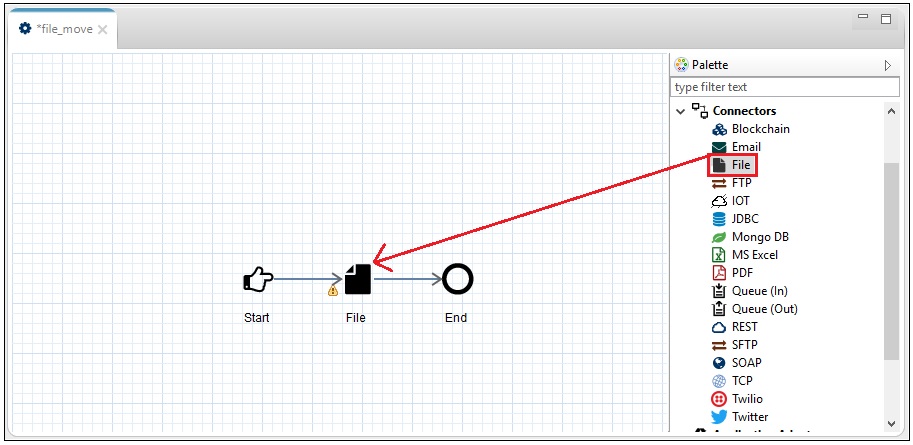
By default, each new process flow consists of a Start and an End object.
- To add an object to your process flow, navigate to the Palette on the right pane, expand one of the categories, and drag the
required object onto your process flow. In the following example, the Connectors category is expanded and the File object is being added between the Start and End nodes of the process flow.
- To configure your File object, navigate to the Properties tab, as shown in the following image.
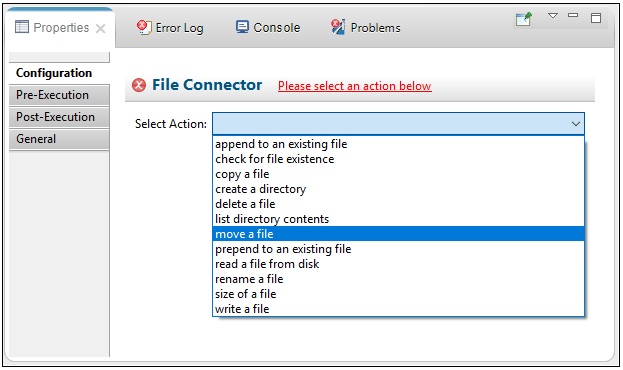
You first need to specify the type of action that you would like this File object to perform. Once a specific action is specified, the appropriate configuration parameters are displayed for that action. This behavior, which simplifies development and saves time, also applies to other objects (for example, Email, FTP, TCP, and so on) that you can add to your process flow.
- Select move a file from the Select Action drop-down list.
- Expand the Source parameter group and specify the path to the source file that you want to move, as shown in the following
image.
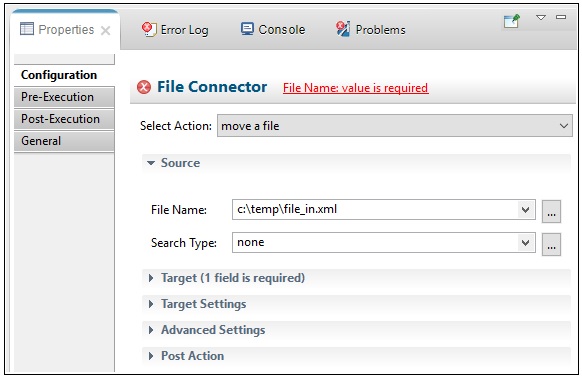
- Expand the Target parameter group and specify a destination for the source file, as shown in the following image.
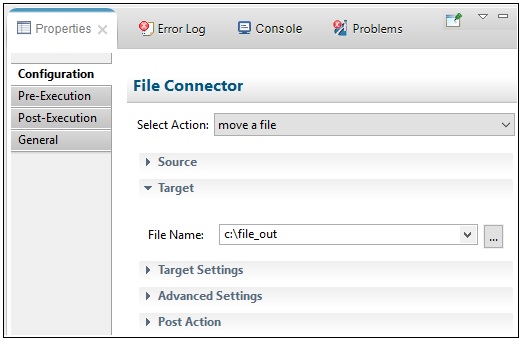
- Click Save on the toolbar to save the changes you made to your process flow, as shown in the following image.
To open an available process flow for further configuration or editing at any point, simply double-click the name of the process flow in the Flows subfolder of an application project, as shown in the following image.
The selected process flow will open as a tab in your workspace area.