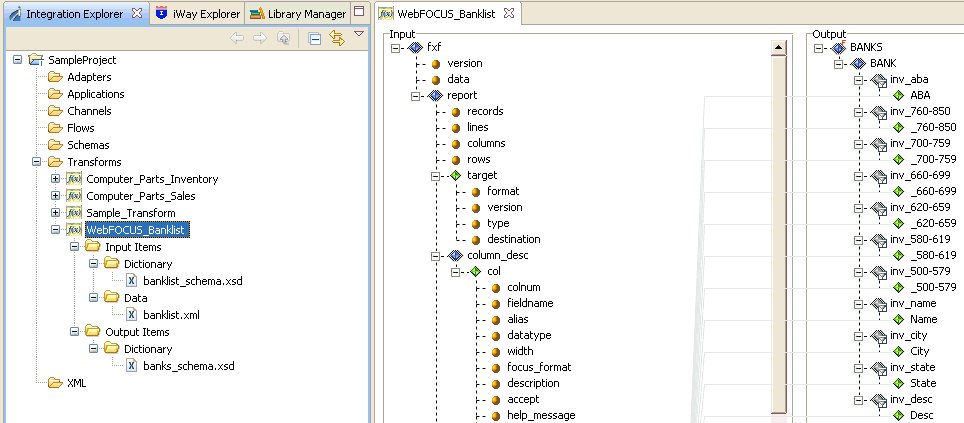
Creating a Transform Component
|
How to: |
iWay Transformer provides a quick way to create a Transform component. It guides you through the major steps of building the component. After you create the component, you can manipulate it using the editing and configuration tools provided with iWay Transformer. The following procedure shows you how to create a Transform component using iWay Transformer.
Procedure: How to Create a Transform Component
To create a Transform component:
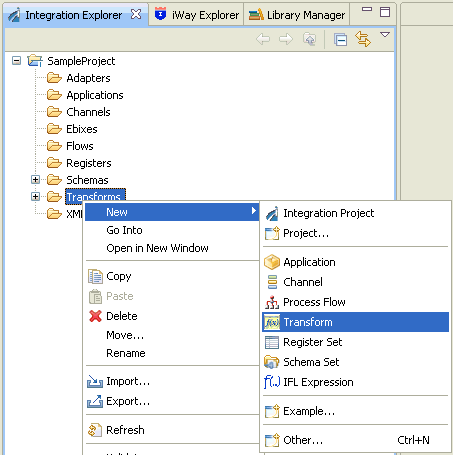
- Right-click
the Transforms folder in your Integration
Project, select New, and then click Transform,
as shown in the following image.
The New iWay Transform dialog box opens, as shown in the next image.
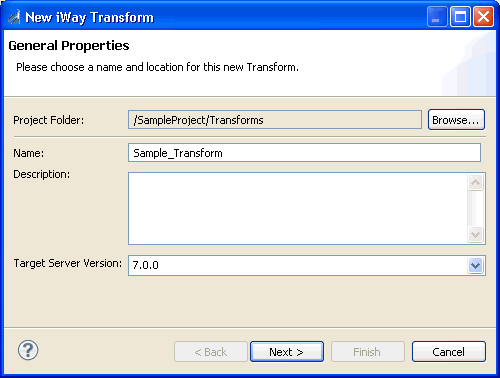
- Type a name
and a description (optional) for the new Transform component.
Tip: If required, you can change the preselected project folder by clicking Browse next to the Project Folder field.
- Select a target version of iWay Service Manager (iSM) from the Target Server Version drop-down list.
- Click Next.
The Transform Type Selection pane opens, as shown in the following image.
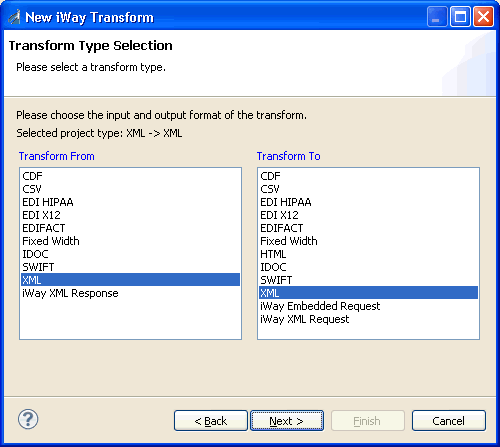
- From the list in the Transform From section, select the format of the input data, for example, XML.
- From the list in the Transform To section, select the format of the output data, for example, XML.
- Click Next.
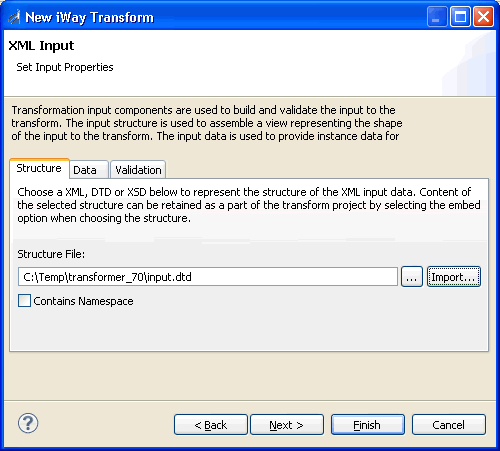
The XML Input pane opens with the Structure tab selected, as shown in the following image.
Tip: You can skip the remaining steps by clicking the Finish button if it is enabled. You can then manually alter the Transform component properties at your convenience from the Properties dialog box.
- In the Structure
File field, type the name of a DTD, XSD (schema), or XML file that represents
the input dictionary.
- Click the ellipsis button to the right of the field to browse the workspace for the structure file.
- Click the Import button to the right of the field to browse your file system for the structure file.
- Click Next.
The XML Output pane opens with the Structure tab selected, as shown in the following image.
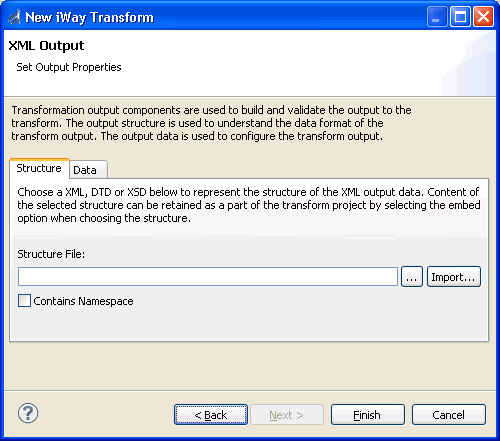
- In the Structure
File field, type the name of the data dictionary that represents
the structure of the output data (optional).
- Click the ellipsis button to the right of the field to browse the workspace for the structure file.
- Click the Import button to the right of the field to browse your file system for the structure file.
- Click Finish.
The new Transform component is displayed in the iWay Integration Tools workspace, as shown in the following image.
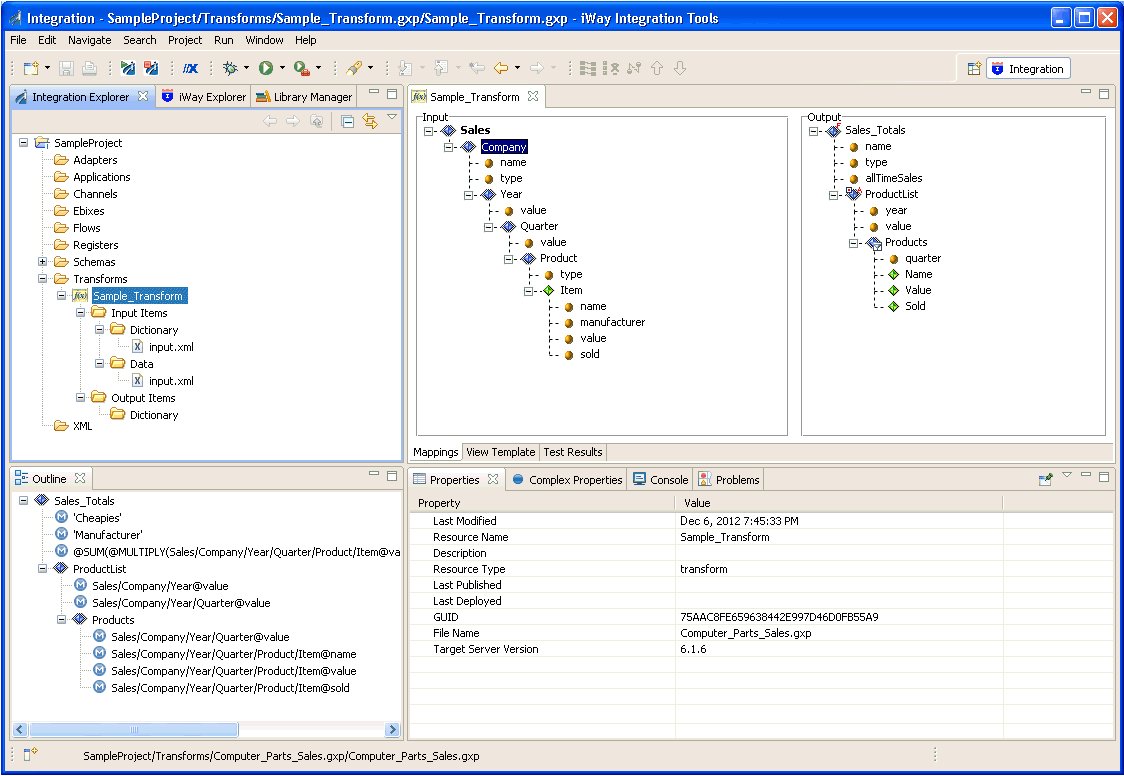
The Transform component and any related resources (for example, structure files or input data) exist in the workspace subdirectory that you named during the creation process. For example:
iIT_Home\workspace\SampleProject\Transforms\Sample_Transform.gxp
Procedure: How to Add a Transform Component From the iWay Registry
You can load a Transform component from the iWay registry into your Integration Project by exporting it using iWay Explorer.
- Click the iWay
Explorer tab.
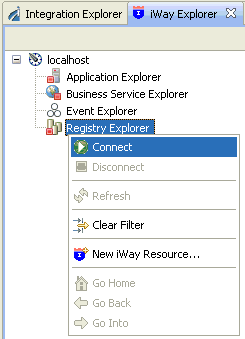
- Right-click Registry Explorer, and select Connect from the context menu.
- To obtain
a list of Transform components that are available for export, expand Registry Explorer, Components,
and then Transforms, as shown in the following
image.
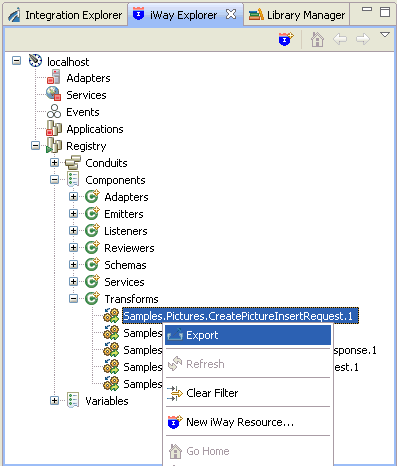
- Right-click
the Transform component, and select Export from
the context menu.
The Export Resource dialog box opens, as shown in the following image.
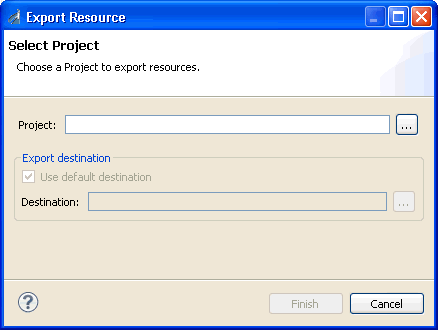
- Click the
ellipsis button to the right of the Project field.
The Export dialog box opens, as shown in the following image.
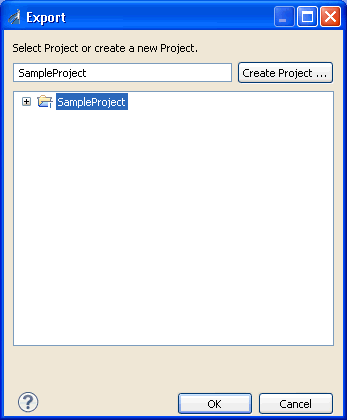
- Select an
available Integration Project to which the Transform component will
be exported, and click OK.
You are returned to the Export Resource dialog box, where the selected Integration Project name is displayed in the Project field, as shown in the following image.
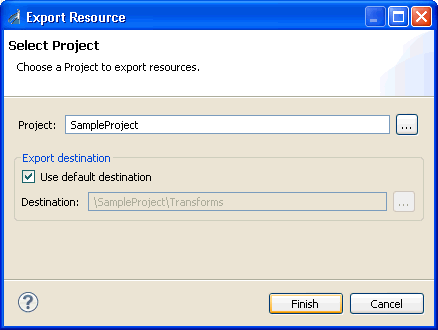
- Click Finish.
Procedure: How to Add a Transform Component From the File System
To add a Transform component from the file system:
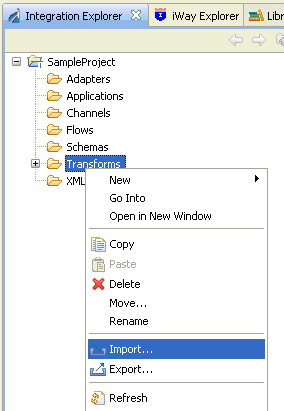
- Click the Integration Explorer tab.
- Expand an
available Integration Project, right-click the Transforms folder,
and select Import from the context menu,
as shown in the following image.
The Import dialog box opens, as shown in the next image.
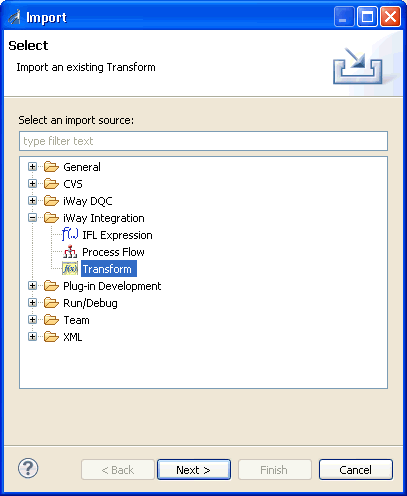
- Expand the iWay
Integration folder, select Transform,
and click Next.
The Transform Import Wizard opens, as shown in the following image.
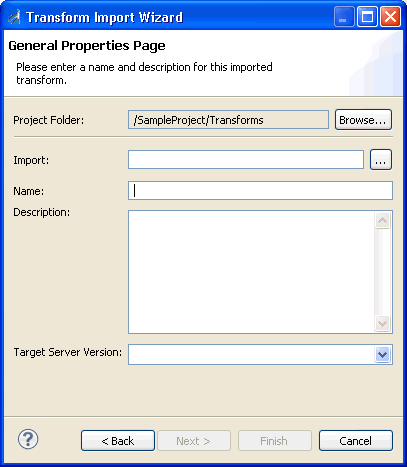
- Click the
ellipsis button to the right of the Import field.
The Open dialog box is displayed, as shown in the following image.
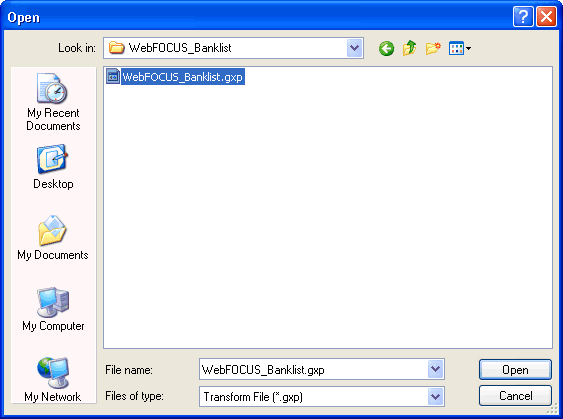
- Browse to
the location of the Transform component (.gxp file extension) on
your file system, and click Open.
You are returned to the Transform Import Wizard, as shown in the following image.
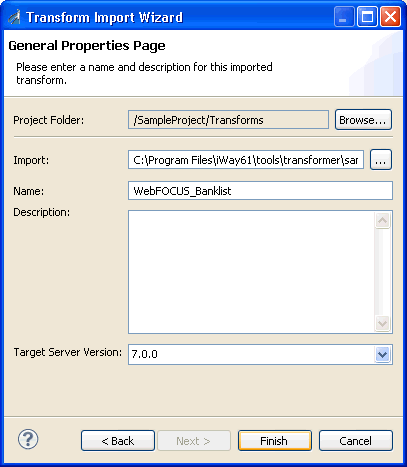
If required, you can change preselected values for the imported Transform component. Verify that the values specified in the following fields are accurate:
- Project Folder. The location to which the Transform component will be imported.
- Import. The location of the existing Transform component.
- Name. The name of the Transform component, as it will appear in the Integration Project.
- Description. The description of the Transform component, as it will appear in the Integration Project.
- Target Server Version. By default, this is the version of iWay Service Manager (iSM) that is installed in the iSM home directory.
- Click Finish.
The imported Transform component is loaded into the specified project folder location and displayed in iWay Transformer, as shown in the following image.
