Configuring and Working With Apache Subversion
|
Topics: |
This section describes how to configure and work with Apache Subversion (SVN) using iWay Integration Tools (iIT).
Adding Repositories
You can add new SVN repository locations to manage your projects as required.
To add a new SVN repository location:
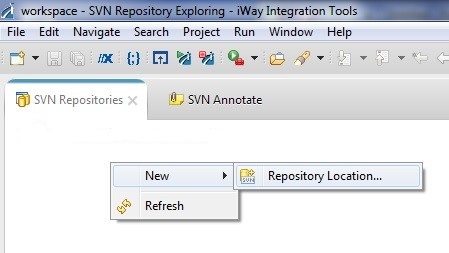
- Right-click anywhere in the SVN Repositories tab, select New from
the context menu, and then click Repository Location,
as shown in the following image.
The Add SVN Repository dialog opens, as shown in the following image.
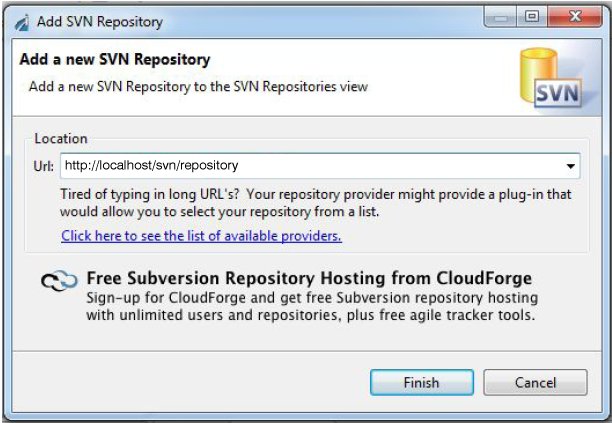
- Type the URL for your SVN repository in the Url field.
- Click Finish.
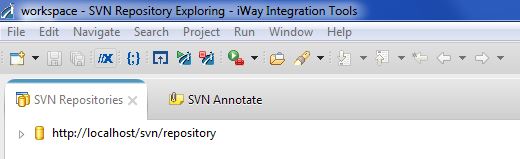
The SVN repository location appears as a node in the SVN Repositories tab, as shown in the following image.
Checkout Projects From SVN
If you have a project synchronized in the SVN repository and want to add It to iWay Integration Tools (iIT), perform the following steps:
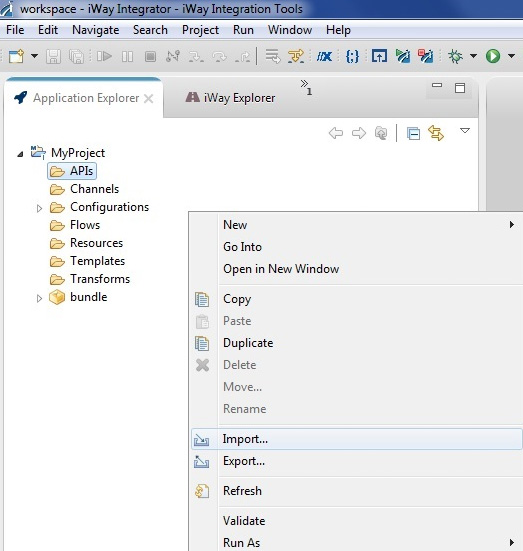
- Ensure that you have switched to the Integration perspective in iIT.
- Right-click in the Application Explorer tab and select Import from
the context menu, as shown in the following image.
The Import dialog opens showing the Select pane, as shown in the following image.

- Expand SVN, select Checkout
Projects from SVN, and then click Next.
The Checkout from SVN dialog opens showing the Select/Create Location pane, as shown in the following image.

- Click Use existing repository location and
select the URL for SVN repository that you previously added.
Note: If you have not previously added a SVN repository location or want to add a new SVN repository location, then you can do so from this dialog by using the Create a new repository location option.
- Click Next.
The Select Folder pane opens, as shown in the following image.
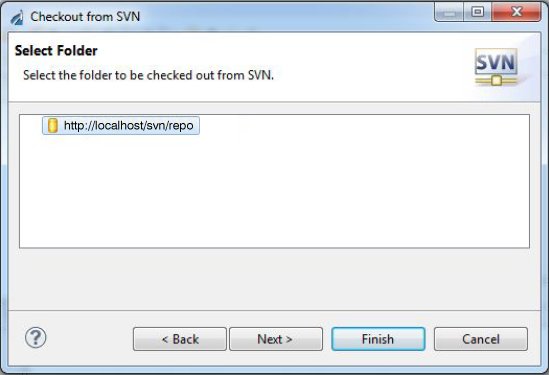
- Select the folder(s) to be checked out from the SVN repository.
Here you can select a specific folder or select the root SVN repository location to check out all of the folders in the SVN repository.
- Click Next.
The Check Out As pane opens, as shown in the following image.
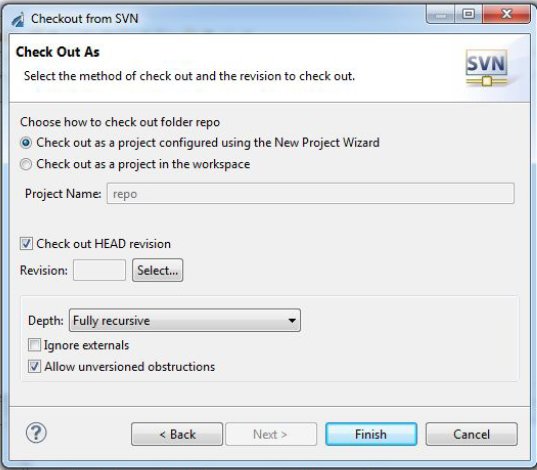
- Select your check out options.
Determine if you want to check out the selected folder as:
- A new project configured using the New Project Wizard.
- An existing project in the workspace.
Note: If you want to check out the selected folder with a specific version of the project, then deselect the Check out HEAD revision option and specify a revision number.
- Click Finish.
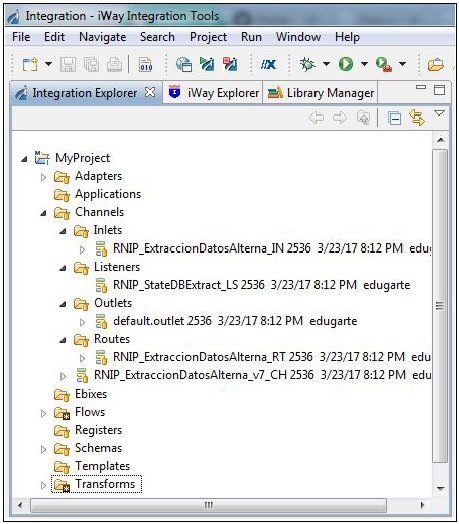
Your checked out project displays in iIT, as shown in the following image.
Understanding the Features of an SVN Project
- Users: You can identify which user has made a change on a file and on what date/time.
- State: Files may have some states that indicate:
- New File: If you add any new files, then they are identified with a question mark (?) icon.
- Synchronized File: All synchronized files are identified with an orange icon.
- Not Synchronized File: If files are not synchronized with the SVN repository, then they are identified with an asterisk (*) icon.
- Ignored Files: If files are ignored by the SVN repository, then they do not have any icon.
Synchronizing With the Repository
The Synchronize with Repository option compares all files against the SVN repository, which enables you to check changes between local and remote files.
Right-click, select Team from the context menu, and then Synchronize with Repository, as shown in the following image.
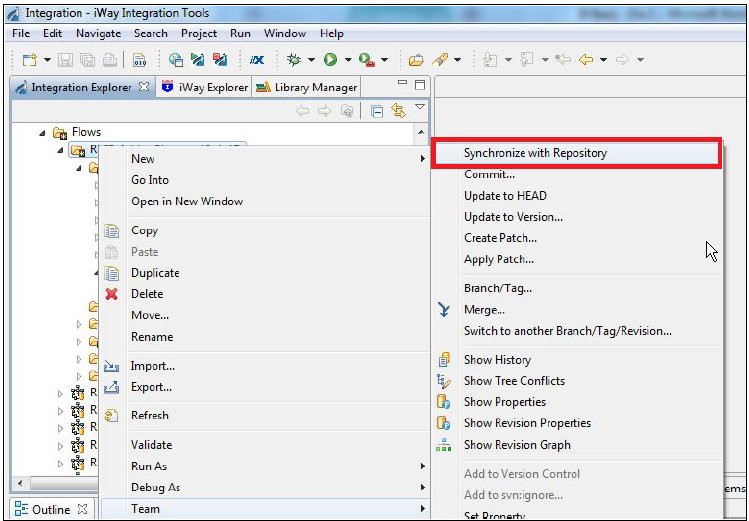
The perspective will change (a Synchronize tab is shown). You will see the modified files locally and the incoming and outgoing changes. In addition, any conflicts will be shown.
- A File icon with a blue arrow pointing left indicates that changes are incoming to the project.
- A File icon with a black arrow pointing right, indicates a change is outgoing to the SVN repository.
- A File icon with a black arrow pointing right and a plus sign character (+), indicates a new file is outgoing to the SVN repository.
- A File icon with a double red arrow indicates a conflict between the local and remote repository.
- A File icon with a red arrow pointing left or right indicates that a file has been deleted on the local or remote repository.
For example:
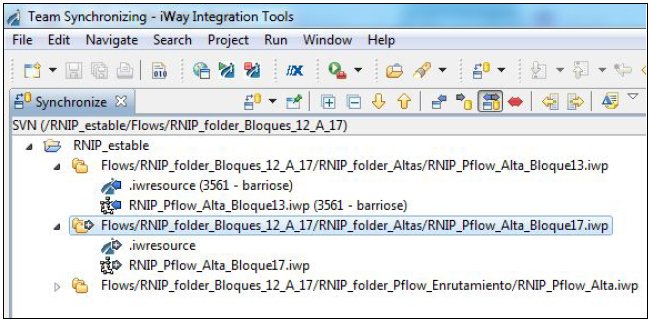
A summary of changes can be found on the lower-right corner, as shown in the following image.

Show the History
To view a history of changes (e.g. for a file) with revision numbers and comments, right-click the file, select Team from the context menu, and then Show History, as shown in the following image.
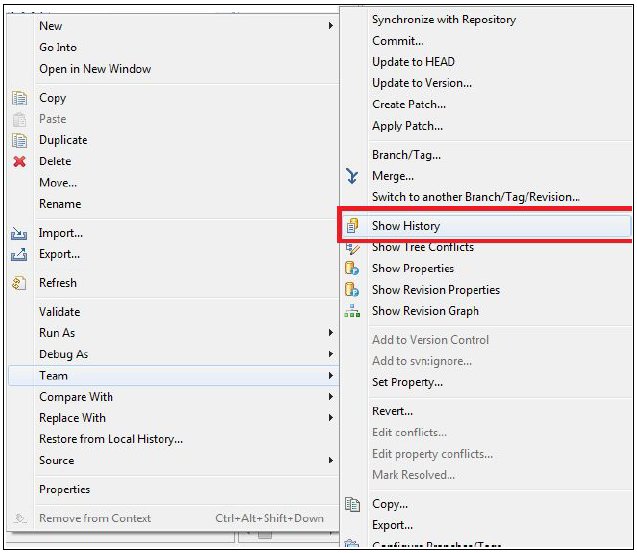
The History tab opens and provides a table with the following columns:
- Revision
- Date
- Author
- Comment
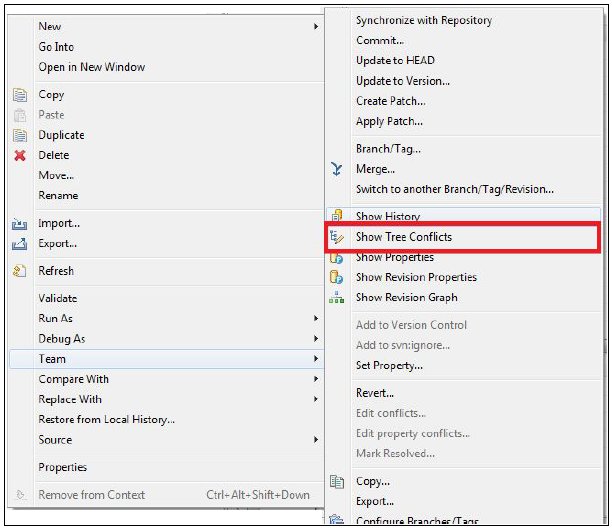
Show Tree Conflicts
If you have a file that is in conflict, you can review the details by right-clicking the file, selecting Team from the context menu, and then Show Tree Conflicts, as shown in the following image.