iWay Integration Tools Overview
|
Topics: |
iWay Integration Tools (iIT) is an Eclipse-based design-time environment that allows you to develop and manage scalable integration applications within the iWay Service Manager (iSM) framework requiring little to no coding.
Installing and Starting iWay Integration Tools
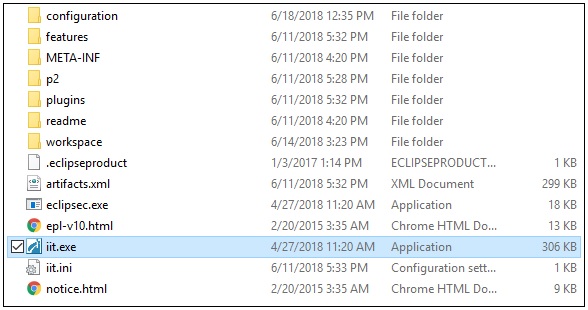
iWay Integration Tools (iIT) is packaged as a .zip file, for example:
iIT-8.0.1-win32.win32.x86_64.zip
To install iIT, simply extract this .zip file to a folder on your file system, for example:
C:\iIT_801
To start iIT, double-click the iit.exe file under the folder where you extracted the .zip file, as shown in the following image.
Setting the Workspace
After starting iIT, the Eclipse Launcher dialog box opens, as shown in the following image, which prompts you to set a workspace location.
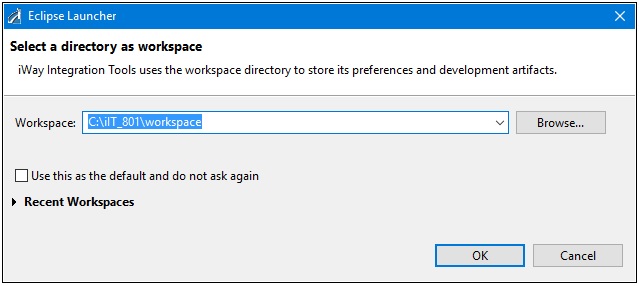
The workspace is a container for all of the application projects that you plan to create.
Workbench Layout
|
Topics: |
After you have defined a directory for your iIT workspace, the workbench opens, as shown in the following image.
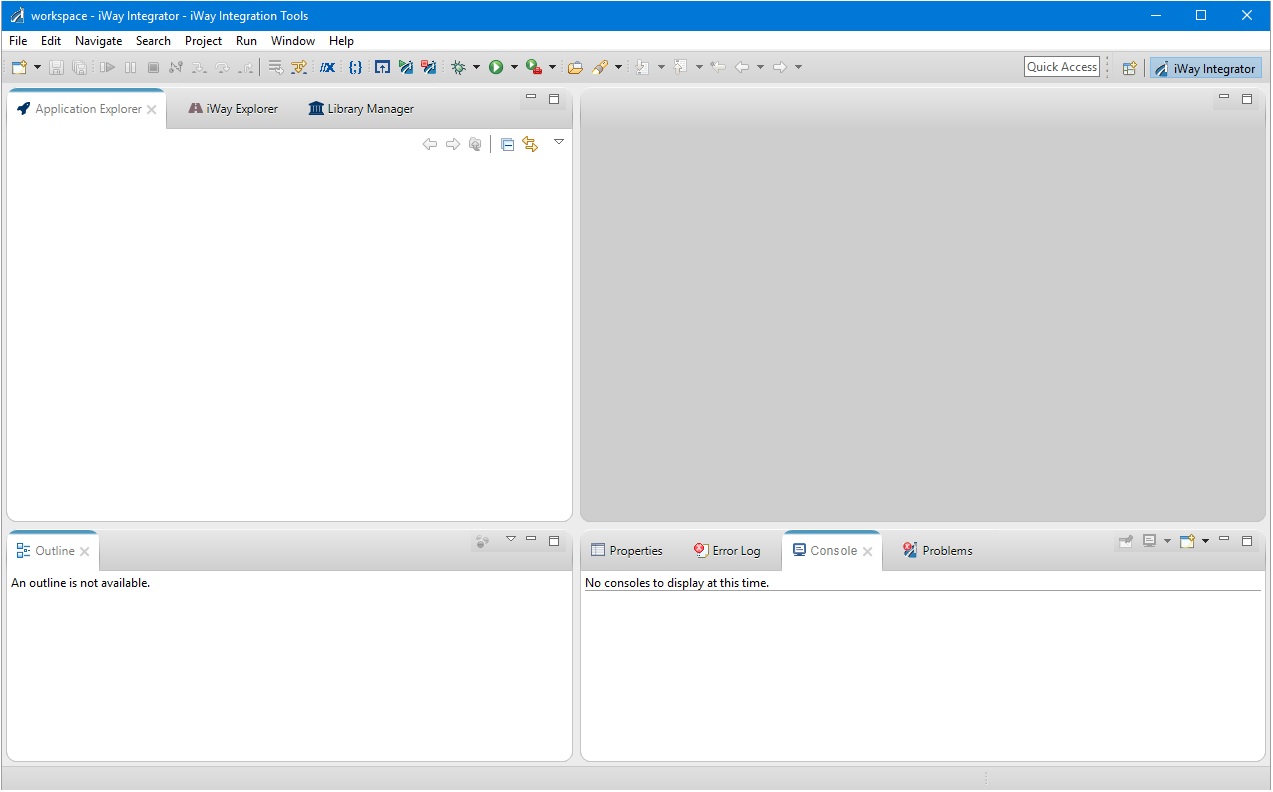
When you start iIT for the first the time, the workbench is empty. To better understand the layout of the workbench, the following image shows a sample application project that has been created, which includes a simple process flow.
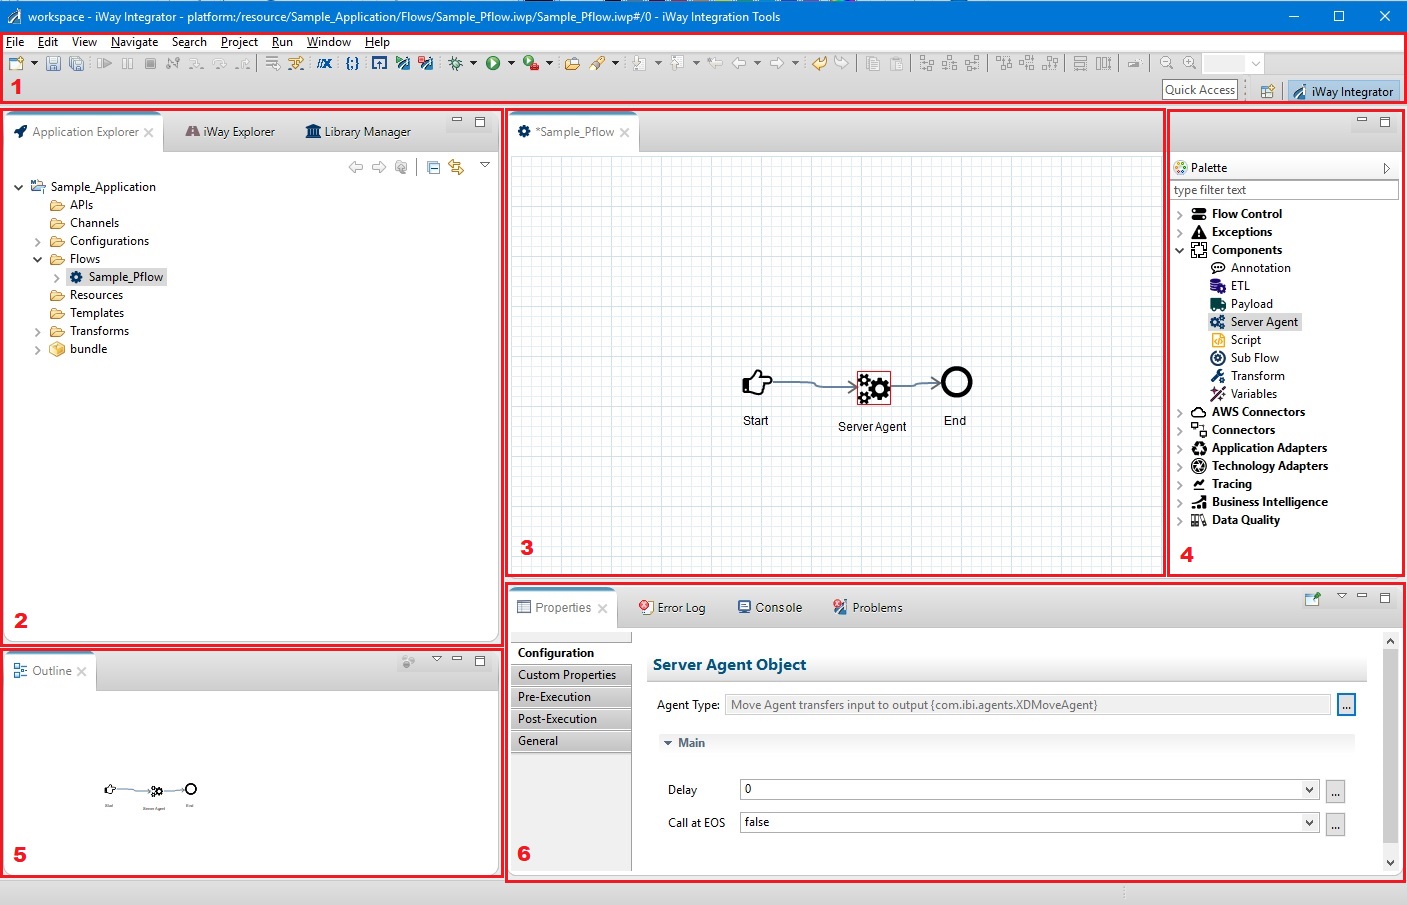
The workbench is organized as follows:
- Menu bar and toolbar. Provides a variety of options for managing your projects, starting and stopping iWay Service Manager (iSM), testing and running your projects, and selecting additional tools.
- Navigator. The navigator pane appears on the left and contains the following tabs:
- Application Explorer. Used to build your individual application projects. The Application Explorer uses a folder structure to organize all of your components and resources.
- iWay Explorer. Allows you to interact with deployed instances of iSM.
- Library Manager. Provides a centralized location of reusable components for channels and transforms.
- Workspace. The workspace pane appears to the right of the navigator pane. This is the area in which you design and develop various iWay components (for example, channels, APIs, process flows, and transforms).
- Palette. Appears to the right of the workspace area when a new process flow is created. The palette contains all of the objects and components that are required to construct a process flow.
- Outline. The outline pane appears below the navigator pane. It displays a preview of the process flow as you create it.
- Properties. The Properties window pane appears at the bottom of the workspace. This pane displays the attributes of the selected object in a process. You can change any attribute of the selected object from the Properties window.
Managing Perspectives
The workbench is the name for the development environment that contains one or more perspectives. A perspective is a simple collection and layout of views and editors. Editors are usually found in the center of a perspective and are used for editing content. Views surround the editor and allow you to browse and modify the properties of resources.
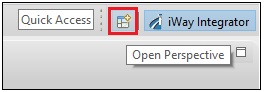
To access available perspectives, click Open Perspective in the upper-right corner, as shown in the following image.
The Open Perspective dialog opens, as shown in the following image.
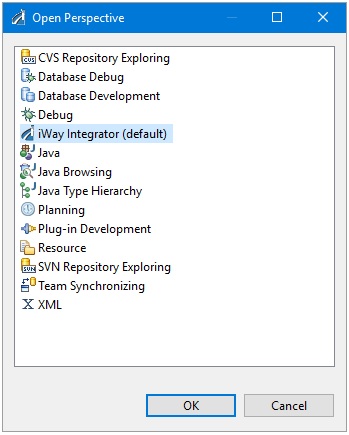
Notice that the iWay Integrator perspective is set by default. Click OK to exit from this dialog.
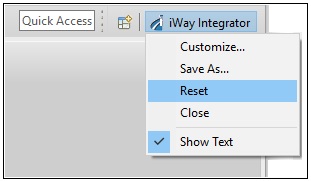
If your iWay Integrator perspective should change for any reason (for example, you accidentally close one of the views), you can easily restore the default settings by right-clicking iWay Integrator in the upper-right and selecting Reset from the context menu, as shown in the following image.
The Reset Perspective prompt is displayed, as shown in the following image.
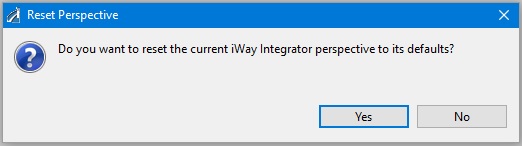
Click Yes to confirm.
Setting the iWay Home Directory
Once the workbench is open, it is recommended that you first set your iWay home directory.
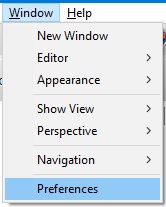
To do this, click Window from the menu bar and select Preferences, as shown in the following image.
The Preferences dialog opens, as shown in the following image.
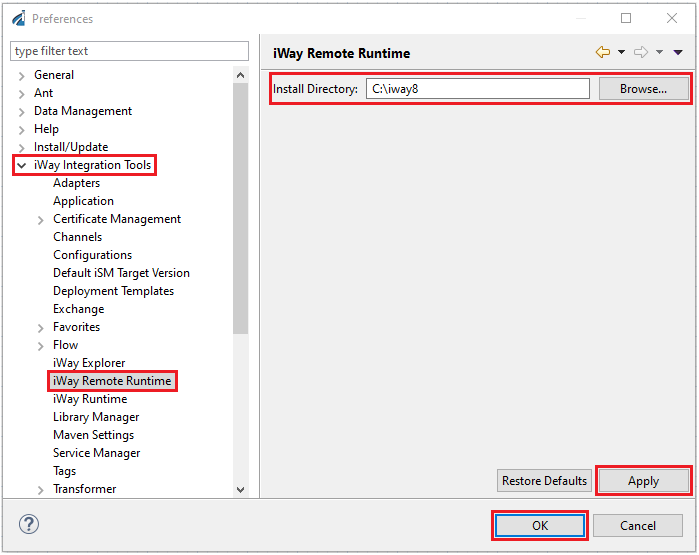
Expand the iWay Integration Tools preference in the left pane and then click iWay Remote Runtime. Click Browse to navigate to the location of your iWay 8 installation on your system. Click Apply and then click OK.
The Set default target server version dialog opens, as shown in the following image.
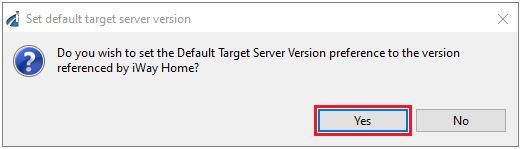
Click Yes, if you want the Default Target Server Version that is used by iIT to match the version of your iWay 8 installation (iWay Service Manager) that is installed in the iWay home directory you have referenced.