Use Case: Hosting RESTful APIs
|
Topics: |
This use case describes how to host RESTful APIs for consumption by external callers using iWay Integration Tools (iIT). This enables an application to expose business processes based on a given endpoint definition. The use case includes a simple RAML file (mailbox.raml) as an example, which is packaged in the mailbox_raml_sample.zip file.
In a real-world scenario you will be responsible for creating your own RAML file to describe your specific business endpoints, which you would like to expose. This can be done using a variety of tools. You also have the option of designing and hosting your RESTful APIs without a pre-existing RAML file. However, this is not recommended and not covered in this use case. This use case also assumes general understanding of RESTful services and concepts related to RESTful APIs.
Key Terms:
- RESTful API Modeling Language (RAML). A YAML-based language for describing RESTful APIs. It provides all of the information required to describe RESTful or practically RESTful APIs.
- RESTful API. A RESTful API is an application programming interface (API) that uses HTTP requests to GET, PUT, POST, and DELETE data.
This use case includes the following topics:
Defining the API Structure Using a RAML File
- Open iWay Integration Tools (iIT) and select the default workspace.
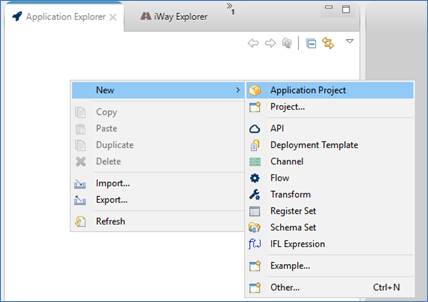
- Right-click anywhere within the Application Explorer tab, select New from the context menu, and then click Application Project,
as shown in the following image.
The New Application Project dialog opens, as shown in the following image.
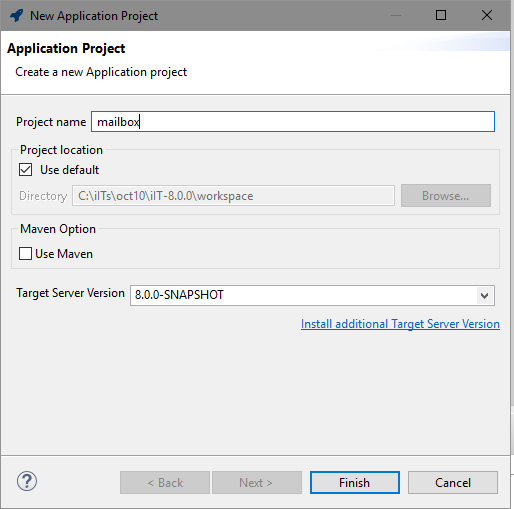
- Provide a project name (for example, mailbox) and then click Finish.
A new application is created, containing the required project folder structure, as shown in the following image.
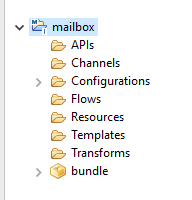
The bundle folder is the application package name, which you can rename if required. During deployment, you will be prompted to select the name of the deployed application.
- Right-click the APIs folder, select New from the context menu, and then click API, as shown in the following image.
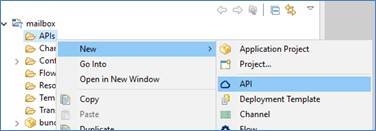
It is highly recommended that you create the API based on a RAML file definition. A sample RAML file (mailbox.raml) is provided with this use case. However, there are many samples that you can find and download online.
The API Object dialog opens showing the Deployment Template General Properties pane.
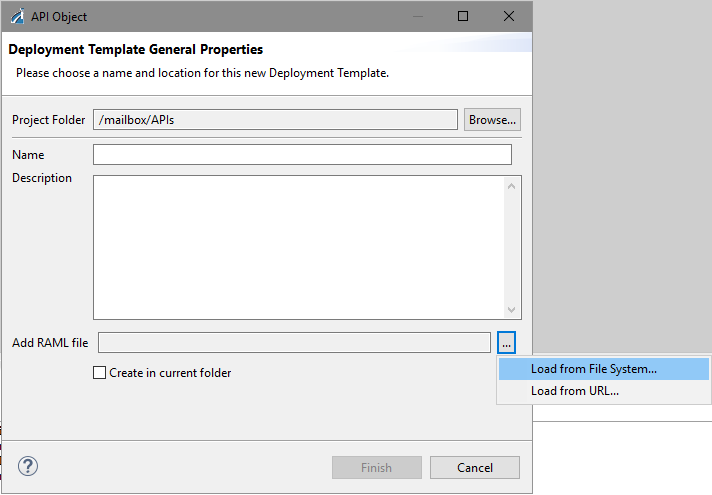
- In the Add RAML file field, click the Browse (…) button and then select Load from File System.
- Navigate to the location on your file system where the sample mailbox.raml file is located.
After selecting the mailbox.ram file, you are returned to the Deployment Template General Properties pane, as shown in the following image
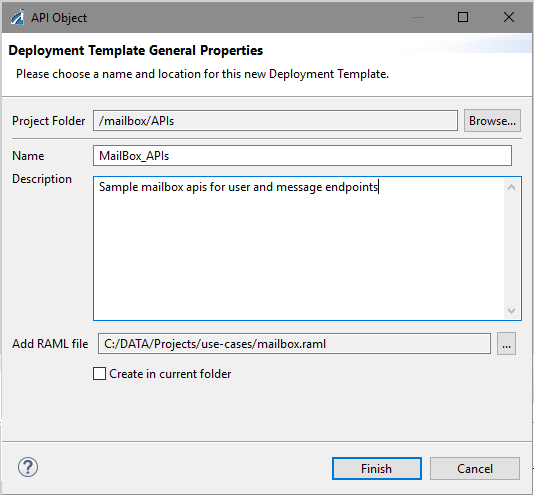
- Provide a name (for example, MailBox_APIs) and an optional description.
- Click Finish.
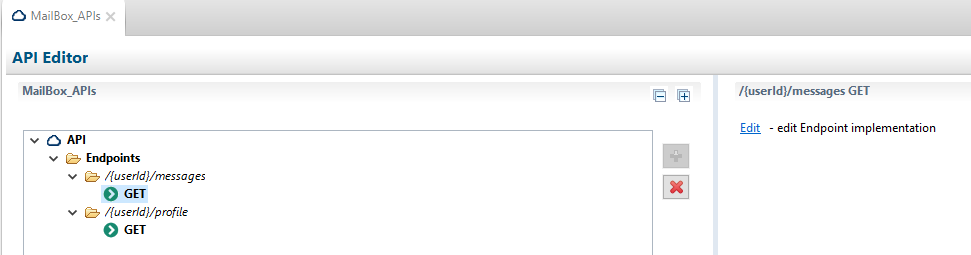
The RAML file is parsed and the structure will be presented for configuration purposes.
Defining the Business Logic to be Executed for each API Endpoint and its Corresponding Action
Each of the actions for any given endpoint has an Edit option located on the right pane. This enables you to assign business logic (a process flow) to be executed for a specific action on the given endpoint.
- In the API Editor, select a GET action, and then on the right pane, click Edit, as shown in the following image.
The default process flow opens in a new tab, which will either have only a START and END object, or will also include a PAYLOD object between the START and END objects. A PAYLOAD object is available if the RAML definition included a sample response document.
The following image shows a sample /{userid}/profile GET operation where the PAYLOAD object is preconfigured with information from the RAML file and provides a sample response.
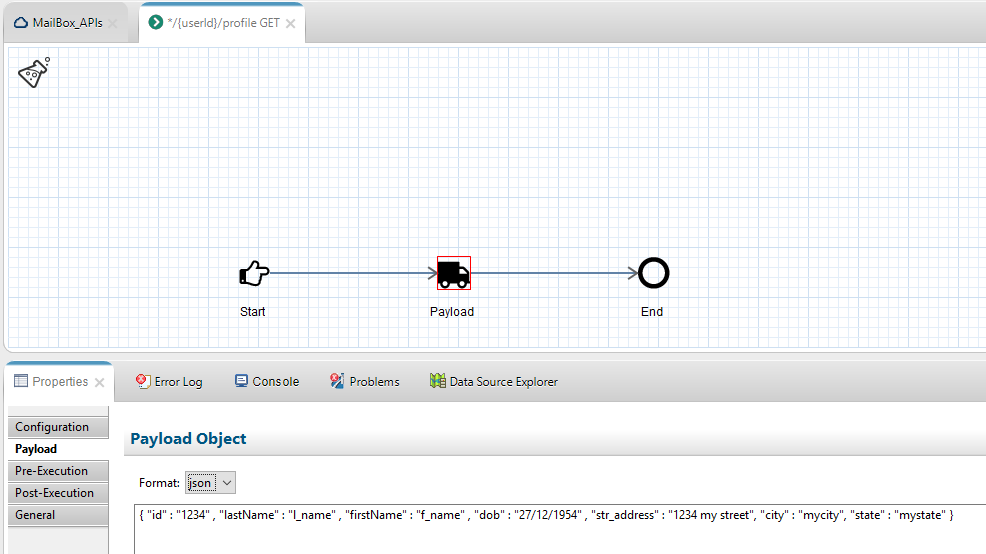
- If required, you can change the preconfigured values of the sample response for testing purposes and save the application project.
In a real-world scenario, the process flow for each action endpoint will be updated to host the business logic to render the response for the specific application. This can be a simple or very complex process flow.
Configuring the API Settings for the HTTP Communication Layer
- Click the MailBox_APIs tab, and then in the middle of the screen, click Settings, as shown in the following image.

This enables you to configure the HTTP properties for hosting the APIs. APIs consist of multiple endpoints where each API is hosted by a single HTTP listener. The application itself can have multiple APIs hosted on many HTTP listeners.
- Expand the IP Settings section and provide a port number that is not currently being used by your system (for example, 1234), as shown in the following image.
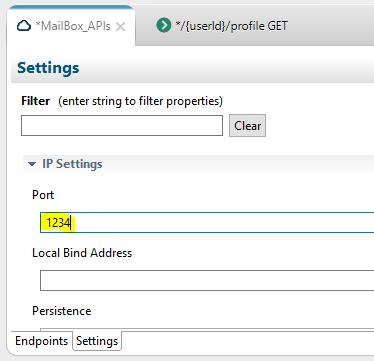
Note: You must provide a valid port number. For more information on any of the other parameters in this section, see the iWay HTTP Solutions Development Guide.
- Save your work by clicking the multi-disk icon.
Your application is now ready for deployment.
Deploying the Application
- Right-click the bundle folder (or the new name you provided for this folder), select Run As from the context menu, and then click Application Deployment, as shown in the following image.

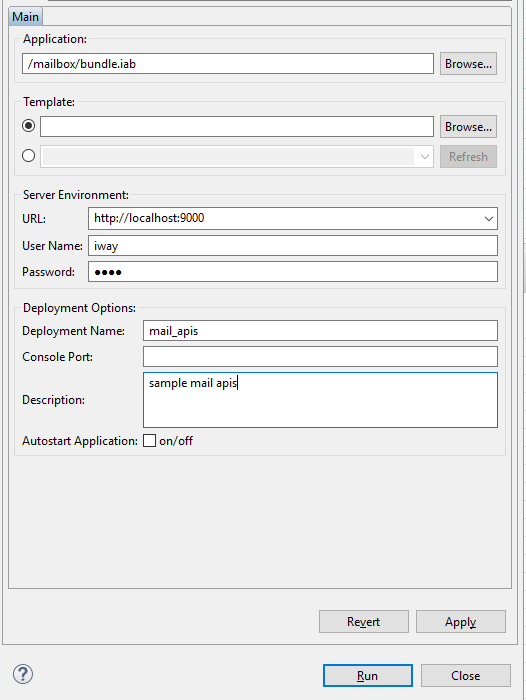
The application deployment (Main) dialog opens, as shown in the following image.
Note: The first time you deploy your application, you are prompted to provide values for the deployment properties. For any subsequent deployments or redeployments, you are prompted to reconfirm the replacement of the previous deployment. If you wish to reconfigure the deployment properties, then select Run Configurations.
- In the Server Environment section, provide the URL and credentials for the iWay Service Manager (iSM) instance where your application will be deployed.
- In the Deployment Options section, provide the deployment name for your application, which will be the actual name of the
deployed/running application, then provide an optional description.
You also have the Autostart Application option, which you can leave unchecked for this deployment instance.
If your application required a runtime template with server-based properties, you can also select the specific template to apply to the deployment. You will not be specifying a template for this deployment instance.
- Click Apply and then click Run.
The application is deployed successfully and the Console tab should display messages similar to the ones shown in the following image.

Starting and Testing the Application Using a Browser
- Open the iSM Administration Console (the default is http://localhost:9999 with admin/admin credentials).
- Click the Management link in the upper-right corner, as shown in the following image.

- Click Deployments.
Your application is listed in the Deployments pane, but is not yet started, as shown in the following image.

- Start your application either from the Windows Services dialog, a command prompt, or from the iSM Administration Console by
clicking on the red minus icon in the State column.
Once the deployed application has started, the icon in the State column will change to a green check mark, as shown in the following image.

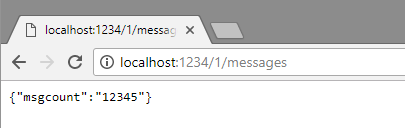
You can use your browser to test the API call. Since no business logic (process flows) was modified, which are hosted by the end-points, you should receive the default response which was provided in the Payload objects as defined by the sample RAML file.
- Open a new browser tab/window and enter the following URL:
http://localhost:1234/1/profile
You will receive a default JSON response, as shown in the following image.
You have now hosted your first set of APIs providing two endpoints for consumers. You can proceed to create your own RAML definitions, define business processes to be executed for the endpoints, and expose your APIs to internal and external consumers.