Adding an Adapter to iIT Designer
|
Topics: |
The Adapter object is a configured connection to a particular instance of a back-end system, for example, the MySAP adapter. You can only create an adapter object using adapters that have a currently configured connection (target) to a back-end system or a database.
Adapter targets are configured in the iWay Explorer. Adding an adapter consists of the following steps:
- Creating a new iWay Resource
- Selecting the adapters to be displayed in the Adapter Explorer
- Connecting to an Enterprise Information System
- Creating a Registry
- Exporting an Adapter Target to an Integration Project
Creating a new iWay Resource
|
How to: |
The following procedure describes how to create a new Resource in iWay Explorer
Procedure: How to Create a new iWay Resource
To create an iWay Resource in iWay Explorer:
- Start iIT Designer and click the iWay Explorer tab in the Navigator pane.
- Right-click
in the Navigator pane and select New iWay Resource from
the drop-down list.
The New iWay Connection dialog box opens, as shown in the following image.
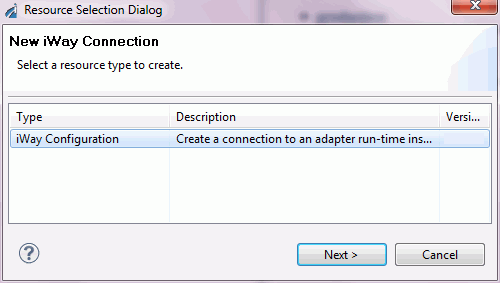
- Select iWay Configuration and click Next.
- In the Configuration Alias field, type a name for the resource, for example, SampleConfig.
- Select either an HTTP Connection or a JCA connection. Click Next.
- The Connection
Information dialog box opens, as shown in the following image.
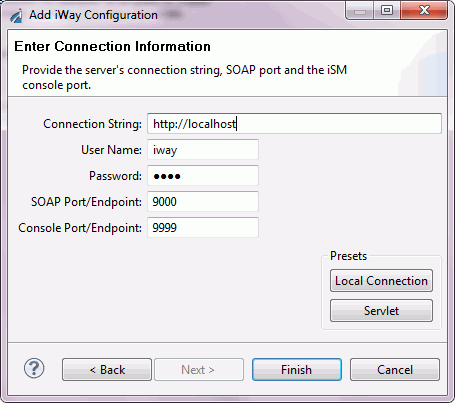
- Enter information
in all of the following fields:
- Connection String
- User Name
- Password
- SOAP Port/Endpoint
- Console Port/Endpoint
- Click Finish.
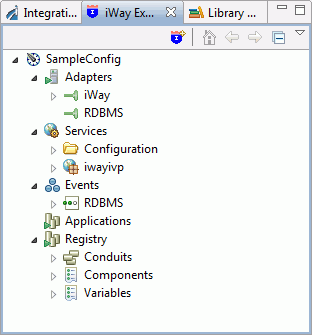
The new iWay Resource appears in the Navigator pane. Expand the new resource to reveal the Adapters, Services, Events, Applications, and Registry nodes. The default adapters under the Adapters node are iWay and RDBMS. The default adapter under the Events node is RDBMS. The following image shows an expanded resource named SampleConfig.
Selecting the Adapter
|
How to: |
Procedure: How to Select an Available Adapter
The following procedure describes how to filter the list of adapters that are displayed in the Adapters node.
- In the Navigator
pane, right-click the resource and right-click. Select Connect in
the drop down list to connect to the iSM server.
Once connected, all the nodes have green arrow icons to show that a connection has been established.
- Select the
Adapter node and right-click. Select Edit
from the drop-down list.
The Adapter Selection dialog box opens. An example of the Adapter Selection page is displayed in the following image.
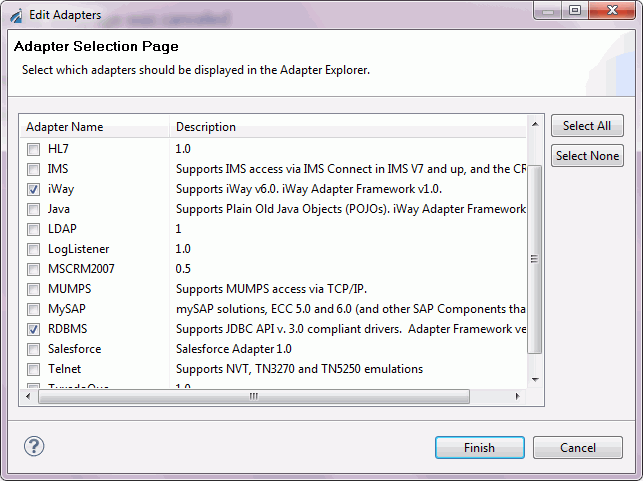
Note: Only the adapters with the corresponding jar files, present in your program files folder, appear on this list.
- Select the adapter(s) in the Available adapters list that you want to add to the display.
- Click Finish.
The selected adapter(s) appears under the Adapters node.
Connecting to an Enterprise Information System
|
Topics: |
|
How to: |
An iWay Explorer target is the connection point to a specific Enterprise Information System (EIS), such as SAP or Oracle. Through a target, you can browse EIS metadata, generate XML schemas, and create web services.
This section explains how to create a new target, connect to a target, and disconnect from a target. In addition, it explains how to edit and delete an existing target.
About Targets
A target is a connection to an EIS. When you create a target, you define the connection parameters, such as the system name and password. The target is saved in iWay Explorer and available for you to use at any time. You will connect to the target to perform iWay Explorer tasks, and then disconnect when the work session is done. Disconnecting from the application system drops the connection, but the target node remains intact. Although you can maintain multiple open connections, we recommend that you close connections that are not in use.
You also have the option to edit the connection parameters of an existing target and to delete a target that is no longer needed.
Procedure: How to Create a Target
To create a new target:
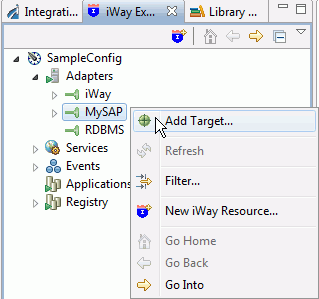
- In the Navigator
pane, right-click the adapter node you want to work with, for example,
MySAP, shown in the following image.
- From the
drop-down list, select Add Target.
The New Target properties dialog box opens, as shown in the following image. The Type drop-down list provides connection options that are specific for the adapter target you are creating. The following image shows the New Target dialog box for an SAP adapter.
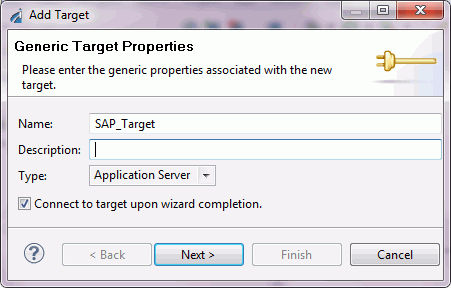
- In the Name field, type a descriptive name for the target, for example, SAP_Target.
- In the Description field, optionally type a brief description of the target.
- From the Type drop-down list, select the target type.
- Click Next.
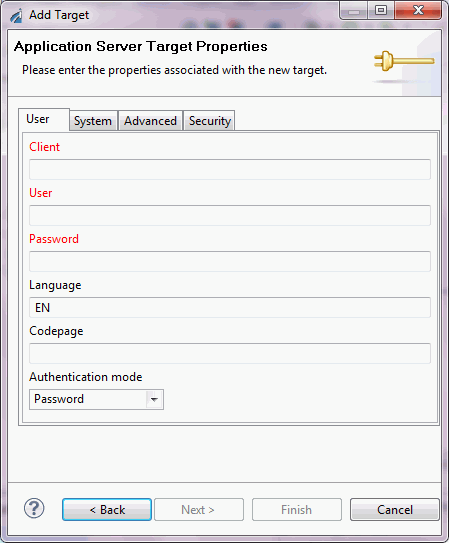
The New Target - Configuration dialog box opens. The configuration parameters that appear are specific to the adapter target you are creating. The following image is an example of a new target configuration dialog box for an SAP adapter.
- Click a
field to activate it, and type a value for that target parameter.
A red field name indicates that the parameter is required.
Note: Depending on the adapter target you are creating, there can be more than one Configuration tab. For example, SAP presents separate User configuration and System configuration dialog boxes. If you are creating a target for the GeoLoad adapter, there is only one configuration tab. See the adapter specific user guide for details on the configuration parameters.
- When configuration
parameter entry is complete, click Finish.
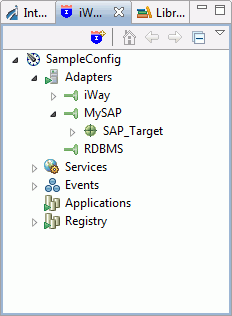
The target appears in the Navigator pane, under the adapter node for which it was created. For example, the SAP_Target appears under the SAP adapter node in the following image.
Procedure: How to Connect to a Target
To connect to a target:
- In the Navigator pane, right-click the target to which you want to connect.
- Select Connect from
the drop-down list.
The Target Connection widow opens. The Target Connection dialog box for an SAP target is shown in the following image.
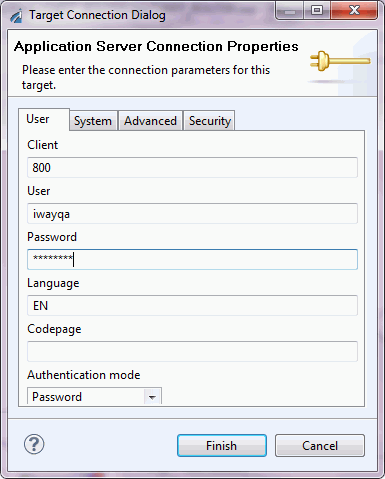
- Type the
password for the target, and click Finish.
The application system objects appear under the target node.
Procedure: How to Disconnect From a Target
To disconnect to a target:
- In the Navigator pane, right-click the target from which you want to disconnect.
- Select Disconnect from
the drop-down list.
The expanded target node closes and is no longer connected.
Procedure: How to Edit a Target
To change the configuration of a target:
- In the Navigator
pane, right-click the target that you want to edit.
Note: You must be disconnected from the target to access the Edit feature.
The following image shows the resulting drop-down list of a target named SAP_Target.
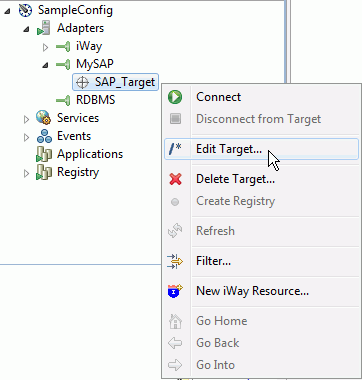
- Select Edit
Target from the drop-down list.
The Edit Target dialog box opens. This dialog box displays the connection parameters that were defined when the target was created. Therefore, this dialog box reflects the EIS parameters of the selected target.
For target editing details, see the specific adapter user's guide.
- Make the
required changes, and click Finish.
The target is updated with the new connection information.
Procedure: How to Delete a Target
To delete a target:
- In the Navigator
pane, right-click the target from which you want to delete. The
following image shows the resulting drop-down list for a target named
SAP_Target.
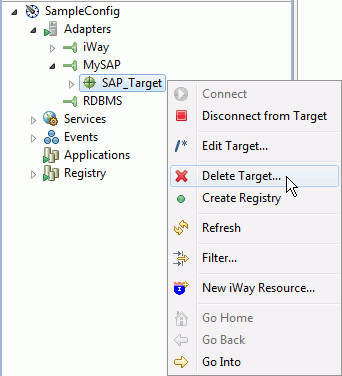
- Select Delete from
the drop-down list.
A confirmation window opens. The following image is an example of a confirmation window.
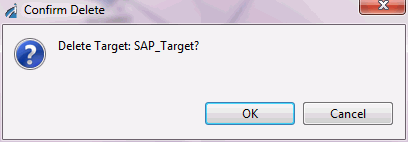
- Click OK.
The selected target node is removed from target list in the Navigator pane.
Creating a Registry
|
How to: |
To create a registry:
Procedure: How to create a registry
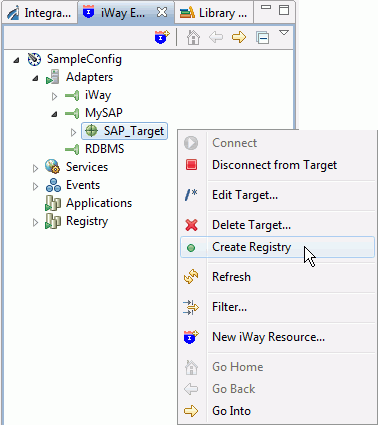
- Select the target for which you want to create a registry and right- click.
- Select Create
Registry from the drop down list. The following image
is an example to create a registry from the SAP_Target
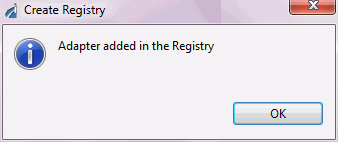
- A confirmation
window opens. The following image is an example of a confirmation
window.
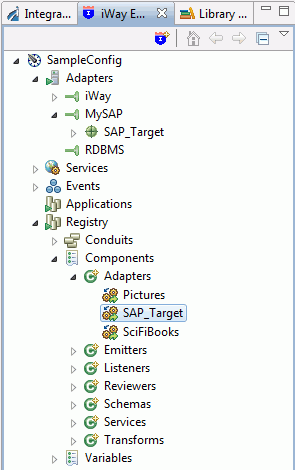
- The new
target now appears in the Registry node. Expand Components and Adapters
to see the newly added target, as illustrated in the following image.
Exporting the Adapter Target
|
How to: |
An adapter must be exported to the server so you will be able to use it in a process flow. To export the adapter target to an integration project:
Procedure: How to Export an adapter target
- Right-click the adapter target in the Registry node. Select Export from the drop-down list.
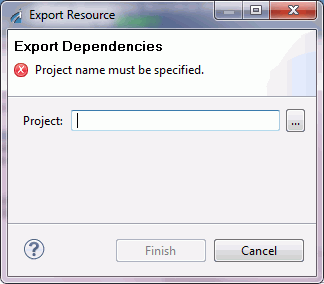
- The Export
Dependencies dialog box opens as shown in the following image.
- Click the
ellipsis (...) button to browse to the project of choice.
A dialog box with the tree nodes and its dependencies opens as shown in the example below.
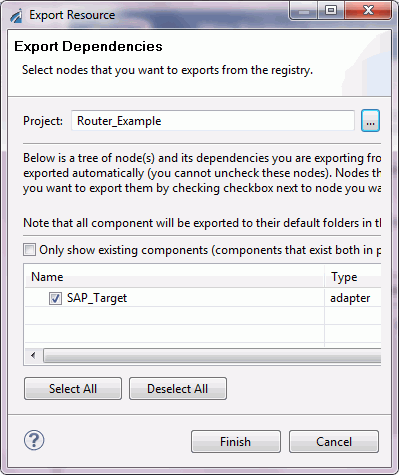
- Some nodes
are checked. These nodes do not exist in your project and will be
exported automatically. Nodes that are not checked by default, exist
in your project. You can choose whether you want to re-export them.
Select the nodes you want to export and click Finish.
The adapter target now appears in the Integration Explorer tab under the Adapters node. An example showing the SAP_Target is illustrated in the image below.
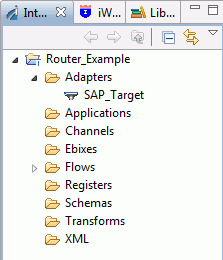
You can now drag and drop the adapter into the workspace to use in a process flow.