Working With iWay Integration Tools (iIT)
|
How to: |
This section describes how to import, edit, and export an Ebix using iWay Integration Tools (iIT).
Procedure: How to Import an Ebix
- Start iWay Integration Tools (iIT).
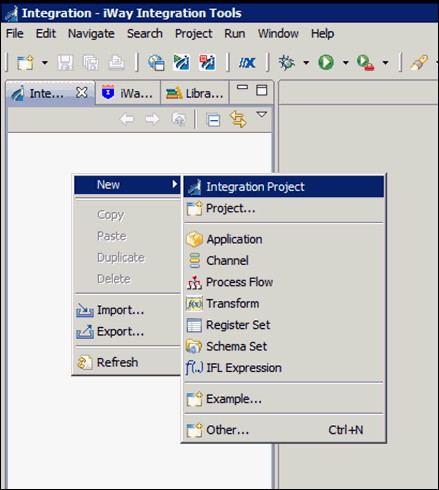
- Right-click the Integration Explorer pane, click New,
and then select Integration Project from
the context menu, as shown in the following image.
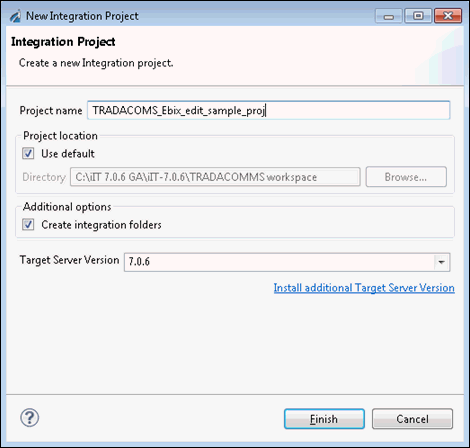
- Enter a new Integration Project name, for example, TRADACOMS_Ebix_edit_sample_proj,
in the Project name field, and then click Finish,
as shown in the following image.
- Right-click the Integration Explorer pane and select Import from
the context menu, as shown in the following image.

- In the Import wizard, expand iWay Integration, select Ebix, and then click Next.
- Click the ellipsis (…) button
to the right of the Import field.
The Open dialog is displayed.
- Navigate to and select your TRAD_TRAD93.ebx file, and
then click Open.

- Click Next.
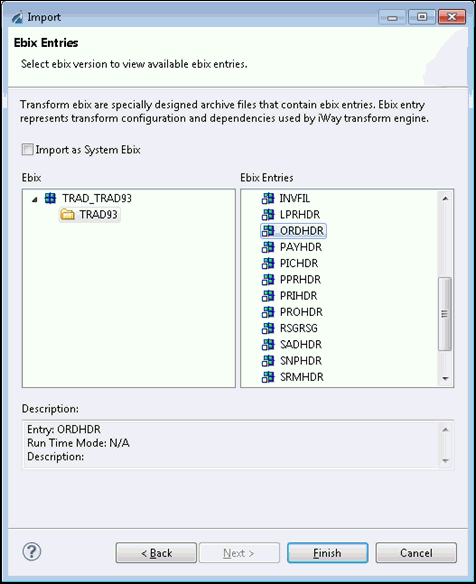
- In the Ebix pane, expand the Ebix tree, and then in the
Ebix Entries pane, highlight ORDHDR, and then click Finish.
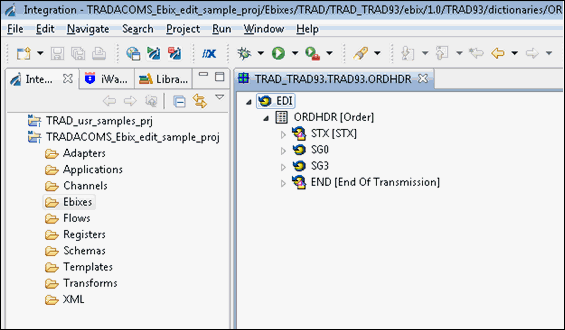
Your iIT interface should now resemble the following image:
Procedure: How to Edit an Ebix
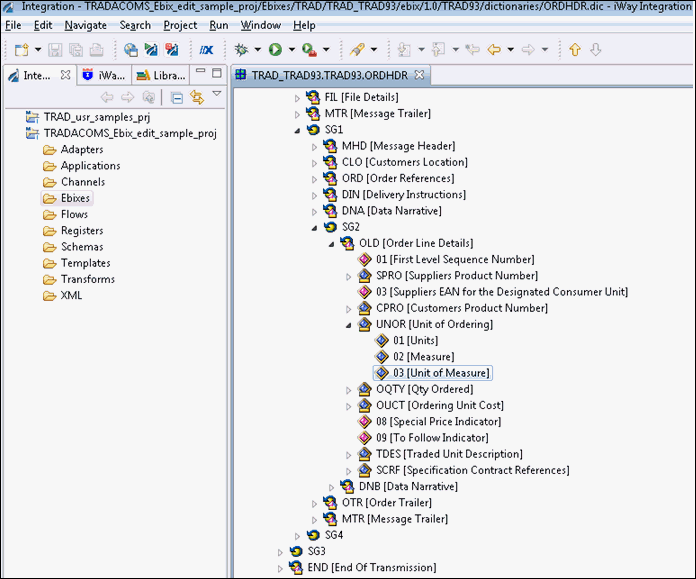
- Expand SG0, SG1, SG2, OLD, UNOR,
and then select 03 [Unit of Measure], as
shown in the following image.
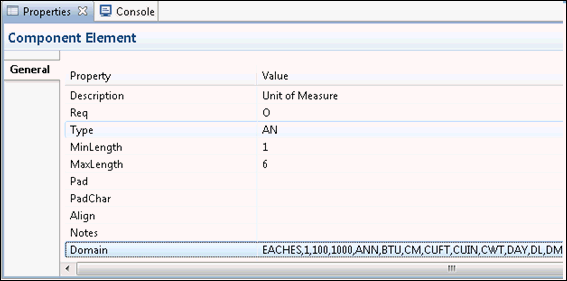
- Click the Properties tab at the bottom, then scroll down
to view the Domain value, and add EACHES into
the Domain value field in the properties window.
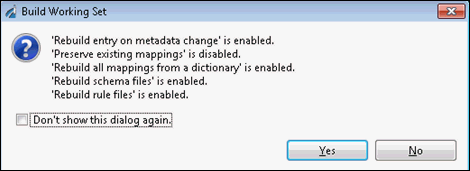
- Save your edited Ebix by clicking the Save icon.
An asterisk (*) character appears next to the file name until you have saved the edited changes, as shown in the following image.

- Click on Yes to confirm your changes.
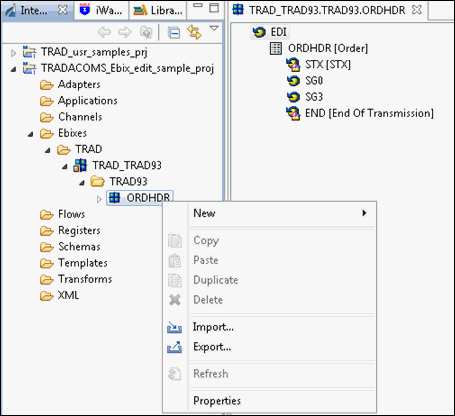
Your iIT interface should now resemble the following image:

Note: The asterisk (*) character will disappear once the edited Ebix has been saved successfully.
Procedure: How to Export an Ebix
To export an Ebix:
- Expand the Ebixes folder
in the left pane, then expand TRAD, TRAD_TRAD93, Trad93,
and then right-click ORDHDR and select Export from
the context menu.
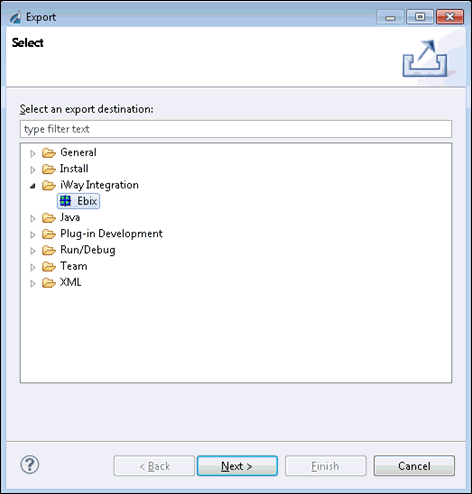
- Expand the iWay Integration folder,
select Ebix, and then click Next,
as shown in the following image.
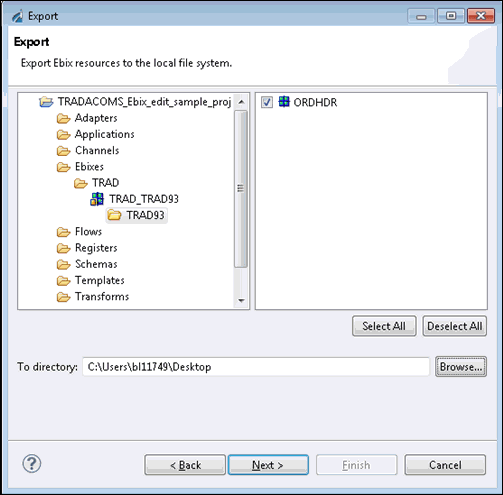
- In the left pane, expand TRADACOMS_Ebix_edit_sample_proj,
then on the right pane, select the check box for the ORDHDR document
and enter or select the destination to write the Ebix, as shown
in the following image.
- Click Next.
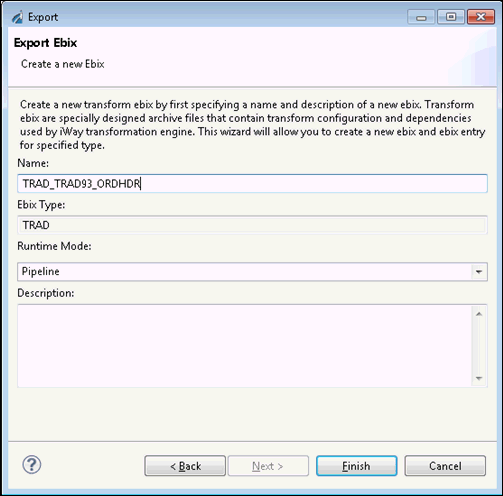
- Provide a name for the Ebix in the Name field, add an
optional description (optional), and then click Finish.
Your exported Ebix is now available in the specified location.
You can attach the Ebix to your channel in iIT using the Channel Builder. Be sure to set the execution order of your Ebix after adding it to your queue. The order that the Ebix are executed is top-down as they are displayed. If you want this custom ORDHDR dictionary to be executed prior to the standard one in the stock Ebix, then the custom Ebix must be at the top of the list.