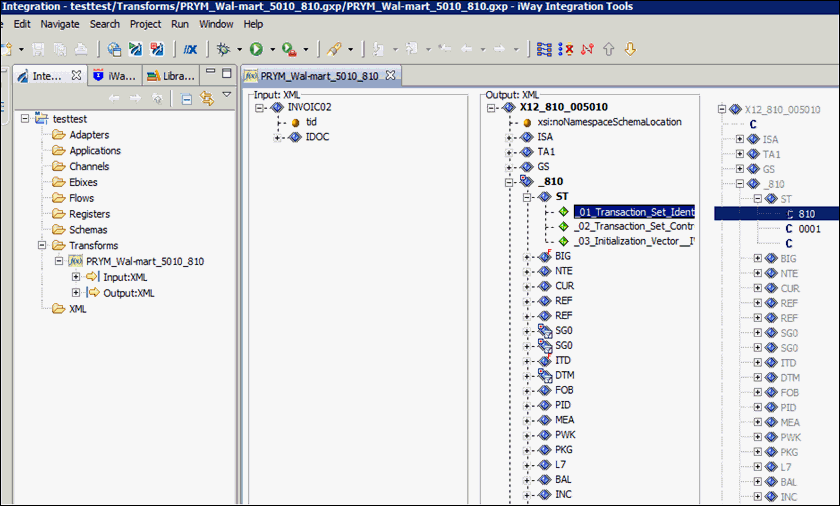
Mapping the Control Segments
|
Topics: |
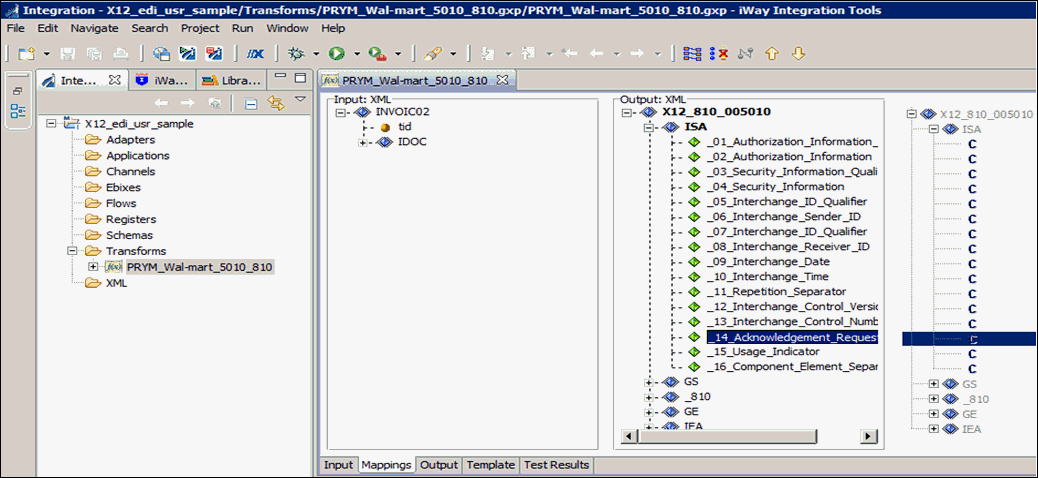
The ISA is the first segment in an X12 EDI document. The ISA contains Sender and Receiver information, which supports the routing and transfer of the data. A primary function of the ISA is to contain the ISA control number which should match the IEA control number to verify the receiver has received a complete transmission.
Most of the elements in the ISA are constants. One way to enter constants is to display the segment, double-click on the data entry area and enter the desired value.
ISA09
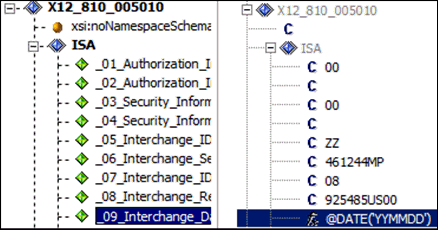
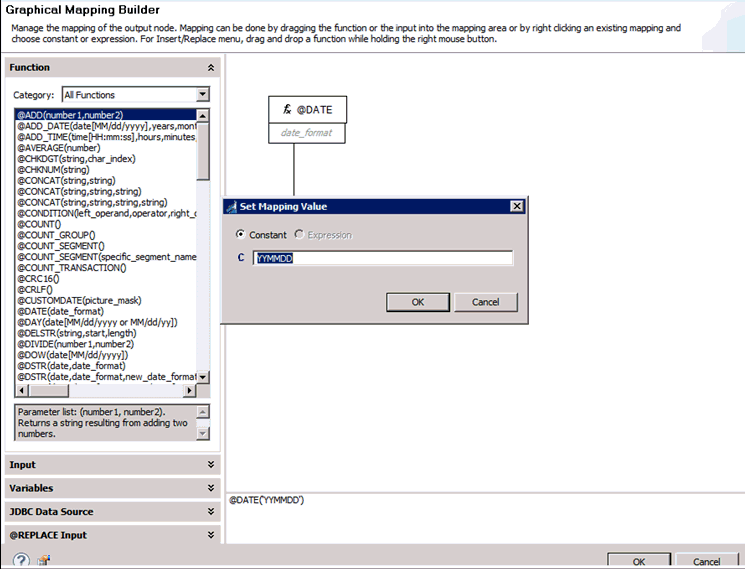
The ISA09 element is an exception to the statement about constants. This element is the date the transmission is created. In this case, select the @DATE function. The parameter for the date function is the Date_Format. The ISA09 is a 6 digit date using the YYMMDD format. Enter the Date_Format in the box under the @DATE function by double-clicking the parameter box. Another box opens, which will allow you to enter a Constant or Expression. Select Constant, enter the value YYMMDD, and click OK, then click OK again in the Graphical Mapping Builder.
ISA10
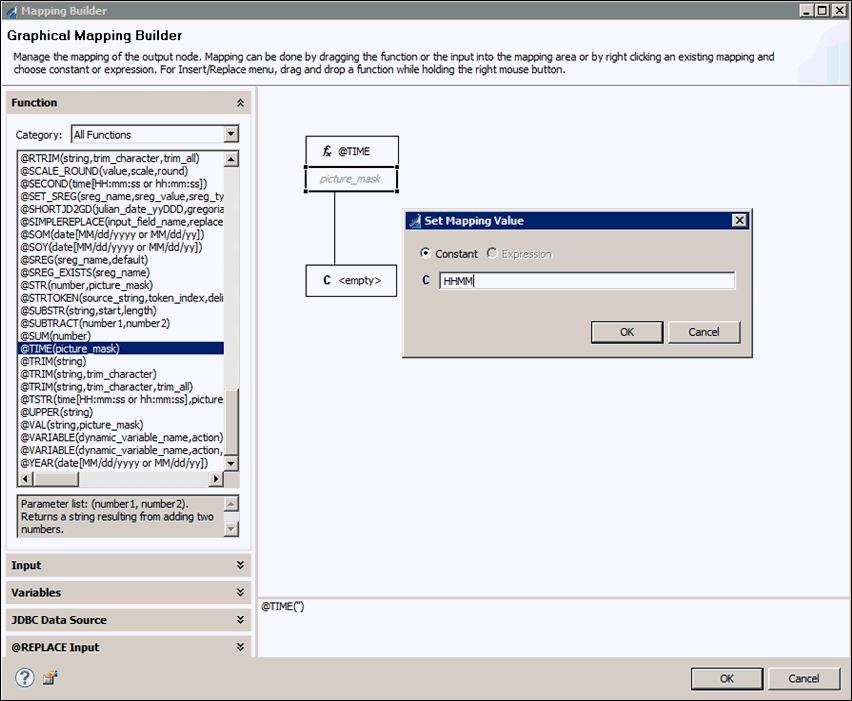
This ISA10 element represents the time that the transmission is created. In this case select the @TIME function. The parameter for the @TIME function is the Picture_mask. The ISA10 is a 4 digit time using the HHMM format. Enter the Picture_mask in the box under the @TIME function by double-clicking the parameter box. Another box opens, which will allow you to enter a Constant or Expression. Select Constant, enter the value HHMM, click OK, then click the OK button again in the Graphical Mapping Builder.
Mapping ISA and IEA
You are now ready to map output fields. Since a Trading Partner is not used for this exercise, the envelope values need to be hardcoded. You can double-click on the line to the right of the split bar to enter constants, or click the button with the ellipsis.
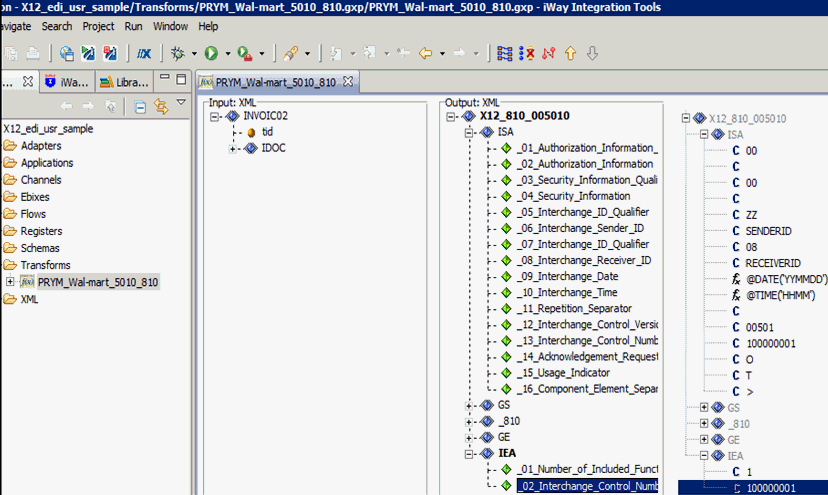
Enter the values that are listed in the following table:
|
Field |
Value |
|---|---|
|
ISA01 |
00 |
|
ISA03 |
00 |
|
ISA05 |
ZZ |
|
ISA06 |
SENDERID |
|
ISA07 |
ZZ |
|
ISA08 |
RECEIVERID |
|
ISA09 |
@DATE('YYMMDD') |
|
ISA10 |
@TIME('HHMM') |
|
ISA11 |
: |
|
ISA12 |
00501 |
|
ISA13 |
100000001 |
|
ISA14 |
0 |
|
ISA15 |
T |
|
ISA16 |
> |
|
IEA01 |
1 |
|
IEA02 |
100000001 |
Mapping GS and GE
Enter the values that are listed in the following table:
|
Field |
Value |
|---|---|
|
GS01 |
IN |
|
GS02 |
SENDERID |
|
GS03 |
RECEIVERID |
|
GS04 |
@DATE('YYYYMMDD') |
|
GS05 |
@TIME('HHMM') |
|
GS06 |
1 |
|
GS07 |
X |
|
GS08 |
005010 |
|
GE01 |
1 |
|
GE02 |
1 |
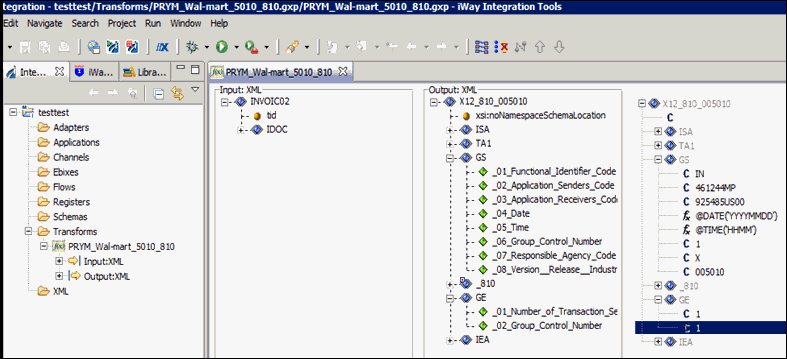
Your iIT interface should resemble the following:
Mapping ST and SE
Enter the values that are listed in the following table:
|
Field |
Value |
|---|---|
|
ST01 |
810 |
|
ST02 |
0001 |
|
SE01 |
1 |
|
SE02 |
0001 |
Your iIT interface should resemble the following:
