Initializing Constant Values
|
How to: |
You can start to configure the variables that you are going to use to calculate the HL counts and carton count. A best practice is to initialize these variables at the start of the process.
Procedure: How to Initialize Constant Values
To initialize constant values:
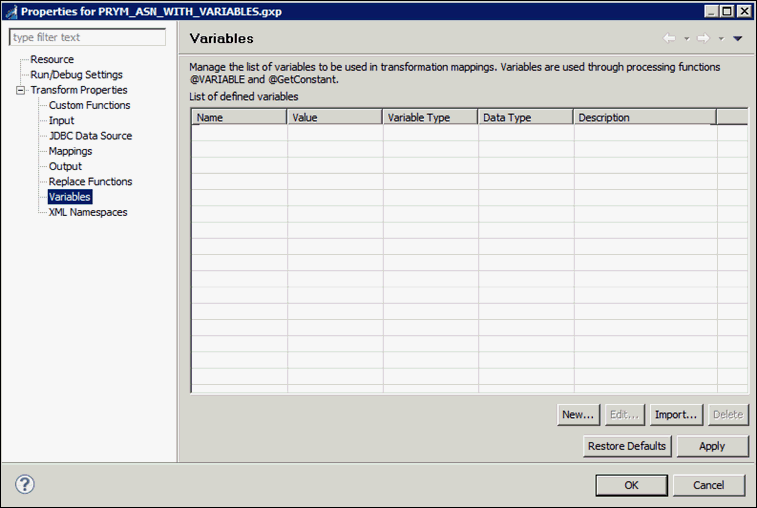
- Right-click the Transform project PRYM_ASN_WITH_VARIABLES and select Properties to open the Transform Project Properties dialog box.
- Expand the Transform Properties tree
and select Variables in the left pane, as
shown in the following image.
- Click New.
The Add New Variable dialog box opens.
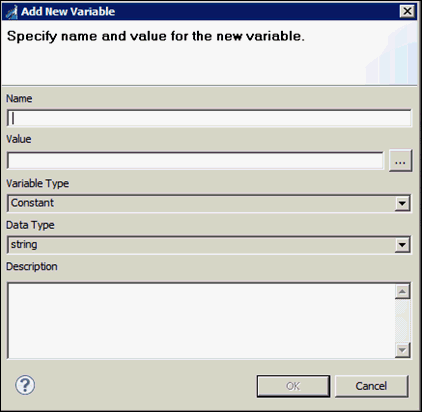
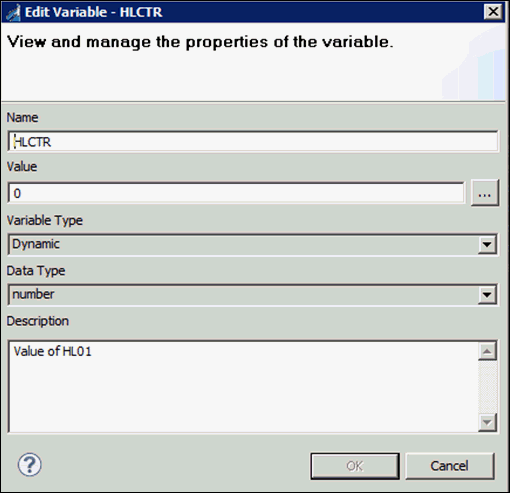
- Enter HLCTR for the name of the
constant, 0 for the value, select Dynamic from the
Variable Type drop-down list, and number from
the Data Type drop-down list.
- Click OK to save and continue.
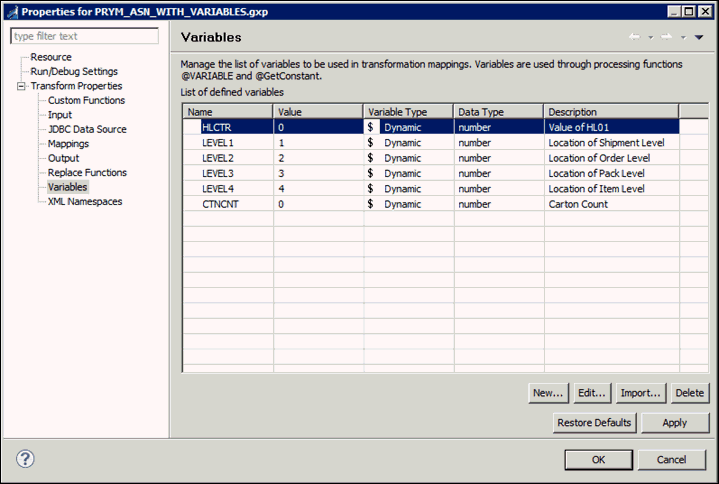
- Enter the remaining values, as specified in the following
table:
Variable Name
Value
LEVEL1
1
LEVEL2
2
LEVEL3
3
LEVEL4
4
CTNCT
0
The Project Properties dialog box should now resemble the following image:
- Click OK.
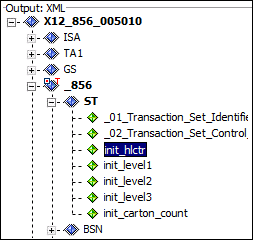
You also need to reset these variables in the Transform as it runs. The proper place to do this is the ST segment. At each new ST segment you can reinitialize the counters. To do this, you will add new element tags at the end of the ST segment. You do not have to hide these elements because there are no corresponding elements in the XML to X12 transform in the Ebix.
- Right-click ST, select Add, and then click Element from the context menu.
- Rename the new element to init_hlctr.
- Add the following additional elements:
- init_level1
- init_level2
- init_level3
- init_carton_count
Your screen should now resemble the following image:
- Right-click the Mapping Values pane for an element (for
example, init_hlctr), and then select Mapping Builder from
the context menu.
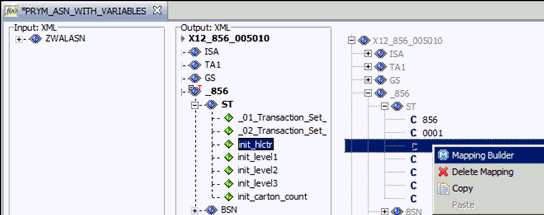
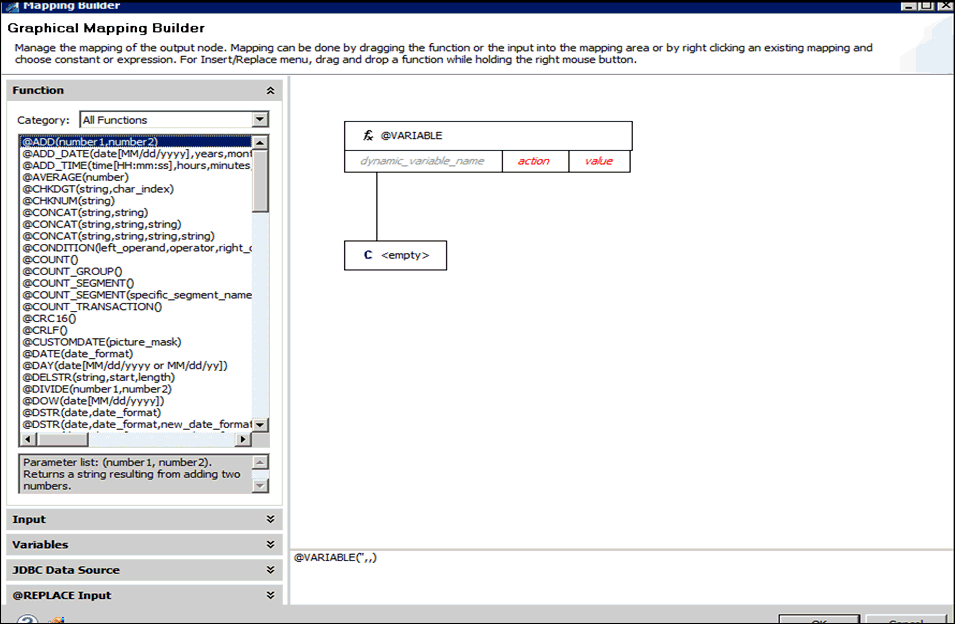
The Output Node Mapping Builder opens.
- From the function list, select @VARIABLE(dynamic_variable_name,
action, value) and drag it to the workspace area.
- Double-click the value parameter
of the function.
The Set Mapping Value dialog box opens.
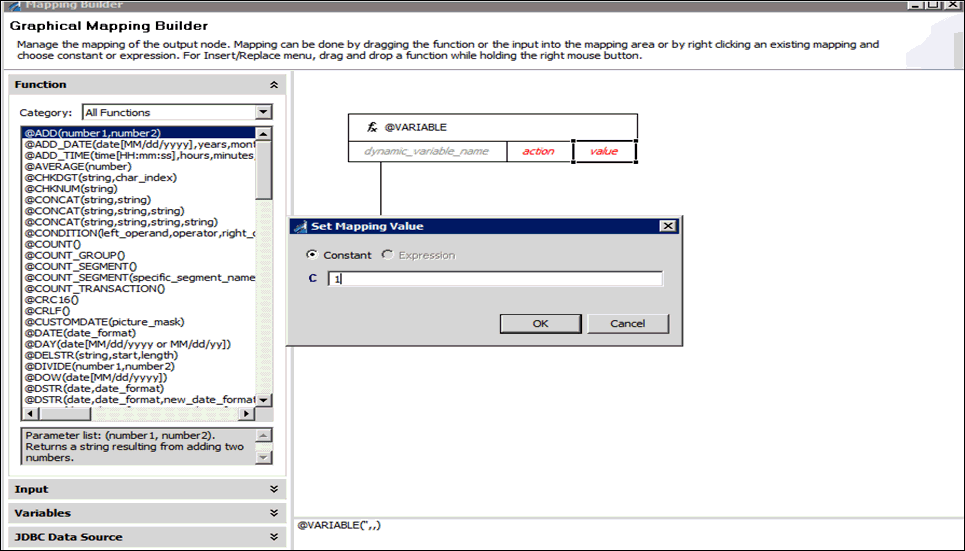
- Type a constant value (for example, 1) and click OK.
- Double-click the action parameter
of the function.
The Set Mapping Value dialog box opens.
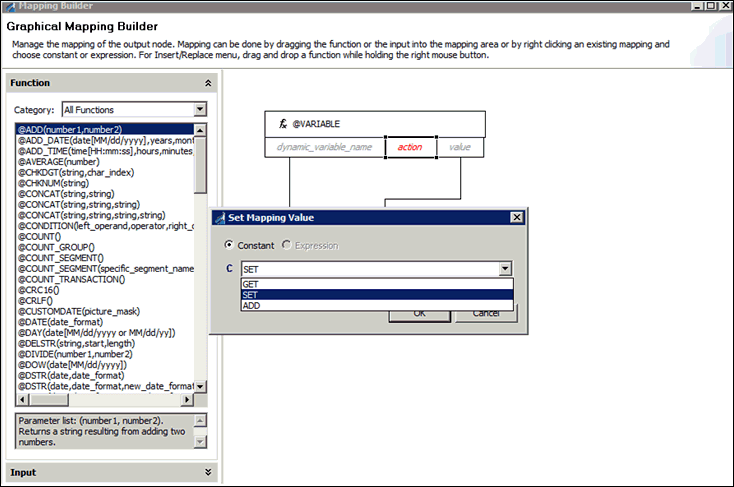
- Select SET from the drop-down list and click OK.
- Double-click the dynamic_variable_name parameter
of the function.
The Variables dialog box opens.
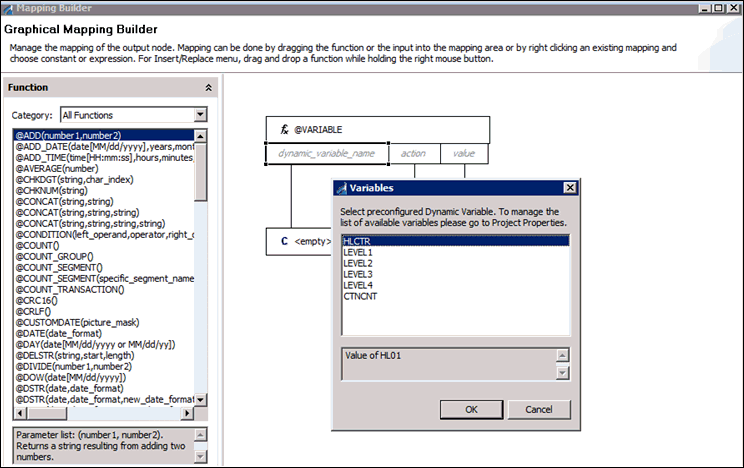
The Variables dialog box lists the variables that you configured earlier.
- Select the HLCTR variable and
click OK.
The configured function for the init_hlctr element is shown in the following image.
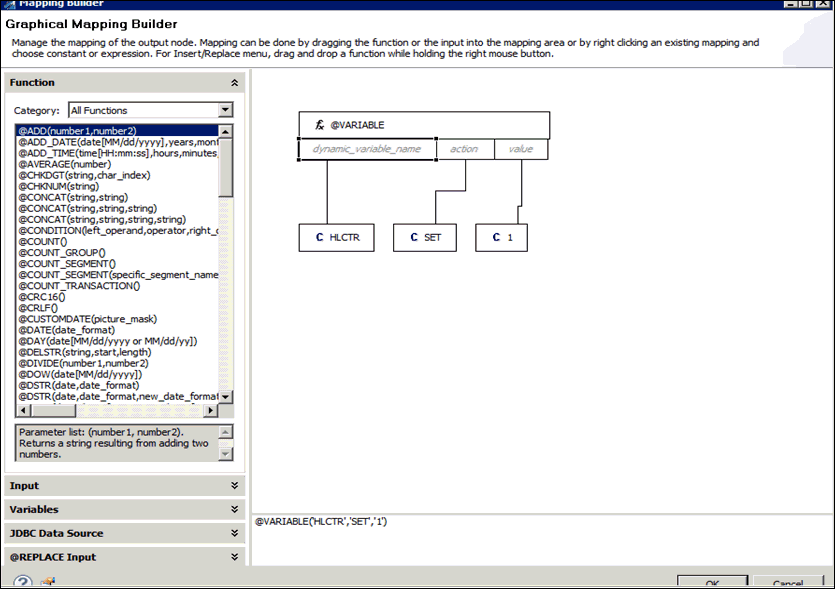
- Click OK.
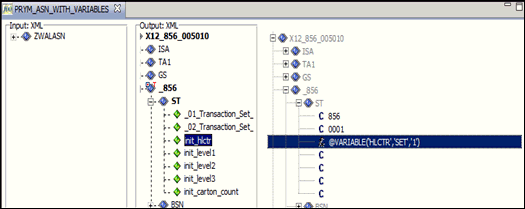
The new function is appended to the init_hlctr element in the Mapping Values pane, as shown in the following image.
- Repeat steps 11 through 19 for the remaining elements
(init_level1, init_level2, init_level3, and init_carton_count).
Use the values that are listed in the following table:
Element
Value
init_level1
@VARIABLE('LEVEL1','SET','0')
init_level2
@VARIABLE('LEVEL2','SET','0')
init_level3
@VARIABLE('LEVEL3','SET','0')
init_carton_count
@VARIABLE('CTNCNT','SET','0')
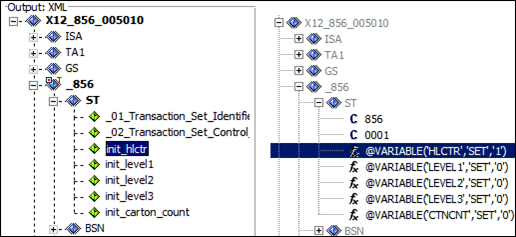
Your screen should now resemble the following image.
Procedure: How to Hide Elements in a Transform
To maintain the integrity of the EDI structure, you must hide the elements that have been added. These elements are initial values, which if displayed in the XML, will cause the XML to EDI transform to fail. Perform the following steps to ensure that these elements do not appear in the transformed output.
- Right-click the init_hlctr tag
in the Output pane and select Properties from
the context menu.
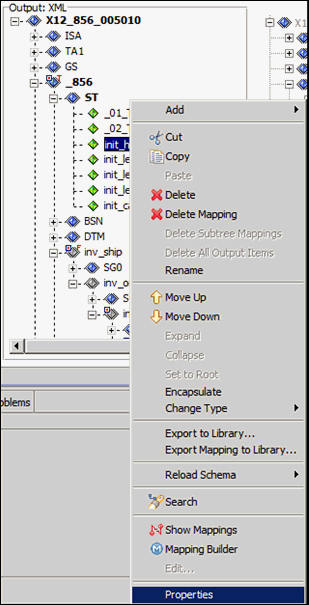
The Output Node Properties - init_hlctr dialog box opens.

- Click the Filter tab.
- Select the Show Element node or its value if specified condition is true check box.
- Select Node from the Show drop-down list.
- Enter the following in the Condition field:
'A' == B' (OR) '1' == '2'
Note: Since ‘A’ will never equal ‘B’ and the check box indicates if the condition is true to show the node, this condition ensures that the node will not be shown in the output XML.
- Click OK.
- Repeat steps 1 through 6 for the remaining init_ elements
that were added:
- init_level1
- init_level2
- init_level3
- init_carton_count