Connecting to a Data Source
|
How to: |
In an iWay Big Data Integrator (iBDI) project, all connections must be defined in advance in a data source profile. Start by defining the data sources in the Data Source Explorer pane.
A data source profile is a collection of properties that describe how to connect to a target and how to authorize the connection to the target. Each data source profile is unique, meaning one profile holds one set of connections. To create a second connection of the same type, such as Postgres database connections to two different Postgres servers, each server must have its own data source profile.
This section describes how to connect to your data source in iBDI.
Procedure: How to Create a Connection to Hive JDBC
- In the Data Source Explorer panel, right-click Database
Connections and select New from
the context menu, as shown in the following image.

The New Connection Profile dialog opens, as shown in the following image.

- Select Hive JDBC from the list of connection profile types.
- Specify a name (for example, New Hive JDBC Connection) and a description (optional) in the corresponding fields.
- Click Next.
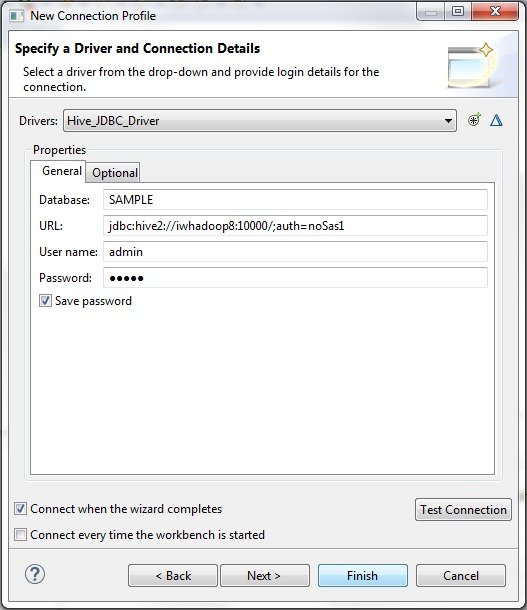
The Specify a Driver and Connection Details pane opens, as shown in the following image.
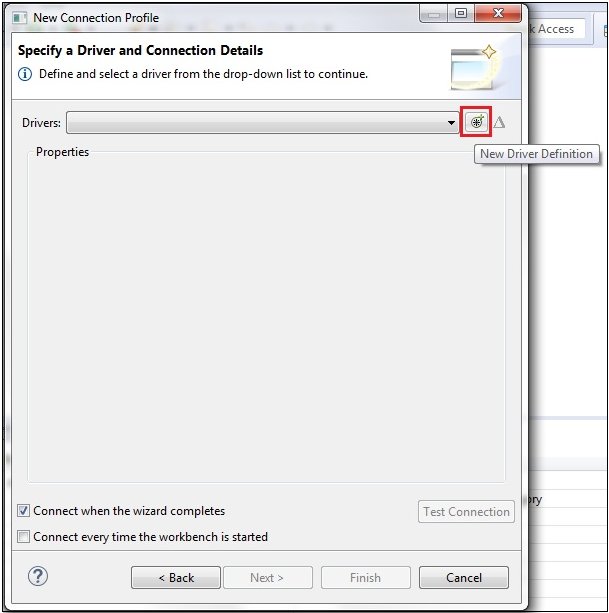
- Click the New Driver Definition icon
to the right of the Drivers field.
The New Driver Definition dialog opens, as shown in the following image.
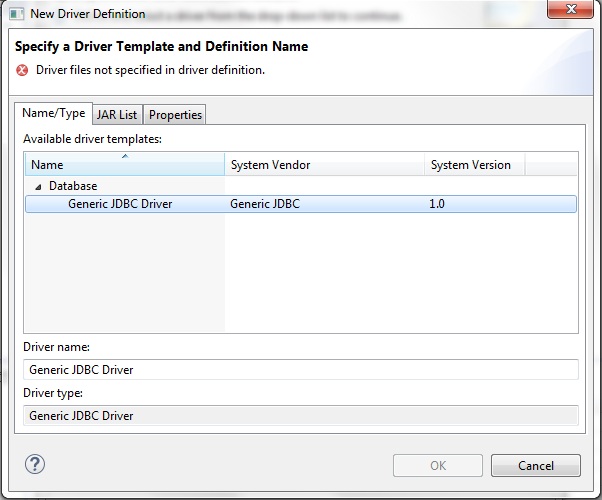
- In the Name/Type field, which is selected by default,
click Generic JDBC Driver.
You can change the name of the driver in the Driver name field.
- Click the JAR List tab, as shown
in the following image.
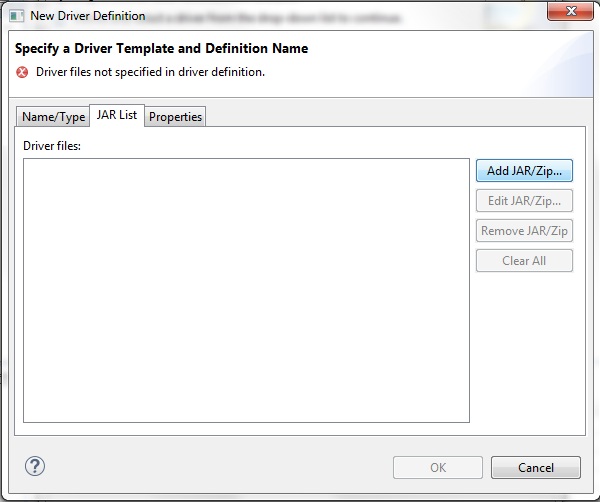
- Click Add JAR/Zip.
The Select the file dialog opens, as shown in the following image.
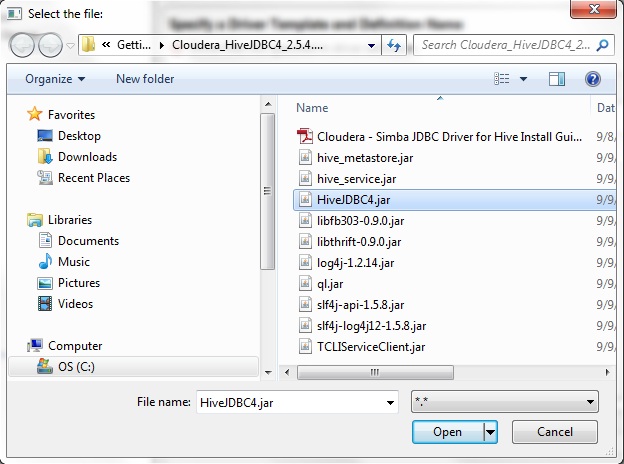
- Browse your file system, select the required .jar file to access your Hive JDBC (for example, HiveJDBC4.jar), and click Open.
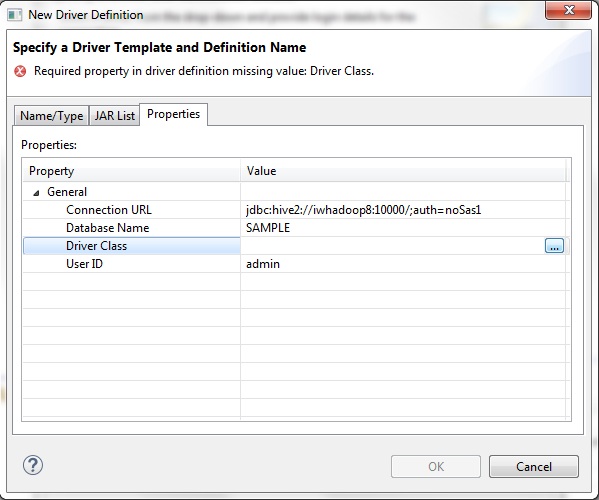
- Click the Properties tab, as shown
in the following image.
- Perform the following steps:
- Specify a connection URL for Hive.
- Specify the name of a database in your Hive instance that you want to explore.
- Specify a valid user ID.
- Click the Browse icon to the
right of the Driver Class field.
The Available Classes from Jar List dialog opens, as shown in the following image.
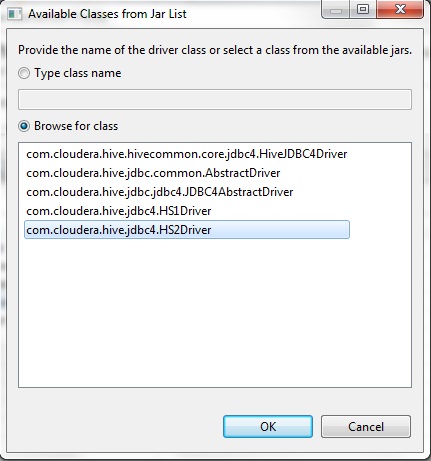
- Click Browse for class, which will browse the .jar file you selected in step 9 (for example, HiveJDBC4.jar) for a list of classes.
- Once a list of classes is returned, select the required class (for example, com.cloudera.hive.jdbc4.HS2Driver).
- Click OK.
You are returned to the Properties tab, as shown in the following image.
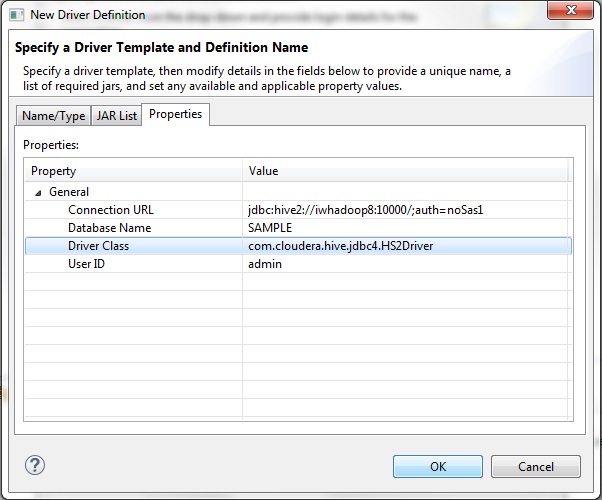
- Click OK.
The Specify a Driver and Connection Details pane opens, as shown in the following image.
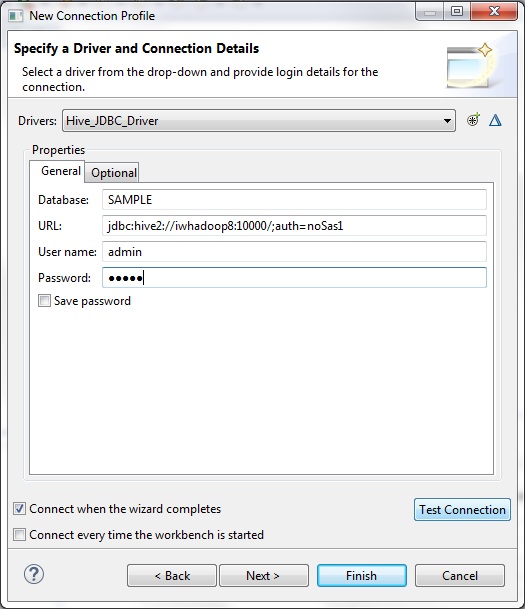
- Specify a valid password.
Note: You can choose to select Save password if you do not want to be prompted each time you connect to Hive JDBC in iBDI.
- Click Test Connection.
If your Hive JDBC connection configuration is valid, then the following message is displayed.
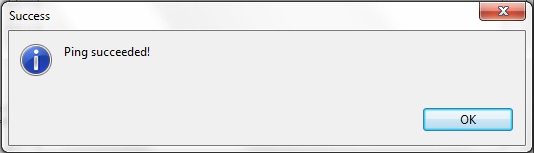
- Click OK.
You are returned to the Specify a Driver and Connection Details pane opens, as shown in the following image.
- Click Finish.
Your new connection to Hive JDBC is listed below the Database Connections node in the Data Source Explorer panel, as shown in the following image.
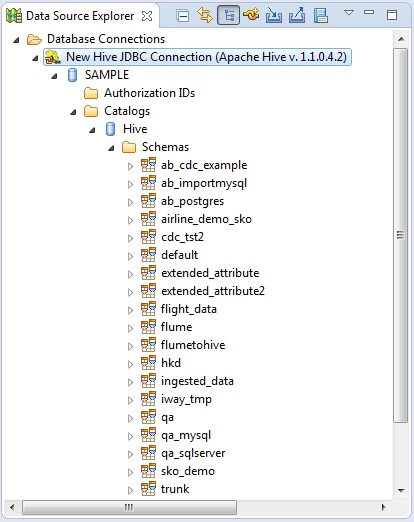
You can explore your Hive JDBC connection by expanding all of the nodes.
Note: JDBC URL formats for Kerberos-enabled clusters differ from non-secured environments. For more information, contact your Apache Hadoop administrator.
Procedure: How to Create a Connection to PostgreSQL
- In the Data Source Explorer panel, right-click Database
Connections and select New from
the context menu, as shown in the following image.
The New Connection Profile dialog opens, as shown in the following image.
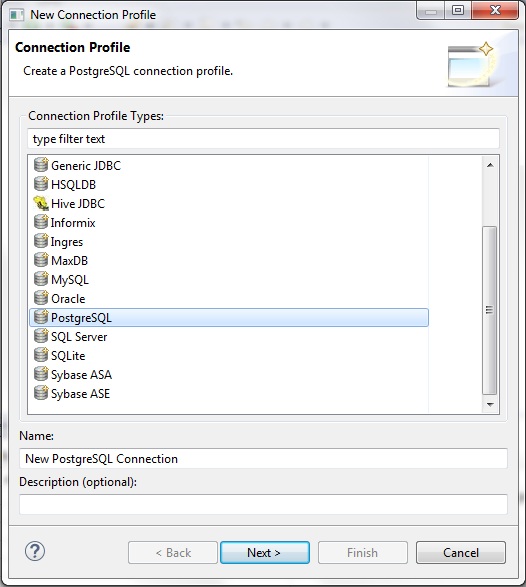
- Select PostgreSQL from the list of connection profile types.
- Specify a name (for example, New PostgreSQL Connection) and a description (optional) in the corresponding fields.
- Click Next.
The Specify a Driver and Connection Details pane opens, as shown in the following image.
- Click the New Driver Definition icon
to the right of the Drivers field.
The New Driver Definition dialog opens, as shown in the following image.
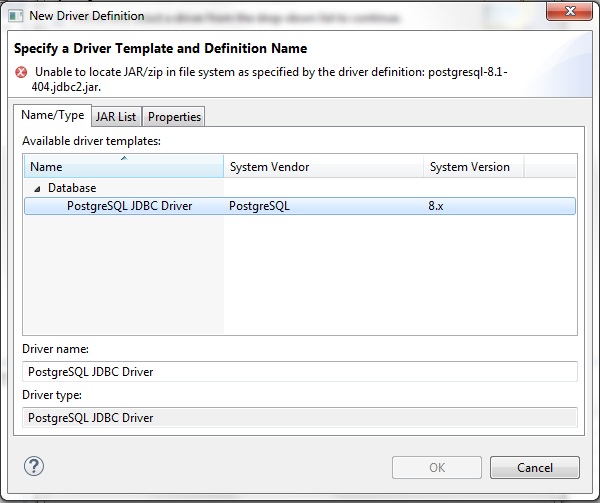
- In the Name/Type field, which is selected by default,
click PostgreSQL JDBC Driver.
You can change the name of the driver in the Driver name field.
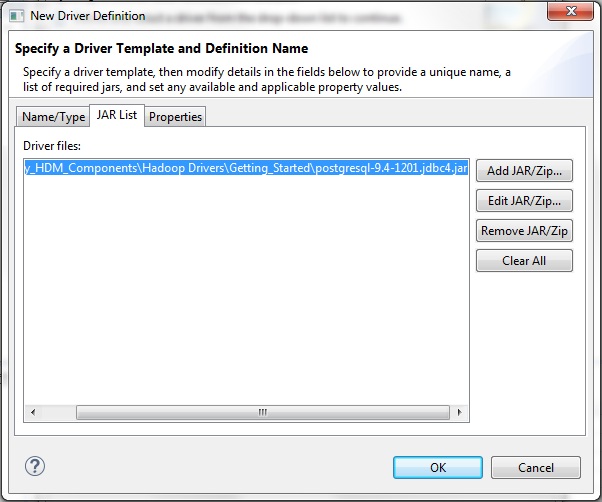
- Click the JAR List tab, as shown
in the following image.
- Click Add JAR/Zip.
The Select the file dialog opens.
- Browse your file system, select the required .jar file
to access your PostgreSQL instance (for example, postgresql-9.4-1201.jdbc4.jar),
and click Open.
- Click the Properties tab, as shown
in the following image.
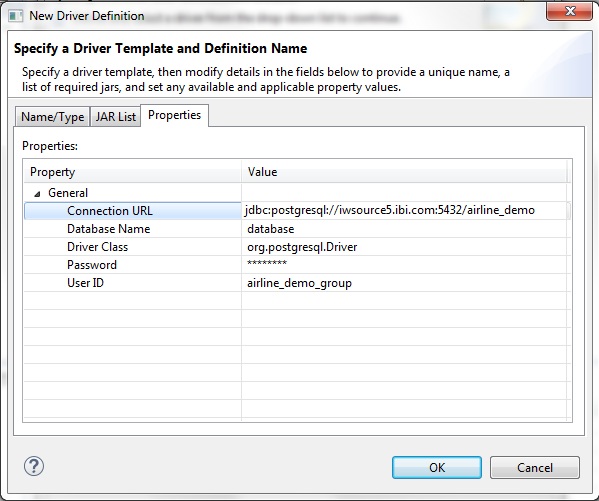
- Perform the following steps:
- Specify a connection URL for PostgreSQL.
- Specify the name of a database in your PostgreSQL instance that you want to explore.
- Specify a valid user ID.
- Specify a valid password.
- Click the Browse icon to the
right of the Driver Class field.
The Available Classes from Jar List dialog opens, as shown in the following image.
- Click Browse for class, which will browse the .jar file you selected in step 9 (for example, postgresql-9.4-1201.jdbc4.jar) for a list of classes.
- Once a list of classes is returned, select the required class (for example, org.postgresql.Driver).
- Click OK.
You are returned to the Properties tab, as shown in the following image.
- Click OK.
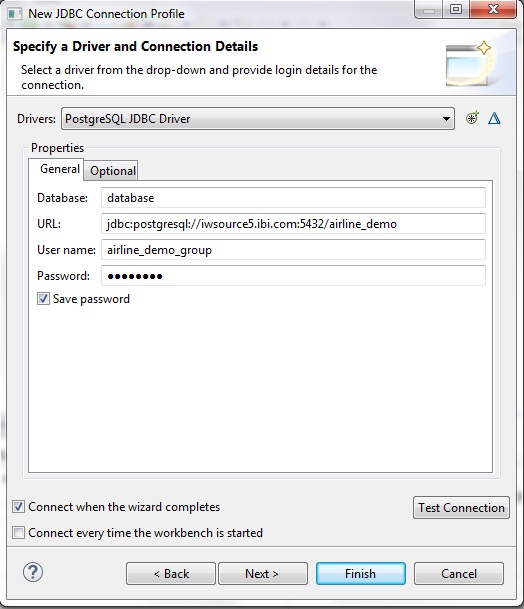
The Specify a Driver and Connection Details pane opens, as shown in the following image.
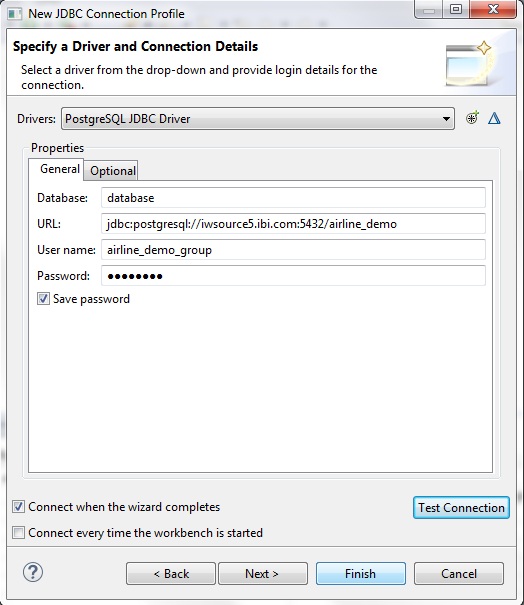
- Specify a valid password.
Note: You can choose to select Save password if you do not want to be prompted each time you connect to PostgreSQL in iBDI).
- Click Test Connection.
If your PostgreSQL connection configuration is valid, then the following message is displayed.
- Click OK.
You are returned to the Specify a Driver and Connection Details pane opens, as shown in the following image.
- Click Finish.
Your new connection to PostgreSQL is listed below the Database Connections node in the Data Source Explorer panel, as shown in the following image.
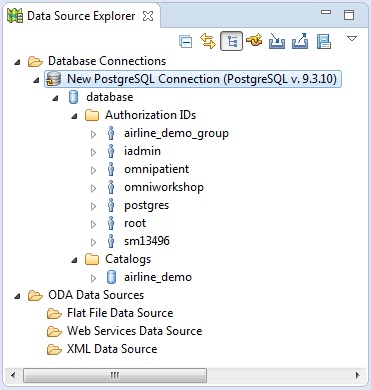
You can explore your PostgreSQL connection by expanding all of the nodes.