Understanding the Components of the Database Connections Facility
The Database Connections facility is composed of several dialogs that enable you to configure a connection to a data source (for example, Hive).
In the Data Source Explorer panel, right-click Database Connections and select New from the context menu, as shown in the following image.

The New Connection Profile dialog opens, as shown in the following image.

Select a supported data source from the list of connection profile types. Specify a name and a description (optional) in the corresponding fields, and then click Next.
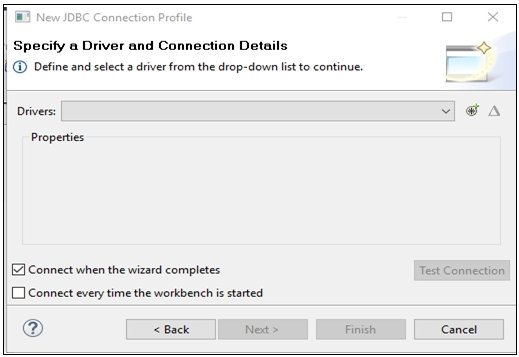
The New JDBC Connection Profile dialog opens, which shows the Specify a Driver and Connection Details pane, as shown in the following image.
Click the following icon to open the New Driver Definition (Specify a Driver Template and Definition Name) dialog:

Click the following icon to open an existing connection profile that you would like to edit:

Hint: If an existing data source is defined for a given connection type (for example, PostgreSQL) and a new connection profile is being created, the existing connection details are shown when the New Connection Profile dialog opens. Follow the instructions below to create a new data source template to disambiguate the connections.
To create a new connection profile or resolve a duplicate definition:
- Click the New Driver Definition icon
located at the top of the New JDBC Connection Profile dialog.
The Specify a Driver Template and Definition Name dialog opens with the Name/Type tab selected.
The name of the driver, the vendor, and system version are displayed.
- Click the driver template name, then click the JAR List tab
to specify the driver for the template name, as shown in the following
image.
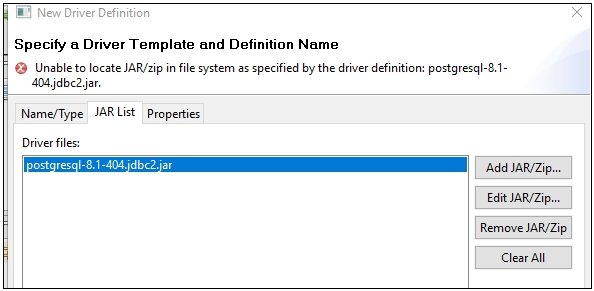
- Remove the default driver from the template by clicking the .jar file name and then click Remove JAR/Zip.
- Click Add JAR/Zip to locate an appropriate
driver on your local file system, as shown in the following image.
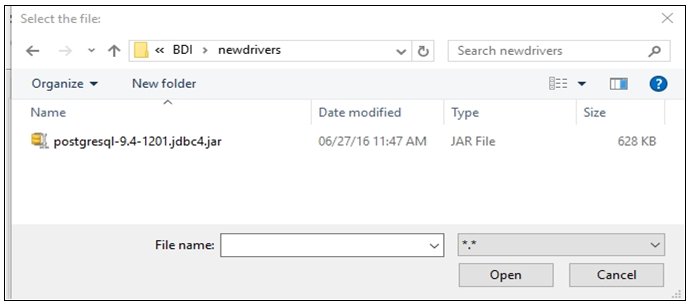
- Select the driver file and click Open.
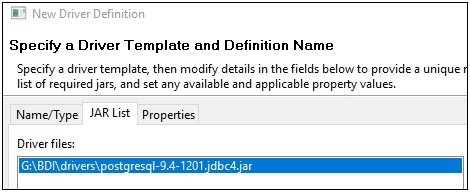
The JAR List tab is refreshed with your new driver file, as shown in the following image.
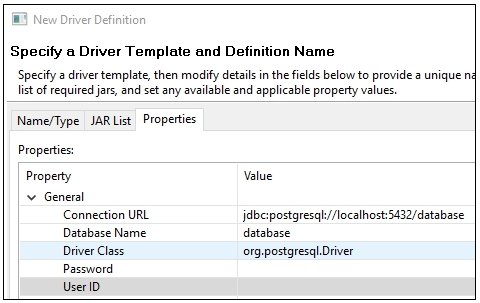
- Click the Properties tab and specify
the connection information, as shown in the following image.
- When you have finished specifying the connection information,
click OK to close the New Driver Definition
(Specify a Driver Template and Definition Name) dialog.
The New Connection Profile (Specify a Driver and Connection Details) dialog is now populated with the credentials you entered in the New Driver Definition (Specify a Driver Template and Definition Name) dialog.
- Select the Save password check box to
save the password for the data source logon credentials.
Hint: If a password has been entered in the New Connection Profile (Specify a Driver and Connection Details) dialog and the Save password check box is not selected, you will need to re-enter the password if another dialog window is opened or if the data source connection is closed and then re-opened. Otherwise, the data source will attempt to use the default password of the database driver.
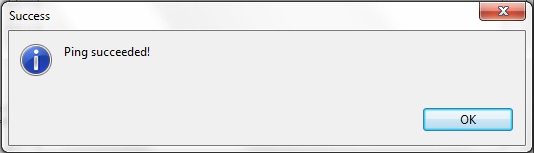
- Click Test Connection to verify that
the connection details are valid.
If your connection configuration is valid, then the following success message is displayed.
- Click OK.
You are returned to the New Connection Profile (Specify a Driver and Connection Details) dialog.
- Click Finish to save your data source connection.