Creating a Workflow Rule
|
How to: |
The following procedure describes how to create a workflow rule using the Salesforce web console.
Procedure: How to Create a Workflow Rule
To create a workflow rule using the Salesforce web console:
- Log on to the Salesforce web console.
- Click Setup.
The Personal Setup page opens.
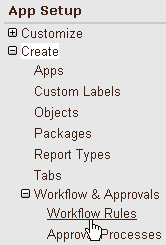
- In the left pane, expand Create, Workflow
& Approvals, and click Workflow Rules.
The All Workflow Rules page opens.
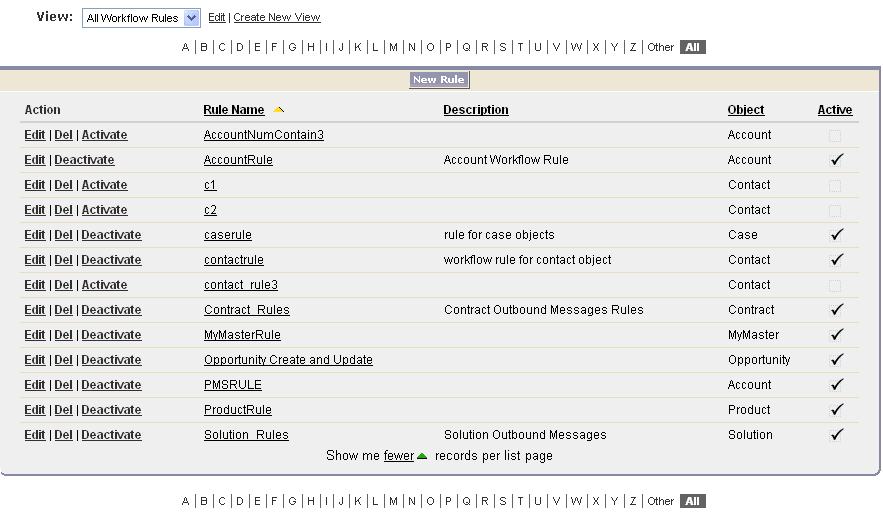
- Click New Rule.
The New Workflow Rule page opens and Step 1: Select object is displayed.
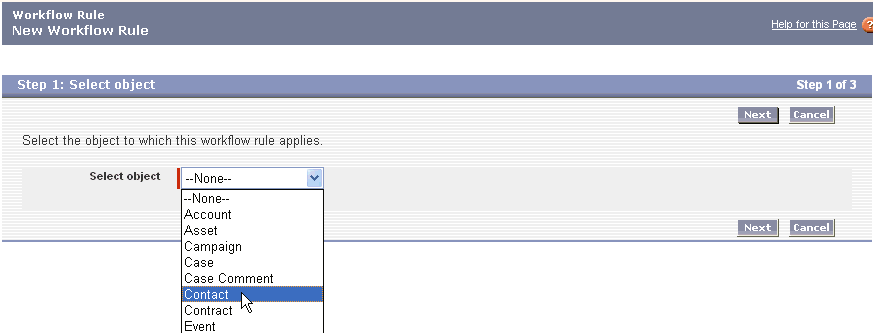
- From the Select object drop-down list, select the object that
you want to associate with the new workflow rule, for example, Contact.
Note: You must select the same object for the workflow rule that was used to create the outbound message.
- Click Next.
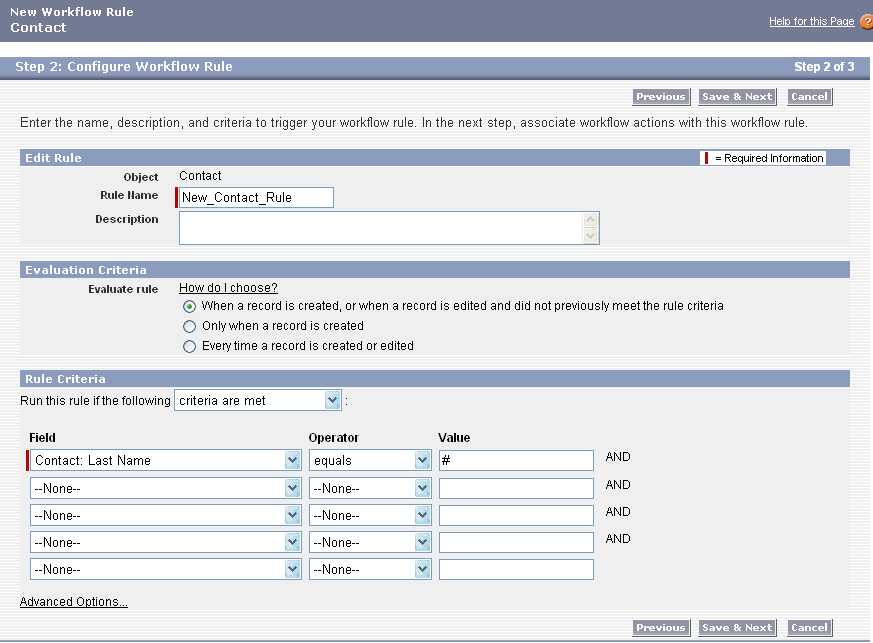
The Step 2: Configure Workflow Rule page opens.
- Perform the following steps:
- In the Name field, enter a name for this workflow rule, for example, New_Contact_Rule.
- In the Description field, enter a brief description for this workflow rule (optional).
- In the Evaluation Criteria section, select one the following options
that will be used to trigger the workflow rule:
- When a record is created, or when a record is edited and did not previously meet the rule criteria. (Default)
- Only when a record is created.
- Every time a record is created or edited.
- In the Rule Criteria section, specify the criteria that will
be used to trigger the workflow rule. For example:

In this example, the Last Name field and equals condition is selected from the corresponding drop-down lists. In the Value field, the symbol (#) is entered.
- Click Save & Next.
The Step 3: Specify Workflow Actions page opens.
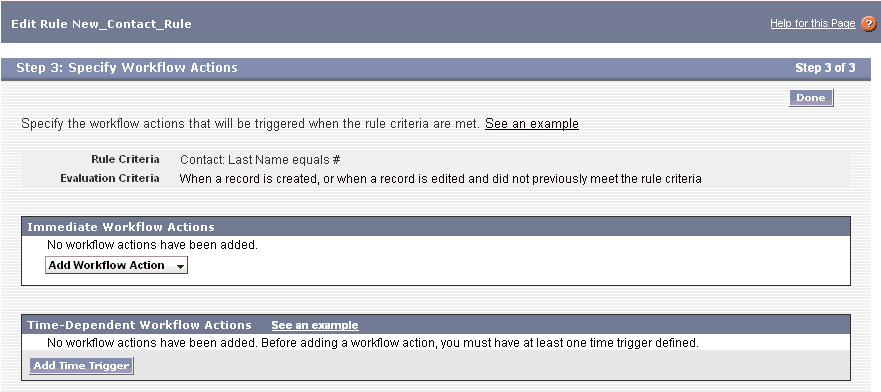
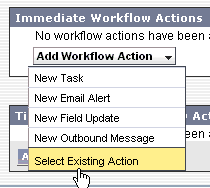
- From the Add Workflow Action drop-down list, choose Select Existing
Action.
The Select Existing Actions page opens.
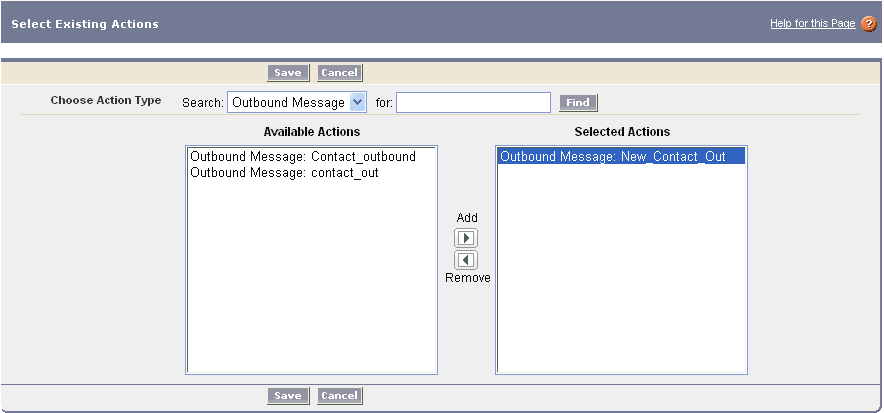
- Perform the following steps:
- From the Search drop-down list, select Outbound Message.
- From the Available Actions list, select the outbound message you want to emit when an event is triggered.
- Click Add to move the outbound message to the Selected Actions list.
- Click Save.
You are returned to the Step 3: Specify Workflow Actions page.
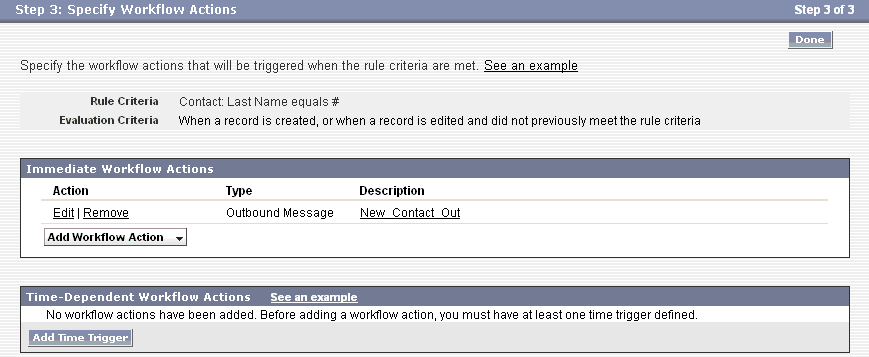
- Click Done.
A summary page opens, which provides details about the workflow rule that was created.
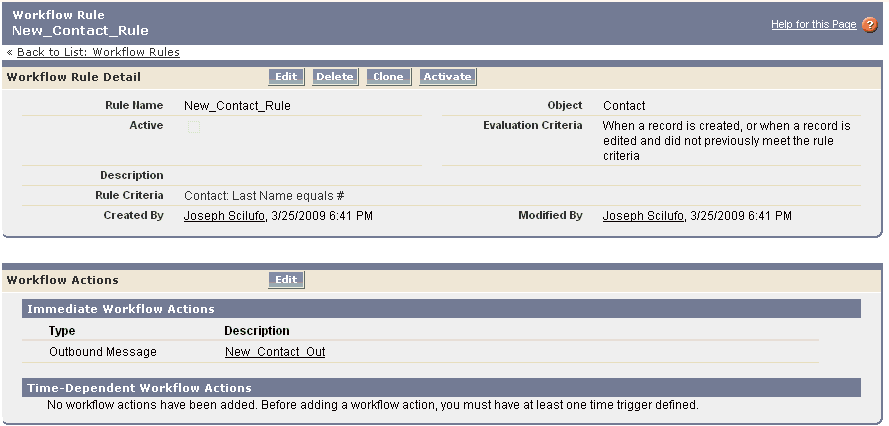
Procedure: How to View an Outbound Message
To view an outbound message using the Salesforce web console:
- Log on to the Salesforce web console.

- Click Setup.
The Personal Setup page opens.
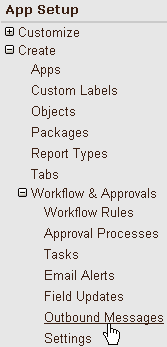
- In the left pane, expand Create, Workflow
& Approvals, and click Outbound Messages.
The All Outbound Messages page opens.
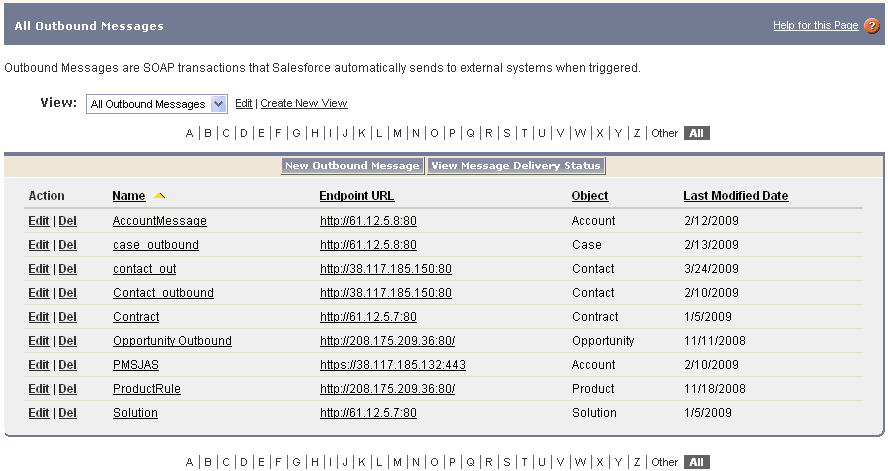
- Perform any of the following steps depending on your current requirement:
- Click New Outbound Message to define a new outbound message.
- Click View Message Delivery Status to track the status of an existing outbound message.
- Click the name of an existing outbound message to view its details
or view associated workflow rules and approval processes.

- Click Edit to make changes to an existing outbound message.
- Click Del to delete an existing outbound message.
Procedure: How to Track an Outbound Message Status
To track an outbound message status using the Salesforce web console:
- Log on to the Salesforce web console.
- Click Setup.
The Personal Setup page opens.
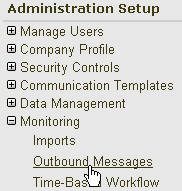
- In the left pane, expand Monitoring and
click Outbound Messages.
The Outbound Messaging Delivery Status page opens.
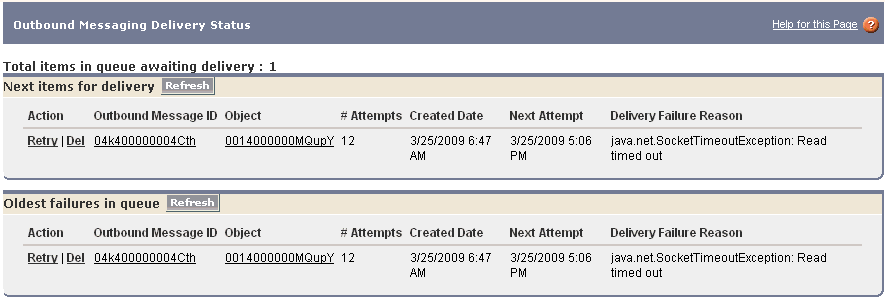
Note: You can also click View Message Delivery Status from the All Outbound Messages page to access this page.
- Perform any of the following steps depending on your current requirement:
- View the status of your outbound messages including the total number of attempted deliveries.
- View the action that triggered the outbound message by clicking any workflow or approval process action ID.
- Click Retry to change the Next Attempt date to now. This causes the message delivery to be immediately retried.
- Click Del to permanently remove the outbound message from the queue.
| iWay Software | |
|
Feedback |