Configuring a Channel
|
How to: |
After you have configured the Microsoft Exchange listener and associated the listener with an inlet, you can configure a channel in iWay Service Manager.
Procedure: How to Configure a Channel
To configure a channel:
- In the iSM Administration Console, select Registry,
then Channels.
The Channels pane opens, as shown in the following image.
- Click Add.
The Channels pane opens, as shown in the following image.
- Specify a name and description to identify the new channel
and click Finish.
The Construct Channel pane opens, as shown in the following image.
- Click Add.
The Select component type pane opens, as shown in the following image.
By default, the Inlet component type is selected by default.
- Click Next.
The list of available inlets that have been configured is displayed, as shown in the following image.
- Select the inlet that was previously configured (for example, MS_Exchange_Inlet).
- Click Finish.
You are returned to the Construct Channel pane, where the previously configured inlet is now associated with the new channel, as shown in the following image.
- Click Add.
The Select component type pane opens, as shown in the following image.
By default, the Route component type is selected by default.
- Click Next.
The list of available routes that have been configured is displayed, as shown in the following image.
- Select the move route, which is
defined by default.
The move route simply transfers the input stream to the output stream. You can define more complex routes if required (for example, as process flows) for more advanced business logic.
- Click Finish.
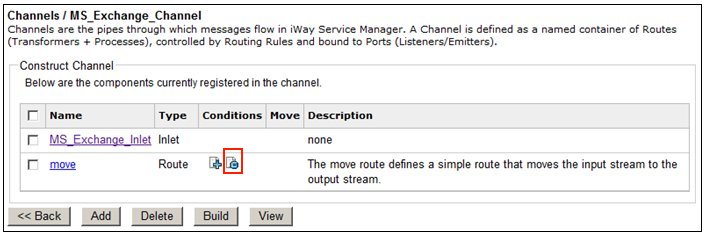
You are returned to the Construct Channel pane, where the selected route (move) is now associated with the new channel, as shown in the following image.
- Click the Default Route icon in
the Conditions column, as shown in the following image.
- Click Add in the Construct Channel pane.
The Select component type pane opens, as shown in the following image.
- Ensure Outlet is selected and then click Next.
The Outlet Definitions pane opens, which lists the available outlets that have been configured, as shown in the following image.
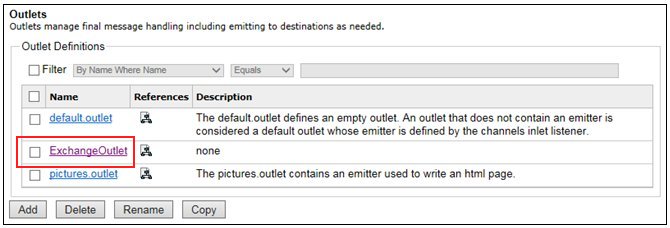
- Select the outlet that was previously configured (for example, ExchangeOutlet).
- Click Add.
You are returned to the Construct Channel pane, where the selected outlet (ExchangeOutlet) is now associated with the new channel, as shown in the following image.
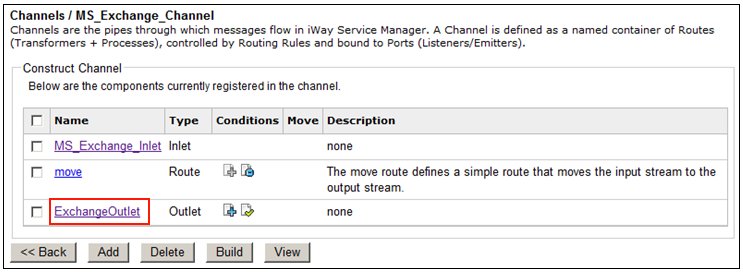
The construction of the iSM channel is now complete.
- Click Build.
All of the components for the iSM channel are compiled and the results are displayed in the results pane, as shown in the following image.
- In the iSM Administration Console, select Deployments,
then Channels.
The Channels pane opens, as shown in the following image.
- Click Deploy.
The Available Channels pane opens, as shown in the following image.
- Select the channel you have configured (for example, MS_Exchange_Channel)
and click Deploy.
The Channel Management pane opens and lists the deployed channel, as shown in the following image.

You can start and stop the channel accordingly. For more information on channel management, see the iWay Service Manager User’s Guide.
| iWay Software | |
|
Feedback |