SSL Configuration
|
Topics: |
Note: This functionality is applicable only to monitoring iWay Release 8.0.3 or higher servers.
When first installed, Sentinel and Envoy communicate over HTTP. To secure the communication with SSL, see How to Configure Sentinel for SSL and How to Configure Envoy for SSL.
Sentinel and Envoy can automatically detect when the iWay Service Manager console is secured with SSL. This does not require any special configuration in Sentinel and Envoy.
Configuring Sentinel and Envoy Security for SSL
|
How to: |
The following procedures describe the steps for configuring Sentinel and Envoy security for SSL.
Procedure: How to Configure Sentinel for SSL
- Create a keystore file that contains the Sentinel private key.
- Create a keystore file that will be used as a truststore. This file must contain the certificate of the Certificate Authority that signed the Envoy server certificate.
- Start Sentinel by typing the following syntax on one line:
java -Dcom.ibi.spog.ssl.ignoreHostnameVerify
  -Djavax.net.ssl.trustStore=tsPath
  -Djavax.net.ssl.trustStorePassword=tsPassword
  -Djavax.net.ssl.trustStoreType=tsType
  -Djavax.net.ssl.keyStore=ksPath
  -Djavax.net.ssl.keyStorePassword=ksPassword
  -Djavax.net.ssl.keyStoreType=ksType
  -jar sentinel.jar -httpsPort=port -keyAlias=alias
where:
- tsPath
-
Is the absolute path to the truststore file.
- tsPassword
-
Is the password of the truststore file.
- tsType
-
Is the truststore file type, for example, JKS.
- ksPath
-
Is the absolute path to the keystore file.
- ksPassword
-
Is the password of the keystore file.
- ksType
-
Is the keystore file type, for example, PKCS12.
- port
-
Is the HTTPS port, for example 8443.
- alias
-
Is the alias for the Sentinel private key entry in the keystore file.
If the Common Name (CN) of the Envoy certificate reflects the correct host name, you can enable host name verification by omitting the following option:
-Dcom.ibi.spog.ssl.ignoreHostnameVerify
- Open the Sentinel console with
an HTTPS URL at the chosen port, for example:
https://localhost:8443
- Optionally, create a shell script or batch file with this command to make it easier to start Sentinel the next time.
Procedure: How to Configure Envoy for SSL
- Create a keystore file that contains the Envoy server private key.
- Create a keystore file that will be used as a truststore. This file must contain the certificate of the Certificate Authority that signed the Sentinel server certificate.
- Start iWay Service Manager (iSM) and open the iSM Administration Console.
- In the left pane, select Security Provider, as shown in the following image.

The Security Provider page opens, as shown in the following image.
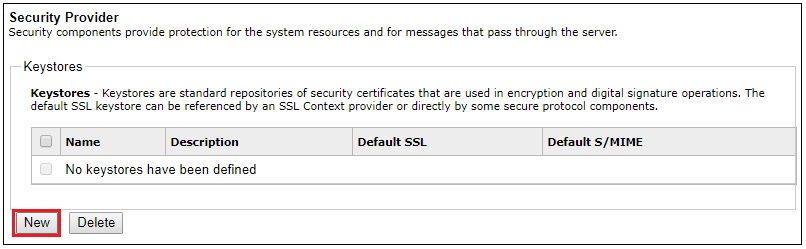
- Click New to create a Keystore provider for the keystore in step 1.
The Keystore Definition pane opens, as shown in the following image.
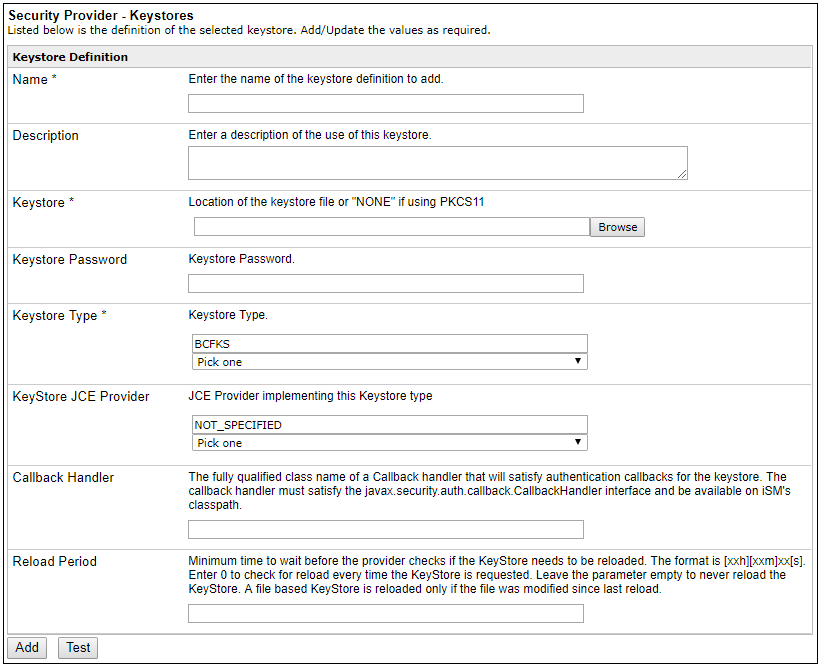
- Specify values for the configuration parameters based on the keystore file you created in step 1.
- Click Test to confirm your keystore settings, and then click Add to finish.
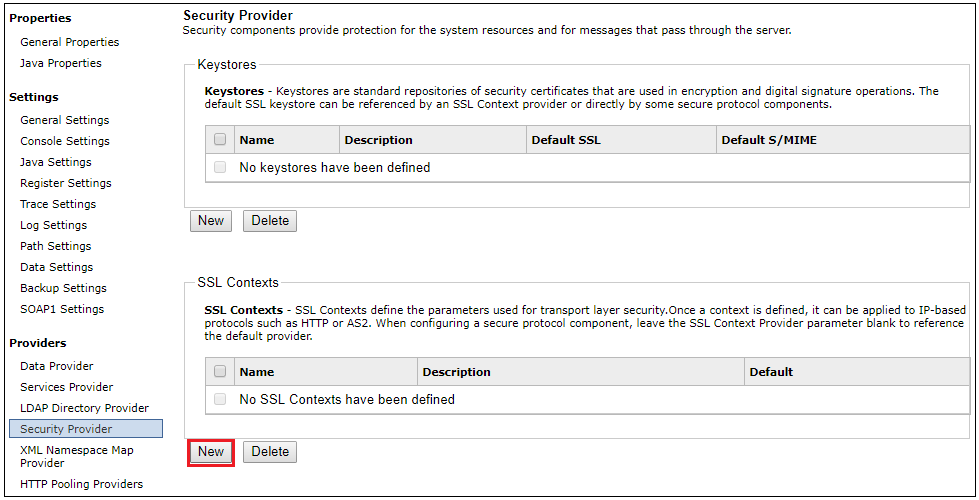
- Repeat steps 5-7 to create a Keystore provider for the truststore in step 2.
- Return to
the Security Provider page and click New in the SSL Contexts section to create an SSL Context Provider for Envoy, as shown in the following image.
The SSL Context Definition pane opens, as shown in the following image.
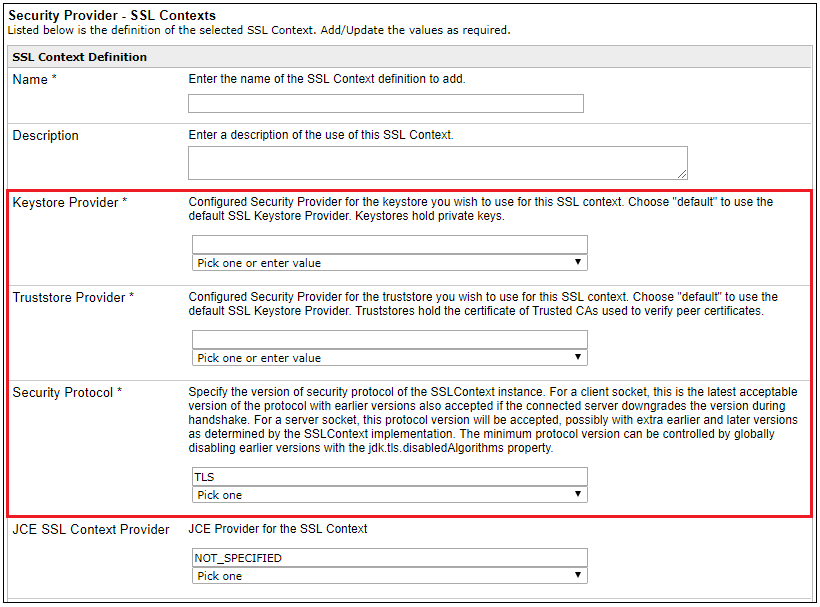
- Select the Keystore Provider and Truststore Provider from the corresponding drop-down lists.
- Choose the Security Protocol for the version of TLS.
- Scroll down the page to view additional configuration parameters, as shown in the following image.
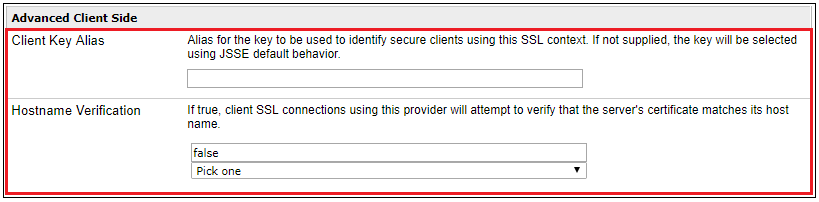
- Specify a Client Key Alias if the Keystore in step 1 contains keys other than the Envoy private key.
- Enable Hostname Verification if the Common Name (CN) in the Sentinel certificate reflects the correct host name, otherwise disable Hostname Verification.
- When you are finished specifying values for the SSL Context Provider configuration parameters, scroll down the page and click Add.
- In the left pane, select Register Settings, as shown in the following image.
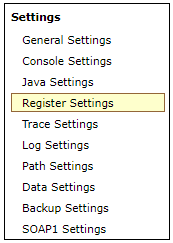
The Register Settings page opens.
- Click the special register named envoy-secure and change the value to true.
- Click the special register named envoy-sslcontextprov and change the value to the name of the SSL Context Provider created in step 5.
- To configure Envoy to register with Sentinel the next time it starts, perform the following steps, otherwise skip to step
14.
- Edit or add the special register sentinel-url. The value is the Sentinel URL. A typical value would be http://host:8080 or https://host:8443.
- Edit or add the special register sentinel-uid. The value is the user name to log into Sentinel. A typical value would be admin.
- Edit or add the special register sentinel-pwd. The value is the password to log into Sentinel. A typical value would be admin.
- Restart iSM.
- If you have not configured Envoy to register with Sentinel again, you must go in the Sentinel console and edit the corresponding server registration to turn on the SSL toggle. You must do this only once per server.